Getting Business Content and Samples from the Content Network
The Content Network can help you get SAP Business Content, 3rd Party Business
Content, and Samples.
Who does this apply to?
- Users with Read and Maintain
permissions for Lifecycle.
- Admin and BI Admin standard
application roles.
Use of the sample content and business content is optional. You can browse the content
and choose packages to add to your system from within the application. You can find more
information about business content in the Content Package User Guide.
When you import a package from the Content Network, you become the owner of it. However,
you must have read permissions on the relevant object types to access the package
content.

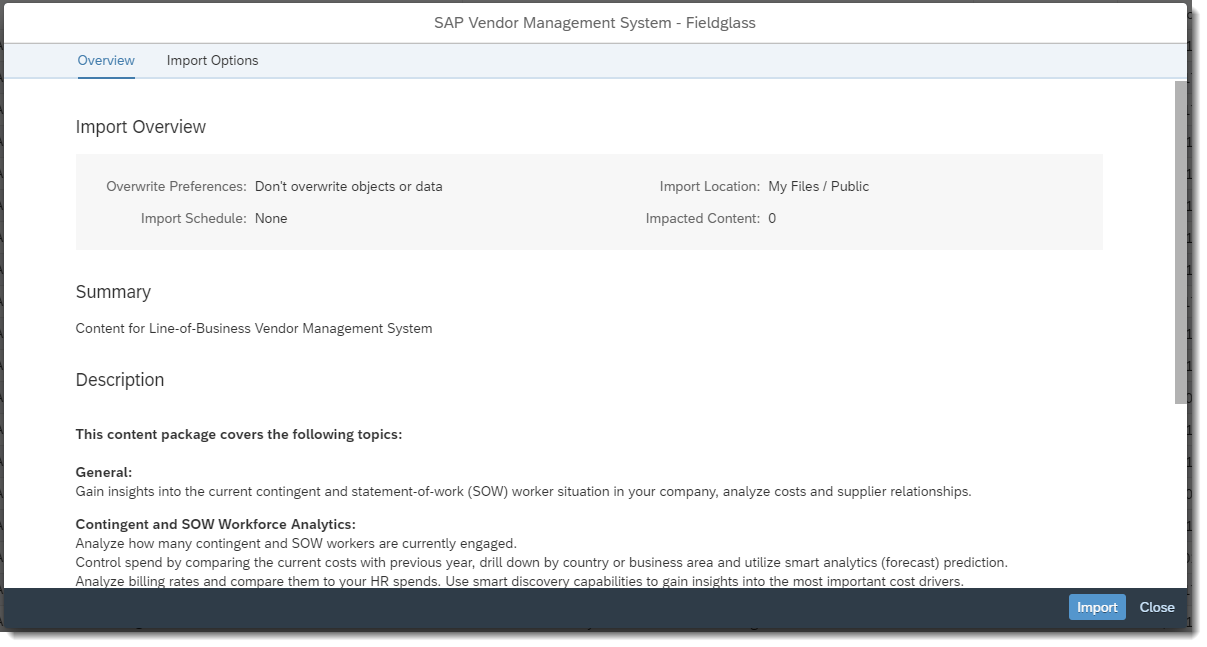
The Overview page of a content package
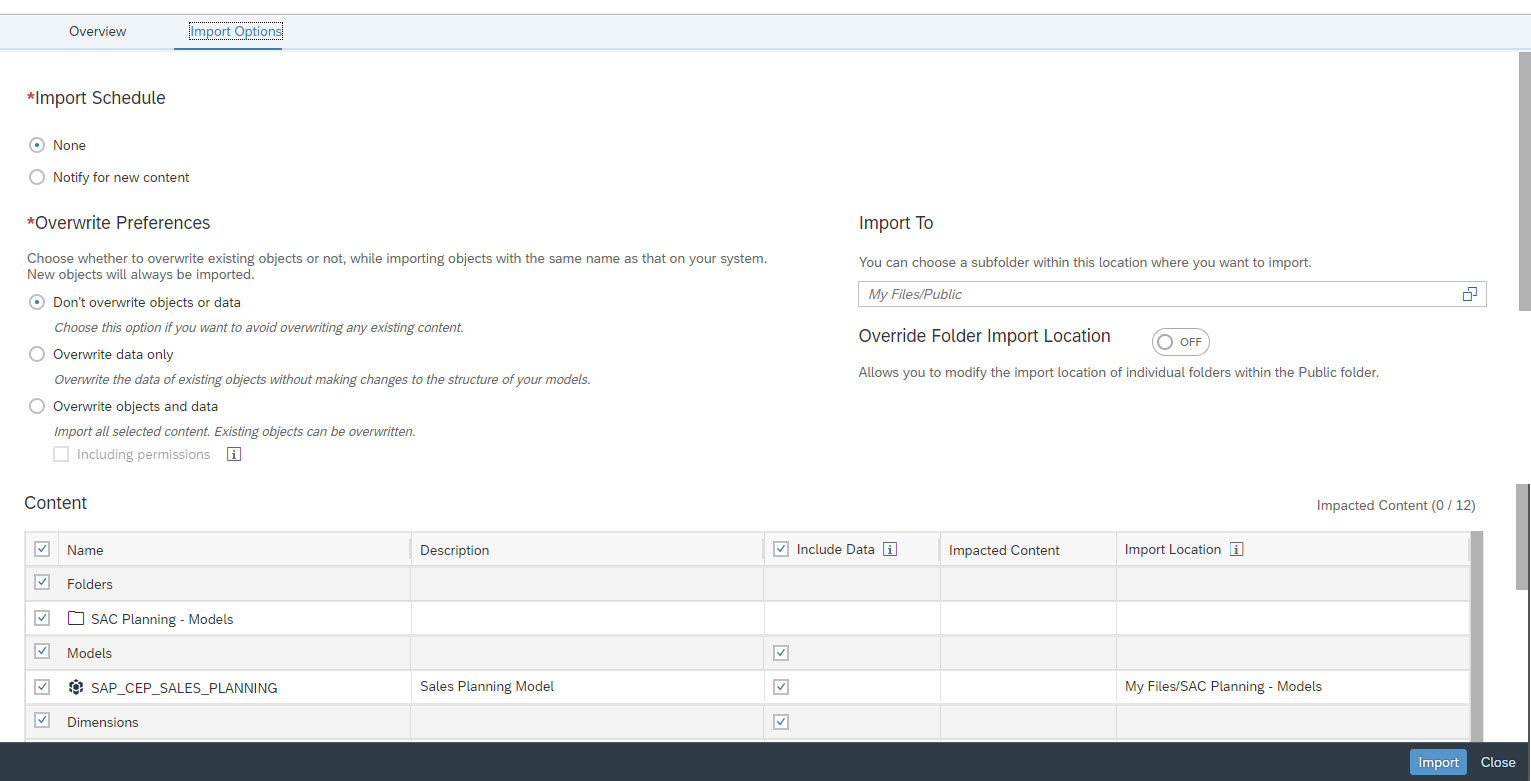
From the Import Options tab, you can choose a sub folder within
the Public folder, where you want to import the package contents.
If you're trying to import a package that has already been imported earlier, you cannot
change the import location.
Note
The Import Location column displays the location where new
content will be imported to or the location where already imported content
resides.

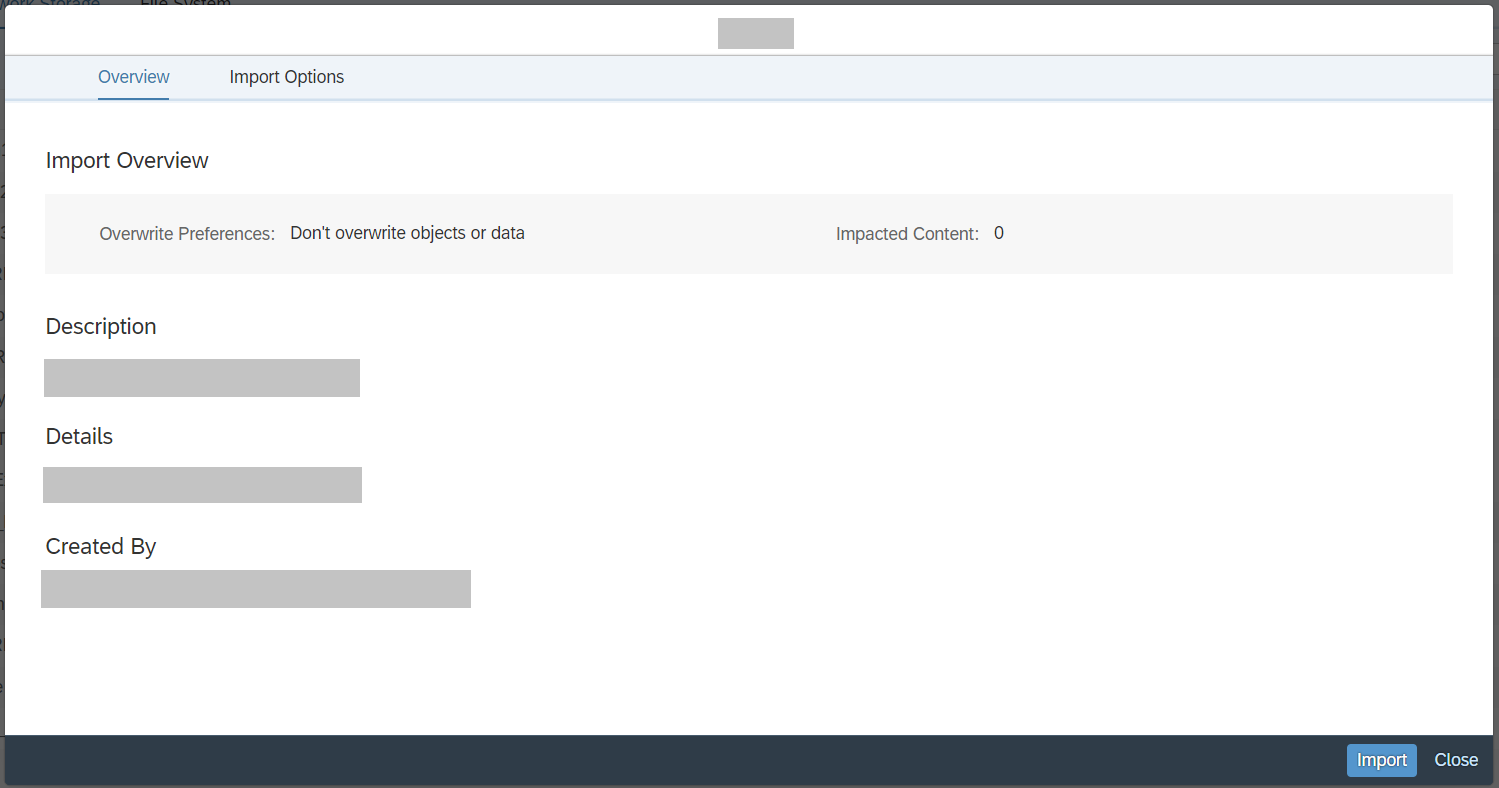
The Import To page of a content package
Video: How to Get Business Content from the Content Network
Downloading Content from the Content Network
Procedure
-
Select .
-
Choose the type of content that you want to add:
-
Samples: Get a collection of
technical samples for stories and SAP Digital Boardroom presentations as well as
templates to easily create your own layouts.
-
Business Content: >Get
industry and line of business content created by SAP, including models, stories, SAP
Digital Boardroom presentations, analytic applications, and smart predict
scenarios.
-
3rd Party Content: Get end-to-end business scenarios for various industries and lines of business,
created by SAP partners. This content can include models, stories, and SAP Digital Boardroom presentations,
and it comes ready to run with sample data or live data connections. Some
third-party content is paid content. You can open these packages in the Content
Network to see the content description and a link to the SAP App Center to purchase
the content. These links will lead you outside SAP Analytics
Cloud.
Select the tile to see a
list of available packages. You can filter the list of pre-defined packages based on
Industries and Lines of Business.
Any package that you have already imported to your system shows a check mark in the
Imported column.
-
Select the package that you want to add to your system.
An overview of the content appears. To get a quick summary of the import
settings and whether any existing content on your system will be
overwritten, take a look at the Import Overview
table.

-
If necessary, select the Terms and Conditions
checkbox at the bottom of the Overview tab.
-
If you need to change any of the settings, select the Import
Options tab.
-
Under Import Schedule, select one of the following
options to specify what happens when the package is updated in the content
network:
- None: No updates are made on your system.
This option is automatically selected for packages that cannot be
updated in the content network.
- Notify for new content: You receive a
notification and can choose whether to import the new version of the
package to your system.
- Automatically update new content: The updated
package is automatically imported to your system.
-
Select an option for the Overwrite
Preferences.
If an object selected for import does not exist on your system, the
object will be created and its data will be imported. For objects that
already exist in your system, the
Overwrite
Preferences determine whether to update the object and
its data.
Note
If objects or data on your system will be overwritten by
the import, a warning appears in the import window, and next to the
relevant objects in the
Content list. If you
have made changes or enhancements to your sample content, follow the
instructions in the
Post-requisites section to avoid
losing your work.
- Don’t overwrite objects or data:
This
setting prevents any existing objects in your system from being
overwritten or updated with new data. You are notified if any of the
objects selected for import already exist in your system.
For
example, you can choose this setting if you have replaced the data
in an imported model with your own data, and want to avoid
overwriting this data.
- Overwrite data only:
If you have made
changes to the structure of an imported model and want to avoid
losing those changes, choose this setting.
Data is imported
into each object, but the objects themselves are not
updated.
The Privacy and
Data Access Control settings for models,
as well as the permission settings for users and roles, remain
unchanged.
- Overwrite objects and data:
Objects on
your system can be overwritten and their data can be
updated.
For example, you may choose this option if you are
not using any of the content for business tasks.
Select
Including permissions to update the
Privacy and Data Access
Control settings for models and dimensions. The
corresponding permissions assigned to each role are also
updated.
-
In the Content list, choose which objects to import,
and whether to include the data for each imported dimension and model.
You can select and deselect individual objects, or types of objects (for
example, Models or
Stories).
The Impacted Content column shows warnings for
objects that will overwrite content on your system.
-
In the Import To field, navigate to the folder
within the Public folder, where you want to import
the package contents.
Note
You can switch on the Override Folder Import
Location toggle if you want to choose the import
location of individual folders within the
Public folder. You cannot modify the
location of individual objects, such as stories or models
present directly in the Public folder.
For example, if you have imported some content into
My Files/Public/Folder A, you can
modify the location of individual folders in the package to
Folder B and not any objects present in the root location.
-
Select Import.
The import process begins. You receive a notification when the process is
complete, or if an error occurs.
If you selected Don’t overwrite objects or data or
Overwrite data only, a notification will let
you know if any of the content wasn’t imported to avoid overwriting
existing content.
To view the log of updates and imports for a package, select the package
in the content network and choose  (History).
Next Steps
Because imported content in your system can be deleted and replaced if the
package is imported again with certain Overwrite
Preferences, you’ll want to consider how to maintain the
content. This is particularly important if you’re using business content in a
production system. See Maintaining Business Content for
details.


 (Main
Menu)
 Content
Network

 (
(