Configure Input Controls in Analytic Applications
You can configure input controls to dynamically change which dimension members to display for widgets in analytic applications without scripting and compare specific measure values side by side.
About Input Controls
-
dimension member input control
Dimension member input control lets you change which dimension members to display for the widgets in your analytic application. Supported widgets are chart, table, R visualization, geo map and value driver tree.
Furthermore, with linked analysis input controls can be applied to any widgets you include in the analysis.
-
calculation input control based on restricted measure
Calculation input control based on restricted measure lets you compare measures of restricted dimension members within or outside hierarchies simply by filtering. Supported widgets are charts, tables, R visualizations and value driver trees.
Furthermore, you can turn on the cascading effect of input controls so that any value selection changes you make to one will affect related others from the same data source, and vice versa.
Create a Dimension Member Input Control
Create an input control to control which dimension members to display for your widgets via filtering.
Procedure
-
From the Insert area of the toolbar, select


 Input Control.
You’ll see that a filter is added to your canvas.
Results
You’ve created an input control. By default all the widgets from the same data source will display any selected dimension members from the input control. You can further use linked analysis to modify the widgets affected by filtering. For more information, see Create Linked Analyses in Analytic Applications.
From  (More Actions) on the input control,
you can select Edit Input Control to change the dimension members. To change the display information of the
input control, select Display As and choose one of the options: Description,
ID and Description and ID.
(More Actions) on the input control,
you can select Edit Input Control to change the dimension members. To change the display information of the
input control, select Display As and choose one of the options: Description,
ID and Description and ID.
Create a Calculation Input Control Based on Restricted Measure
You can create a calculation input control within a widget to display specific measures of restricted dimension members via filtering.
Context
A calculation input control can dynamically control which dimension members to be included in measure calculation.
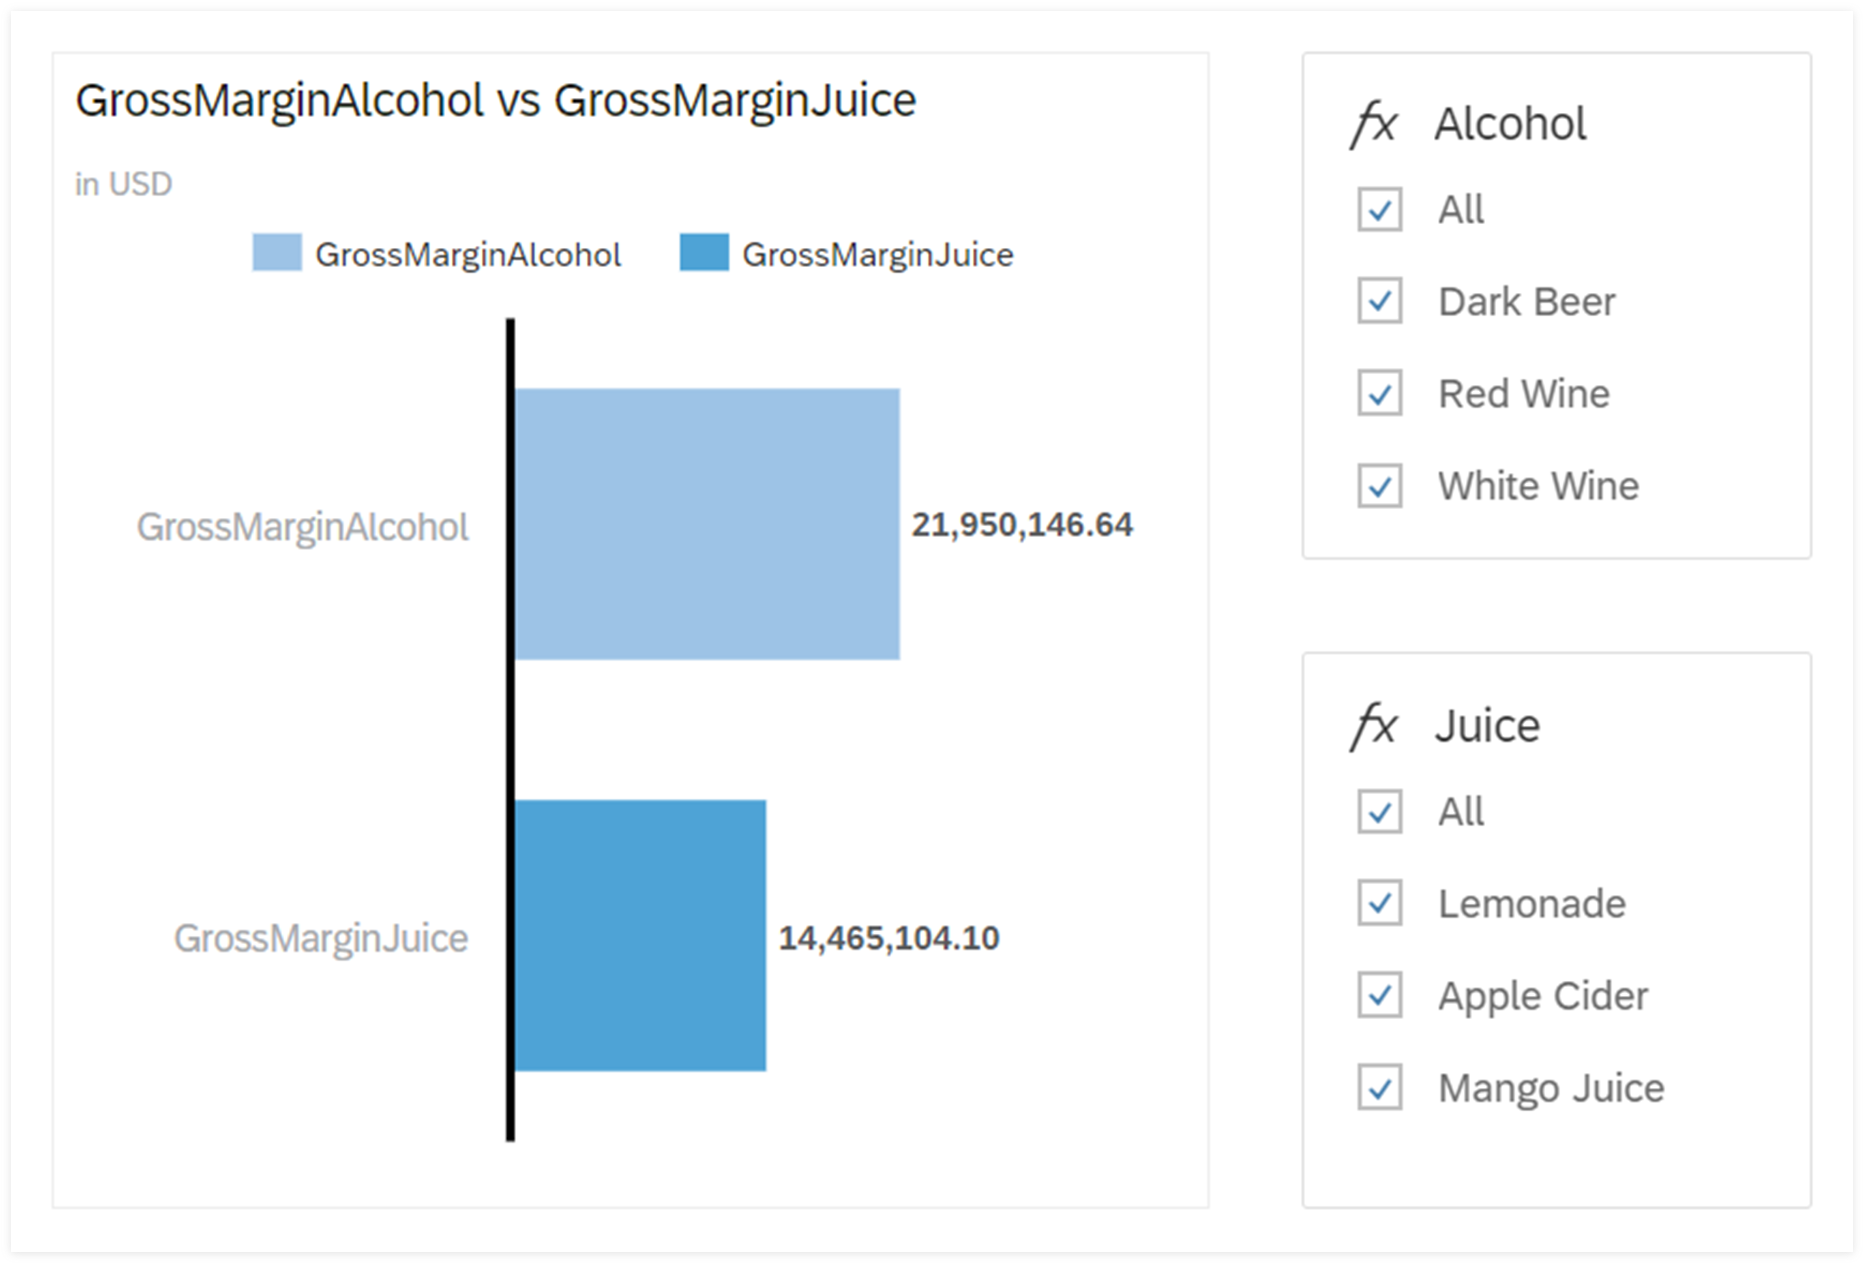
For example, you can create two measures called GrossMarginAlcohol and GrossMarginJuice with calculation input controls Alcohol and Juice respectively bound to them. You can thus compare gross margin of alcohol and juice and dynamically change the dimension members for comparison to find the cause for the difference.
Procedure
-
Create calculation in the widget’s Builder panel:
-
For chart, under Measures select + Add Measure, and then from the dropdown, select + Create Calculation.
-
For table and R visualization, under Columns select
when hovering over
Account, and then select + Add Calculation. -
For value driver tree, select + Add Account, and then from the dropdown select + Create Calculation.
You can see that Calculation Editor opens.
-
Results
You can see that the widget displays restricted measure with the calculation input control beside it. You and application users can select any dimension members from the input control to dynamically compare the measure values.
You can change the name on a calculation input control directly beside  or in Calculation Input Control dialog. However,
you can't change it in Outline or Styling panel.
or in Calculation Input Control dialog. However,
you can't change it in Outline or Styling panel.
Turn on Cascading Effects
You can turn on cascading effect for specific input controls, so that any value selection changes in one input control will affect others from the same data source and vice versa.
Prerequisites
All the input controls related to the cascading effect must come from the same data source.
Context
By default the cascading effect is on for all input controls.
With the cascading effect on for multiple input controls, you can make them affect each other in your application. For example, if you have both Country and Region filters, and you change the Country filter value from All to Sweden, the Region filter will be updated to show only regions within Sweden while all other region names are hidden.
Calculation input controls can’t affect dimension member input controls, but can be affected.
Procedure
- Select the input control.
-
On the Builder panel, select an interaction option:
Option Description All Input Controls from This Data Source (default option) Any value selection changes you make to this input control will affect all the input controls from the same data source and vice versa. Only Selected Input Controls Any value selection changes you make to this input control will affect only specific input controls from the same data source and vice versa.
- Select Input Controls: Select the input controls to be affected by changes in this input control.
- Automatically Connect Newly Created Input Controls: Apply cascading effect to any newly added input controls from the same data source.
- Select Designer to close the panel.
Results
You’ve created the cascading effect. Any value selection changes made to this input control will simultaneously update other ones depending on the interaction option you’ve selected. To display hidden values in the affected input controls, select Show Inactive Values on them.
From (More Actions) on the input control,
you can turn off the cascading effect. When there’s no checkmark next to Cascading Effect, any changes made
to this input control won’t affect others or vice versa.
At design time, cascading effect won't be applied to any input controls in popups.