Configure Workspaces
Workspaces provide a way for users to collaborate. As a system administrator, you can create workspaces to mimic your organization setup, which allows you to manage your content and users.
- System administrators who are assigned roles that have Read and Manage permissions for Workspace.
- Users who are assigned custom roles that are based on the Admin and BI Admin standard application roles.
Getting to Know Workspaces
Workspaces are secure virtual areas where users can save content and collaborate with other users who are members of the same workspace. Workspaces can be used to represent a department (for example, finance, human resources data), a line of business, a project, or any other type of grouping within your organization. Workspaces can also be used for long-term or short-term projects.
By using workspaces, organizations can better manage their content by keeping it secure so that only the users who need the content can access it. Workspaces allow users to share content relevant to a single area only among users of that area. Also, because content can be consumed between workspaces, organizations can avoid content duplication.
Understanding How Users Access and Use Workspaces
User access and capabilities for workspaces can be put into different categories for setup and maintenance, content management, and content sharing and collaboration.
-
Setup and maintenance
A system administrator usually takes care of creating workspaces and overseeing their general maintenance. They use the Workspace Management page to set up and maintain workspaces. Also, they can use the System view to access and manage the content for any workspace.
-
Content management
A user who is assigned as a workspace administrator for a specific workspace can use the System view on the Files page to organize and manage all the content within that workspace. This user also needs to be assigned a role that has the Read permission set for Workspace. Since content management activities can be done using the System view, the workspace administrator doesn't need to be a member of a workspace.
-
Content sharing, and collaboration
A user who belongs to a team that is assigned to a specific workspace can access that workspace from the list view on the Files page. This user also needs to be assigned a role that has the Read permission set for Workspace. From within the workspace, a user can create files and folders and work on content with their colleagues. They can also manage and organize content that they own or have full control access of.
The following table provides a summary of the capabilities that various types of users can do with workspaces. These users can be referenced as the system administrator, workspace administrator, and workspace member.
| Capabilities | System Administrator | Workspace Administrator | Workspace Member | |
|---|---|---|---|---|
| Setup and Maintenance | View Workspace Management | ✓ | ✓ | |
| Create a workspace | ✓ | |||
| Delete a workspace | ✓ | |||
| Edit workspace name and description | ✓ | |||
| Assign or remove teams | ✓ | |||
| Assign or remove a workspace administrator | ✓ | |||
| Content Management | Transport workspaces and their content to another tenant | ✓ | ||
| Transport content from workspaces to other systems in your SAP landscape via the Analytics Content Network Note
This capability requires permission from the Analytics Content Network. |
✓ | |||
| Open System view of a workspace | ✓ | ✓ | ||
| Access a workspace from the list view | ✓ | |||
| View all content created by all users in a workspace | ✓ | ✓ | ||
| Create a folder in a workspace | ✓ | ✓ | ✓ | |
| Create content (for example, a story or dataset) in a workspace | ✓ | |||
| Manage content into folders | ✓ | ✓ | ✓ | |
| Move content between workspaces | ✓ | ✓ | ✓ | |
| Move or copy content between the Public folder and workspaces | ✓ | ✓ | ||
| Move or copy content between folders in the My Files view and workspaces | ✓ | ✓ | ✓ | |
| Content Sharing and Collaboration | Share and publish content within a workspace | ✓ | ✓ | ✓ |
When a user is a workspace member and is assigned as a workspace administrator, they can see and access the workspace from both the list view on the side and the System view on the Files page.
-
When managing content, use the System view. Accessing the workspace from the System view allows you to manage all workspace content, even files not shared with you.
-
When creating content and sharing and collaborating with others on content that you own or have full control of, access the workspace from the list view.
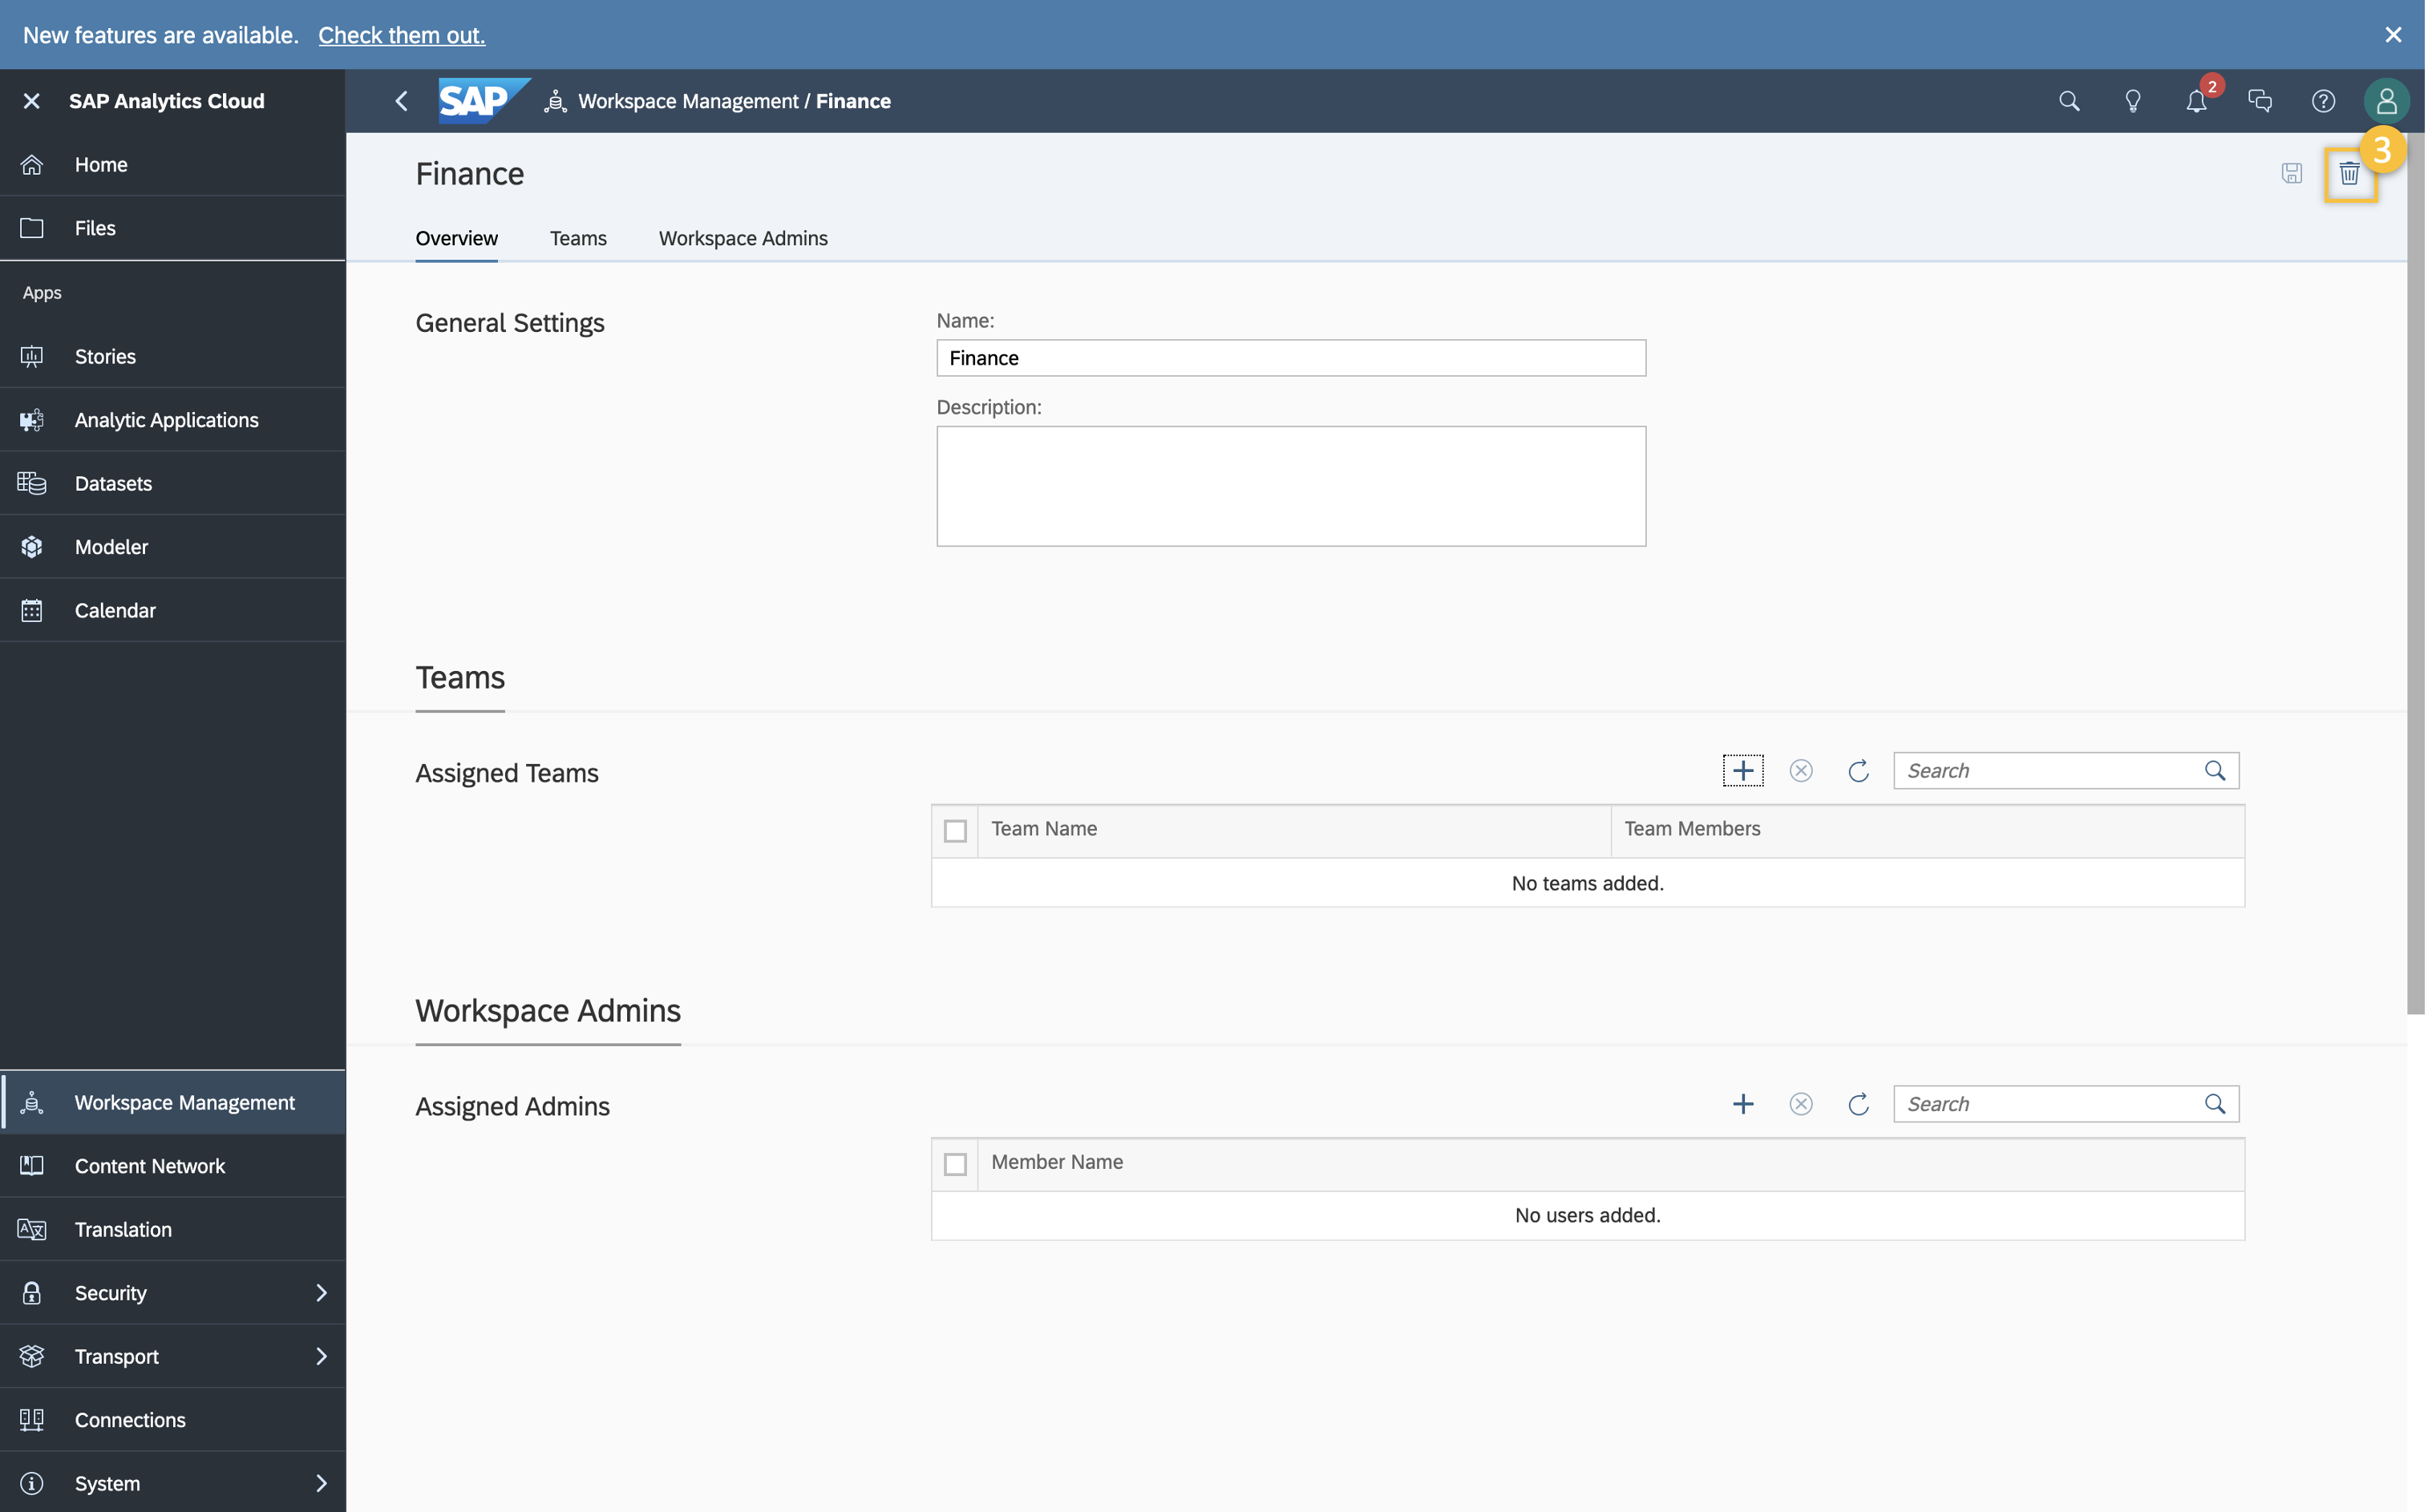
Setting Up a Workspace
Context
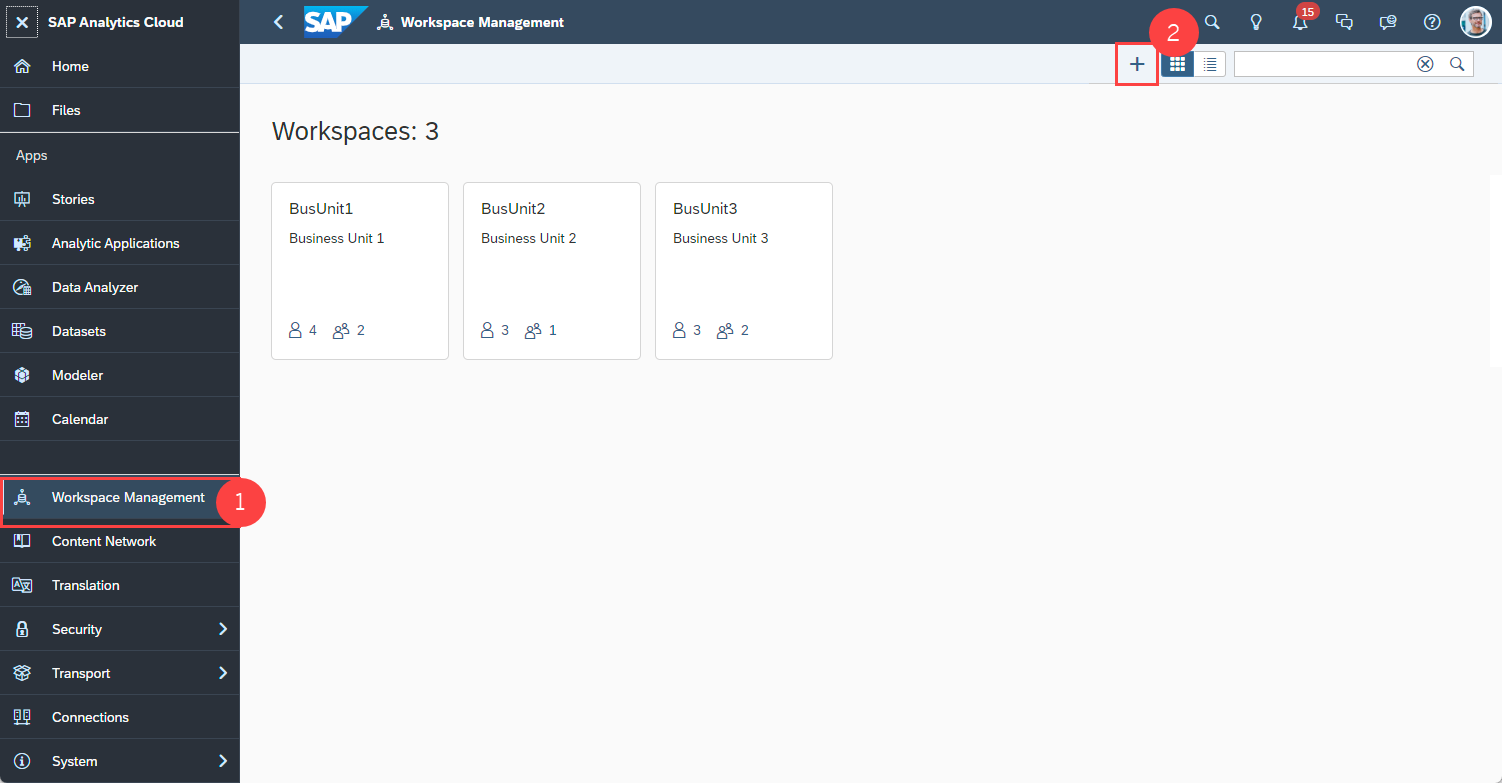
You can set up a new workspace from Workspace Management.
Procedure
-
Near the top right corner, click + (Create Workspace).
Results
Now that you’ve created a new workspace, you can assign teams and workspace administrators. To manage existing workspaces, you can visit the Workspace Management page at any time.
Assigning Teams to a Workspace
Context
With workspaces, you can assign already existing teams to collaborate on content within the shared workspace.
Procedure
-
Under Assigned Teams, select + (Add Team).
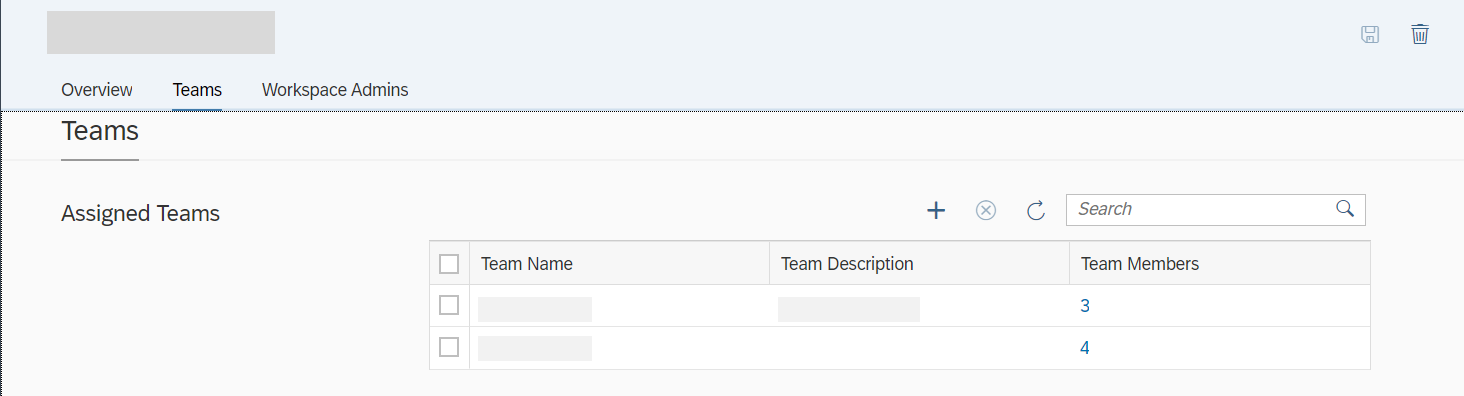
Results
The teams are assigned to the workspace and appear in the Assigned Teams list.
If you want to remove a team from a workspace, select the team from the list and select Remove Team. When you remove a team from a workspace, all users on that team will no longer have access to the content in the workspace. That’s assuming that all users don’t belong to other teams that still have access to that workspace. Also, any pending file access requests for those users are automatically deleted.
Consider the following example, User A belongs to Team 1 and Team 2. User B belongs to only Team 2. Team 1 and Team 2 are both assigned to Workspace Z. When Team 2 is removed from Workspace Z, User B no longer has access to any of the content in Workspace Z. Also, any pending file access requests for User B for content in Workspace Z are automatically deleted. User A will continue to have access to all content in Workspace Z and any file access requests will remain in the queue until they are approved.
Assigning a Workspace Administrator to a Workspace
Context
You can assign one or more users or teams as workspace administrators who can organize the content into folders, edit or delete files, and move content in and out of the workspace. Workspace administrators are also given read-only rights to the Workspace Management area. There, they can view the details of the workspaces they are assigned.
Procedure
-
To add an individual user, under Assigned Users, select + (Add User). Or to add a
group of users, under Assigned Teams, select + (Add Team).
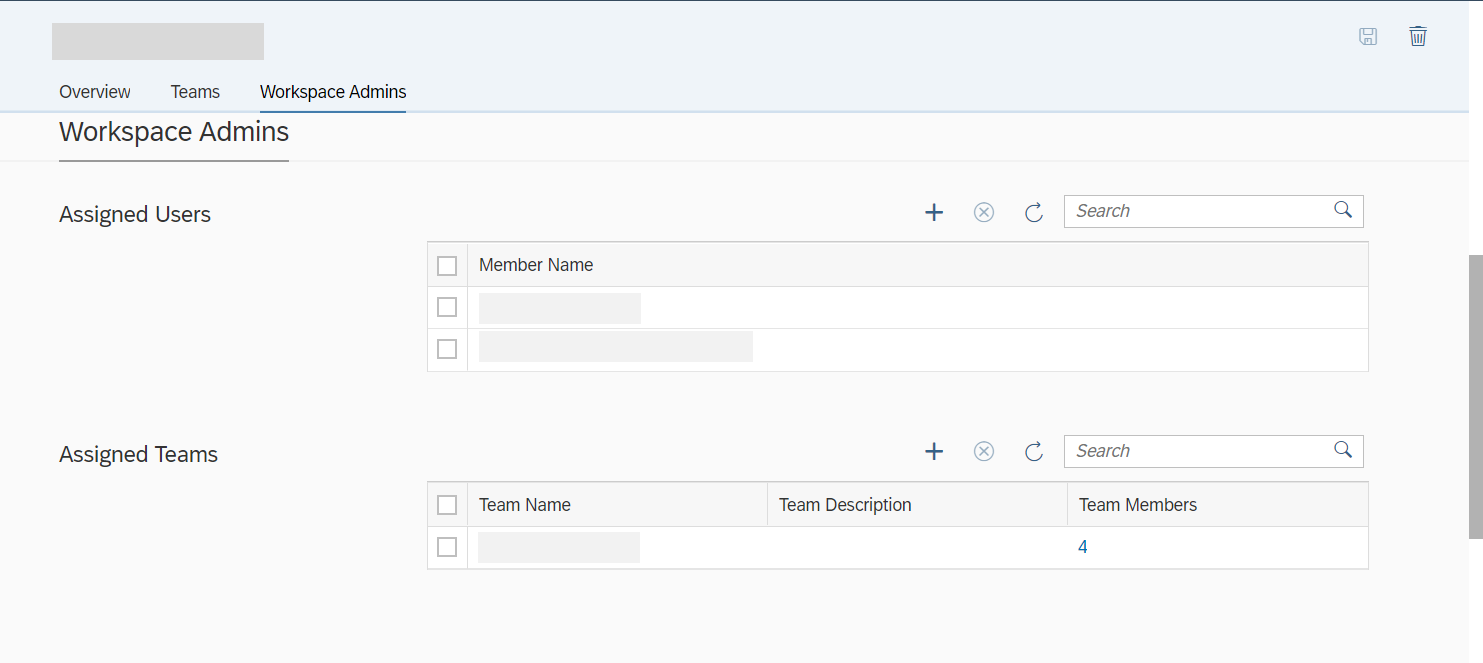
Results
The lists of assigned users and teams are updated with the selected workspace administrators. Under the Assigned Teams list, you can see how many team members are on the team, and you can select the number to see which users are on the team.
-
Users who are assigned as workspace administrators don't have to be in an assigned team in the workspace.
-
Workspace administrators can’t create or delete a workspace; only system administrators can create or delete a workspace.
Deleting a Workspace
Context
As an administrator, you can delete any workspace. To delete a workspace:
Procedure
-
In the selected workspace’s overview, select (Delete) in the top right corner.