Share and Collaborate Within Workspaces
Within a workspace, you and other members of your team can access and collaborate on shared content. If you’re a designated workspace administrator, you can also organize content within the workspace for easier access.
-
Users who are assigned roles with Read permission for Workspaces.
If you’re a system administrator who wants to learn about planning and creating workspaces for your organization, check out Configure Workspaces. You’ll also find information on how to assign workspace administrators.
Sharing and Collaboration Within Workspaces
Review these examples to understand the basics for how sharing and collaboration work within workspaces. In real-world situations, there can be several different and complex combinations of users, teams, and workspaces.
Example:
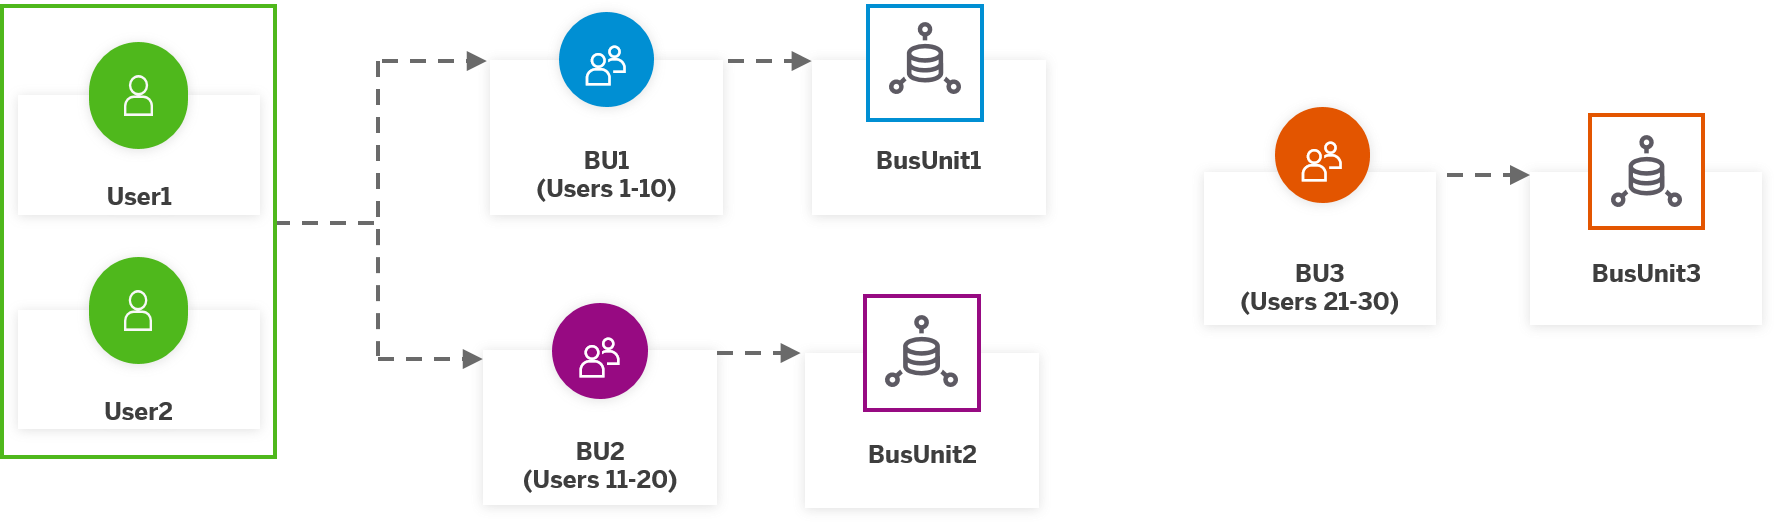
In this simple example, a company has 30 users in three business units. The system administrator creates the following users (Users 1-30), teams (BU1, BU2, and BU3), and workspaces (BusUnit1, BusUnit2, and BusUnit3).

Each business unit has a secure area for their content that only users of the specific teams can access.
Users in team BU1 can create content only within workspace BusUnit1. They can share and collaborate on content with other users in team BU1. Also, when they publish content to the Catalog, only users in team BU1 will be able to see it in their Catalog. Users in team BU1 can’t access content in workspaces BusUnit2 or BusUnit3, nor can they share or collaborate with users in team BU2 or BU3.
Example:
To build on the previous example, a system administrator can set up a user to be members of more than one team. When this happens, the user can access the content in and collaborate with other users from one or more workspaces. Using the same users, teams, and workspaces as the previous example, the following change is made: User1 and User2 are members of teams BU1 and BU2.
User1 and User2 have access to workspaces BusUnit1 and BusUnit2. Everything in the previous example is still true with the update that User1 and User2 can access content from workspaces BusUnit1 and BusUnit2 and share and collaborate with members of teams BU1 and BU2.
When User1 creates a file (for example, a story) in one workspace BusUnit1 that relies on content (for example, a model) from the other workspace BusUnit2, only User1 and User2 can see the full story. Users in team BU1 will be able to access the story, but won’t see the full story because they can’t access the content in workspace BusUnit2. Users in team BU2 only have access to workspace BusUnit2, so they can’t see the story.
When a file (for example, a story) from one workspace depends on underlying objects like models or datasets from a second workspace, only users who are members of the two workspaces will be able to see the full story. In these cases, the content creator must contact the system administrator and request access for users they want to share the story with.
Example:
To build on the previous example, a system administrator can assign a team to more than one workspace. When this happens, the users in the team can access the content from and collaborate with other users from one or more workspaces. Using the same users, teams, and workspaces as the previous examples, one change is made: Team BU3 is assigned to workspaces BusUnit2 and BusUnit3.
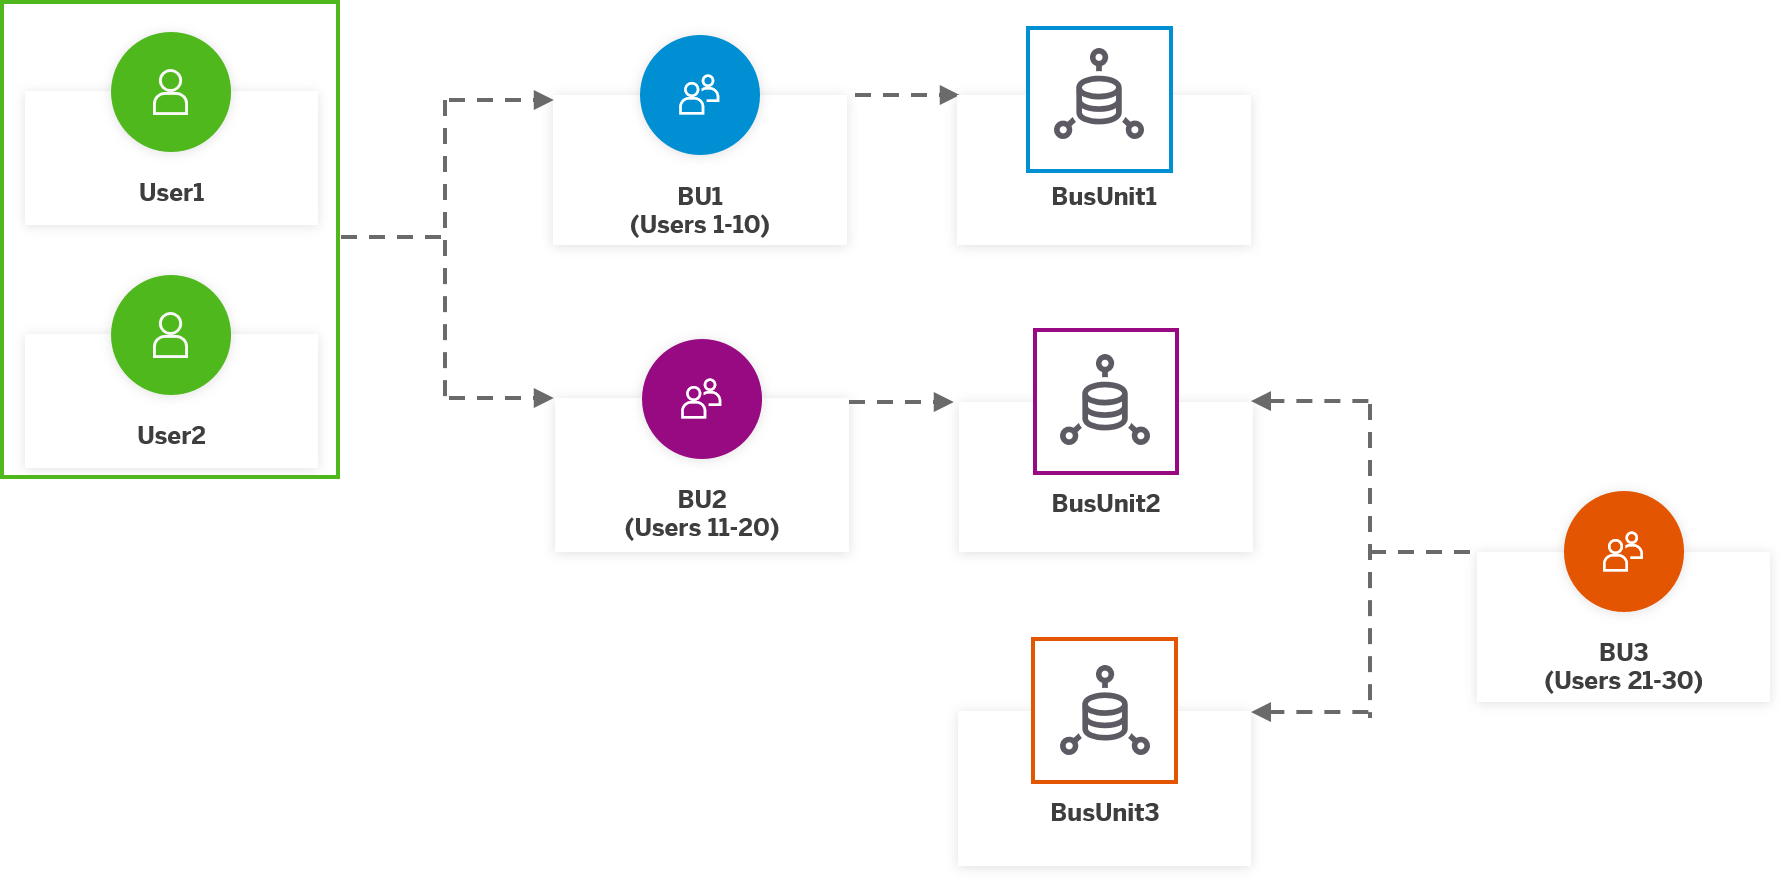
All users in team BU3 have access both workspaces BusUnit2 and BusUnit3. Everything in the previous example is still true with the update that users in BU3 can access content from workspaces BusUnit3 and BusUnit2 and can share and collaborate with members of team BU3 and BU2.
When a user in team BU3 creates a file (for example, a story) in workspace BusUnit3 that relies on content (for example, a model) from the other workspace BusUnit2, only users in team BU3 will be able to see the full story. Users in team BU2 only have access to workspace BusUnit2, so they can’t access the story that is created in workspace BusUnit3.
Managing Content Within Workspaces
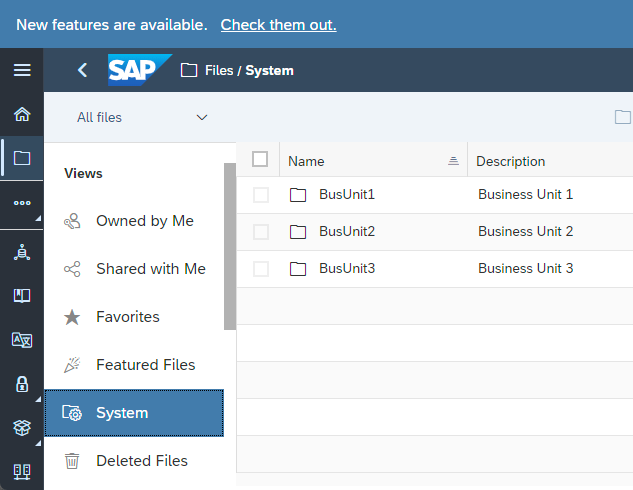
As a workspace administrator, you can see the details of a workspace. Also, you can access and organize content in workspaces from the System view on the Files page.
Viewing Workspace Details
Context
On the Workspace Management page, you can see the workspaces that you have administrative rights to.
Procedure
-
From the side navigation, select
 Workspace Management.
Access Content from Inactive Users
Context
Sometimes, users will leave a team before the end of a project, making it difficult to access their files. As a workspace administrator, you can access any user's content or files within the workspace.
Procedure
-
From the side navigation, select
 Files.
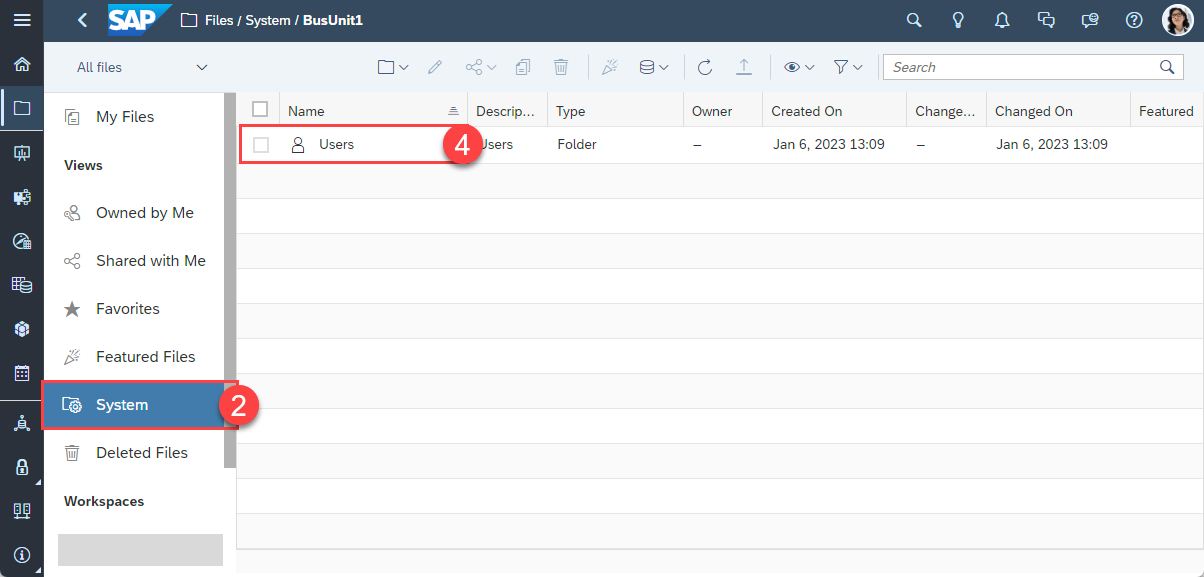
-
From there, open the System view to see the workspaces you’re assigned.
Organizing Content for Easier Access
Context
As a workspace administrator, you can organize content in a single workspace or between workspaces by creating folders and moving files to the folders. Organizing content into folders makes the content easier to access or share with other members of the workspace. For example, you can create a folder for a project and easily share it with the team.
If needed, check the sharing settings of the content before you move it. You can make note of the share settings and then apply them when you share the newly created folders.
If you move content from a workspace to the Public folder, users who previously didn't have access will gain access. If you move content from one workspace to another workspace, users who previously had access to the content will lose access. However, if the users or teams are also members of the receiving workspace, you can share the content with them again.
Procedure
-
From the side navigation, select
Files.
-
For each folder you create, go to the toolbar and select
 Folder actions
  New Folder
 .
.
-
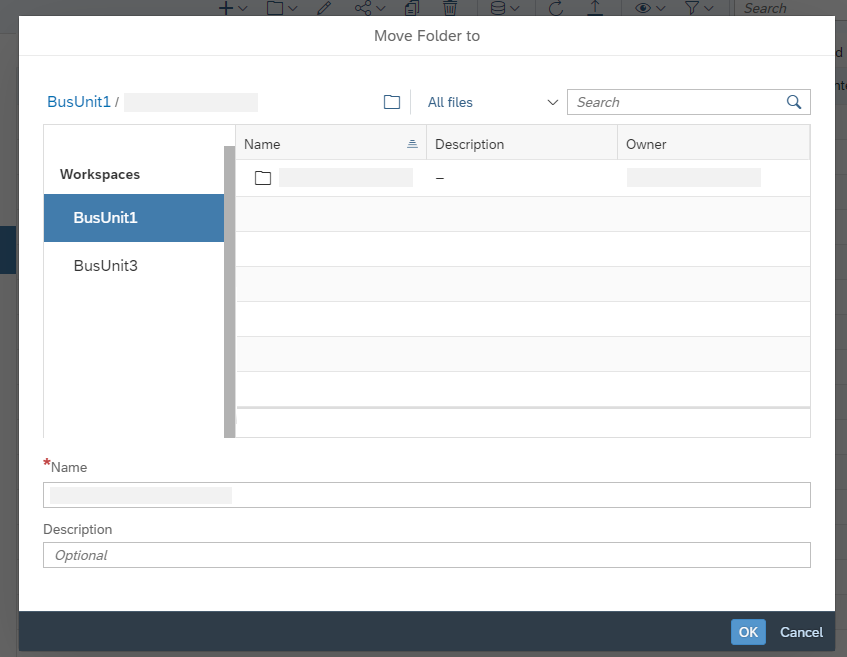
After you've set up your folders, find the content you want, select the checkbox next to it, and select Folder actions
 Move To.
-
After you have organized the content, share the folders with the teams and users.
Tip
If you’re not a workspace administrator but own content in a workspace, you can move that content between workspaces or between workspaces and the Public folder on the Files page.