Share Files or Folders
You can share files and folders with other users or teams to give them access to content so that they can benefit from the information or contribute to it.
Who does this apply to?
- Users who are assigned a role with the appropriate permissions for the object type and file type (public or private), including the Read or Manage (only for the file type) permissions, and the Read permission for Users or Teams.
- Users who are content owners or have the Share permission for any files or folders that are shared with them.
Setting Up Permissions in the Role
The information in this section is for a system administrator. For more information, see Permissions and Create Roles.
For a user to be able to share files and folders, the system administrator must create custom roles that have the appropriate permissions for the following:
-
Object type (for example Content Link or Planning Model), including the Read permission
-
File type (Public Files or Private Files), including the Read or Manage permissions
NoteIn most cases, the Read permission for Public Files or Private Files is enough to allow users to share files and folders. In cases where you want users to have elevated administrator-type permissions, select the Manage permission.
-
Users or Teams, including the Read permission
The system administrator then assigns the custom roles to users. It is up to you, the user sharing the file or folder, to choose whether to let other users share that file or folder. For example, the system administrator creates two custom roles:
-
Content creator role that has Create, Read, Update, and Delete permissions selected for Content Link.
-
Content viewer role that has Read permission selected for Content Link.
Both custom roles have Read selected for Public Files and Read selected for Users or Teams. The system administrator assigns the content creator role to you and the content viewer role to a different user. In the Public folder, you create a content link file. When you share the file with that user, you can choose to give them the Share permission so that they can also share the file.
Using Predefined Access Levels or Custom Access for Sharing
The information in this section focuses on how you, the content owner or user with the Share permission, shares files and folders with others. It's assumed that the system administrator has set up all the roles to have all relevant permissions available to the users (as described in the previous section) and has assigned the roles to the users.
You can share files for data objects, such as stories, models, and analytic applications, and folders by giving users or teams a predefined access level (View, Edit, or Full Control) or by choosing Custom to give them custom access.
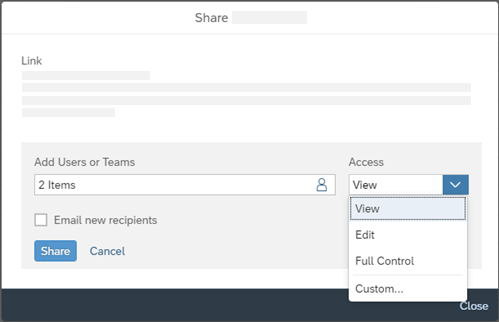
Predefined access levels are groups of permissions and can be given to users or teams. In many cases, the predefined access levels will meet your needs. They are also easier to manage than using custom access settings. For example, to allow some users to view a file but not edit it, you can give them the View access level.
| Access Level | Available Permissions |
|---|---|
| View | Read, Copy, View Comment, Add Comment
If Copy is selected, Read is automatically selected. |
| Edit | Includes all View access level permissions plus: Update, Create
files*, Create folders*, Maintain *applies only to folders |
| Full Control | Includes all View and Edit access level permissions plus: Delete,
Delete Comment, Share Users with this access level can move files or folders between locations. Note
The functionality for Execute is currently not available and reserved for future enhancements. You can ignore this option as selecting or clearing the checkbox has no effect on the functionality. |
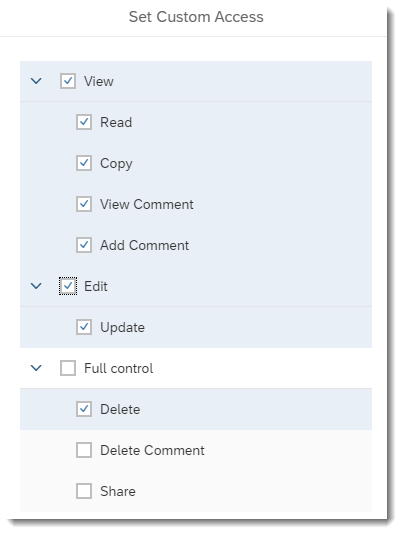
If the predefined access levels don’t suit your needs, select Custom and choose which permissions to give users and teams access to. For example, if you give a user Full Control access, that user automatically gets access to both Delete and Share content. But if you choose Custom, in the Set Custom Access dialog, you can give the user access to Delete content but not Share content.
Sharing a File
Context
You can share a file from the Files page or when you have it open.
-
When sharing a file, for example a story, that depends on underlying objects, like models or datasets, you'll also need to share to those other objects with the same access level as the file. Furthermore, if the dependencies are from different workspaces, you must also request access to the workspaces and objects on behalf of those users.
-
If an object in your story uses a private version, the dimension member IDs of the private version might be exposed when you share the story with another user.
Procedure
-
From the side navigation, choose
 Files, select one or more files, and select
  (
( Share
Share  Share
Share ) to open the Share dialog.
Or if you have the file open (for example, a story or analytic application), select
(Share). -
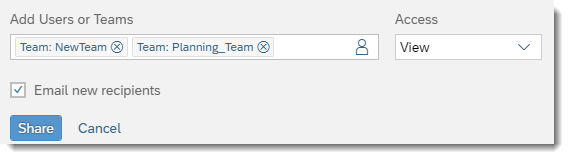
Under Add Users or Teams, select
 (Add usernames or teams) to open a dialog where you
select the users or teams that you want to share the file with.
(Add usernames or teams) to open a dialog where you
select the users or teams that you want to share the file with.
If you know the user and team names, you can type them instead of using the dialog.
 Tip
Tip-
When working within a workspace, you can share files only with other members of the workspace.
-
When working in the My Files view, you can select All Users to share with everyone. This option can be disabled by a system administrator setting when configuring the system settings. For more information, see Configure System Settings.
-
-
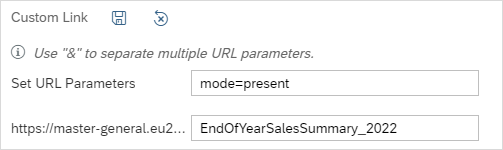
(Optional) For some types of files, for example, stories, analytic applications, and digital boardrooms, you can select
Customize Link to customize the URL link:
- For analytic applications, enter one or more URL parameters.
- In the custom link field, enter meaningful key words for your custom link, to make it shorter and easier to
remember.
-
(Optional) If the file you are sharing is a story that contains global bookmarks and you have it open in
Edit mode, select Apply global bookmark default, and then select a bookmark
to use
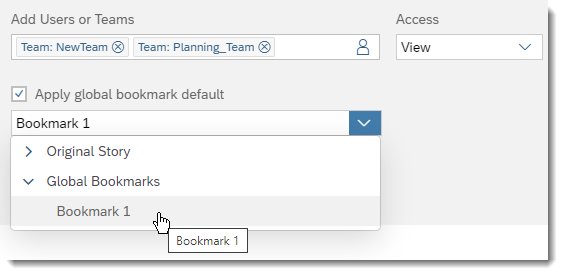
For more information about bookmarks, see Bookmark and Share Story Views.
If you're a system administrator and want users to share global bookmarks, ensure that the custom roles have the permissions set for the Global Bookmark object-type. For more information, see Permissions.
Results
After the file is shared, the Shared with list appears below the sharing settings. Expand the list to see all users and teams and their access level for the shared file. You can use the list to change the sharing settings for the file.
On the Files page, the icon appears beside
the name of the shared file. You can select the icon to reopen the Share dialog and see or change the
file's sharing settings.
Sharing a Folder
Context
The steps for sharing a folder are the same steps as sharing file with a couple of differences.
Procedure
-
From the side navigation, choose
Files, select one or more folders, and select (Share Share). to open the Share dialog.
-
Under Add Users or Teams, select (Add usernames or teams) to open a dialog where you
select the users or teams that you want to share with. Or if you know the name of the user or team, you can type it instead.
Tip
-
When working within a workspace, you can share folders only with other members of the workspace.
-
When working in the My Files view, you can select All Users to share with everyone. This option can be disabled by a system administrator setting when configuring the system settings. For more information, see Configure System Settings.
-
Results
After the folder is shared, the Shared with list appears below the sharing settings. Expand the list to see all users
and teams and their access level for the shared folder. You can use the list to change the sharing settings for the folder. For
users and teams that have inherited sharing settings from the parent folder, the  icon appears next to their names.

On the Files page, the icon appears beside
the name of the shared folder. You can select the icon to reopen the Share dialog and see or change the
folder's sharing settings.
Viewing the Shared with List
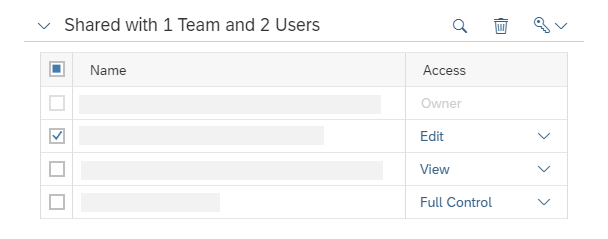
After a file or folder is shared, you can open the Share dialog. The lower half of the dialog has the Shared with list, which you can use to see who the item is shared with or to change the sharing settings.
-
When one file or folder is selected, the Shared with list shows all the users and teams who have shared access to the file or folder and their access level.
-
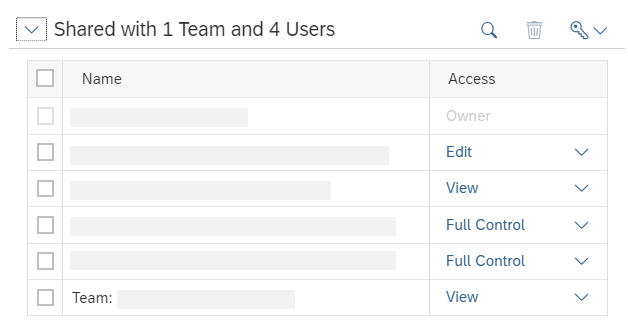
When multiple files or folders are selected, the Share with list shows all users and teams who have access to all the selected items. However, the access level for each user or team might not be obvious.
-
If a user or team has the same access level for all the selected items, the Access column shows the access level. For example, one folder and two files are selected. The user has Edit access for all items.
-
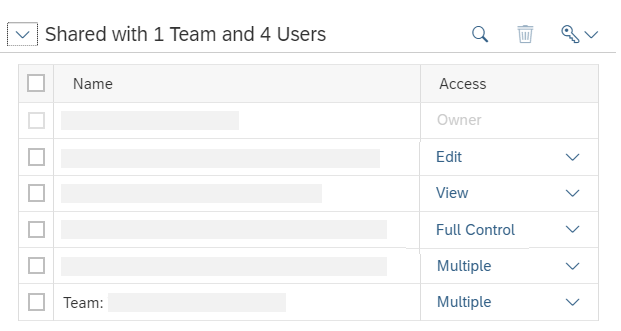
If a user or team has different access levels for each of the selected files or folders, the Access column shows Multiple. For example, one folder and two files are selected. The user has View access to the folder, Edit access for one file, and no access to the other file (because it’s not shared with them). The access level shows Multiple.
Also, the list doesn’t show the details of which files or folders are shared with which users or teams and their access levels. For example, one folder and two files are selected. You won’t know which items a user has View access for. For detailed information, you need to open the Share dialog for the individual file or folder.
-
You can change the access level for a single user or team directly in the Access column, or you can use the toolbar options for changing the share settings for several users and teams:
| Tool | Description |
|---|---|
 (Search)
 |
Lets you search for a user or team. |
 (Unshare)
 |
Lets you unshare (or stop sharing) the selected files or folders with the selected users or teams. |
 |
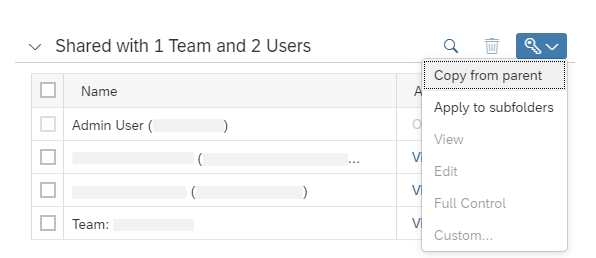
Lets you change the sharing settings for files and folders.
Caution
Changes to the sharing settings for files and folders and access levels for users and teams are immediate and can’t be easily reversed. For example, you choose to apply the sharing settings from the parent folder to the selected folder (Copy from parent). After the change is applied, users who previously didn’t have view or edit access to the files and folders will get that access. Or users who had view and edit access to the files or folders, will lose that access. |
Inheriting Sharing Settings from the Parent
Context
If the file or folder you selected has a parent folder, you can use Copy from parent option to apply the sharing settings of that parent folder to the selected files or folders.
Procedure
-
From the side navigation, choose
Files, select one or more files or folders, and select (Share Share) to open the Share dialog.
-
Expand the Shared with list, select , and select Copy from parent.
If you use the option on files, the action is immediately applied. If you use the option on folders, a confirmation dialog appears.
Results
A message letting you know that the sharing settings have been updated appears and the Shared with list is updated to reflect the changes. Any new subfolders and files that you create will use the sharing settings from the parent folder.
If you use the Copy from parent option for the Public folder, the Public folder's sharing settings are reset and restored to its original settings. Any modifications you made to the sharing settings on the Public folder will be lost. The settings on the Public folder are always applied to all users. However, system administrators can use the System view to change the sharing settings on the Public folder.
Changing Access Level for Files
Context
You can change the access level to shared files for a single user or team directly in the Access column or for several users or teams using the toolbar.
Procedure
-
From the side navigation, choose
Files, select the files, and select (Share Share) to open the Share dialog.
-
Expand the Shared with list::
-
For one user or team, select a new access level directly in the Access column.
-
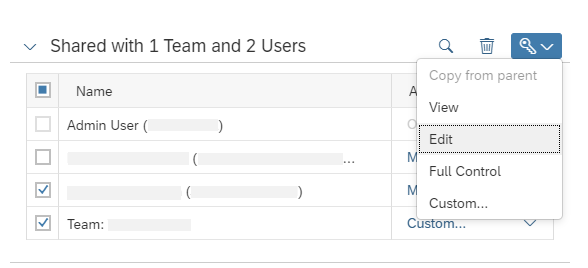
For several users or teams, select the users and teams, select
, and then select the access level (View, Edit, or Full
Control) or select Custom.
-
Results
A message letting you know that the sharing settings have been updated appears and the Shared with list is updated to reflect the changes. The new access levels for the selected users and teams are applied. The access levels for users and teams that are not selected don't change. Any new subfolders and files that you create will use the updated access levels.
Changing Access Level for Folders
Context
You can change the access level to shared folders for a single user or team directly in the Access column or for several users or teams using the toolbar.
Procedure
-
From the side navigation, choose
Files, select the folders, and select (Share Share) to open the Share dialog.
-
Expand the Shared with list:
-
For one user or team, select a new access level directly in the Access column.
-
For several users or teams, select the users and teams, select
, and then select the access level (View, Edit, or Full
Control) or select Custom.
-
Results
A message letting you know that the sharing settings have been updated appears and the Shared with list is updated to reflect the changes based on the option you chose. Any new subfolders and files that you create will use the updated access levels.
-
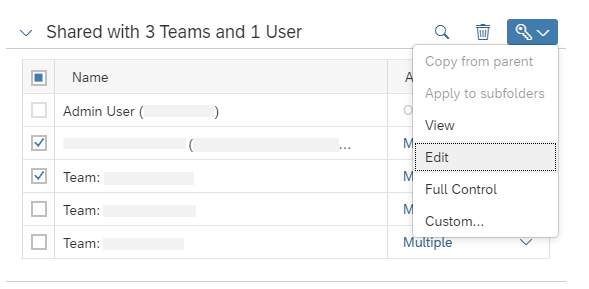
Change the access level for several users and teams by using these steps.
-
Remove users and teams by using
(Unshare). -
Apply these changes to any subfolders and files by using the Apply to subfolders option.
Creating, Copying, Moving, or Restoring Files and Folders
Newly created files and folders inherit the same sharing settings as the parent folder they are created in. However, when you copy, move, or restore a file or folder, the sharing settings may change based on where you copy, move, or restore the file or folder.
-
Files or folders that are copied don't retain their own explicit sharing settings. The sharing settings of the copied files and folders are replaced and inherited from the new parent folder they are copied to.
-
Files or folders that are moved retain their own explicit sharing settings. However, any sharing settings inherited from their original parent folders are replaced with the new parent folder's sharing settings.
-
Files and folders that are restored automatically inherit the sharing settings of the parent folder they are restored to.
API for Sharing Analytic Applications
Application.openShareApplicationDialog() : void