Create a Data Action
In SAP Analytics Cloud, you can create a data action by specifying a source model, and then add steps to the data action.
Prerequisites
To create a data action, you must have the appropriate permissions for the Data Action item. For example, the modeler and admin roles contain these permissions.
Context
Follow these steps to create a data action from scratch. You can also copy an existing data
action by opening  (Data
Actions) from the side navigation, selecting a data action, and
choosing
(Data
Actions) from the side navigation, selecting a data action, and
choosing  (Copy the selected data action).
Procedure
-
Select (Data Actions) from the side
navigation to open the data actions start page, then select Data Action in the Create
New section.
When working on a planning model in the modeler, you can also create a data action based on it by selecting
 (Actions) and selecting
Data Action.
(Actions) and selecting
Data Action. -
Select the Default Model for the data action.
Most steps will use this model as the data source and target. For cross-model copy steps, this model will be the target, and you can pick a different source model. You can also read and copy data from different models in advanced formulas steps.
To open the default model in the modeler, select.NoteYou also have the option to change the default model after adding steps. If you change the default model after steps have already been added, you might get some validation errors. The validation errors will be marked and you can fix them manually.
-
Select
 (Save Data Action).
-
Complete the data action by editing, reordering, copying, and deleting steps as
necessary.
- To open a step for editing, select it in the left pane.
- Undo or redo any changes by selecting
 (Undo) or
  (Redo) in the Operations
toolbar.
(Redo) in the Operations
toolbar. - To reorder steps, drag them up or down in the left pane.
- To copy a step, select it in the left pane and choose (Duplicate
Step).
- To delete a step, select it in the left pane and choose
 (Delete
Step).
(Delete
Step).
-
When the data action is complete, select (Save Data
Action).
Results
You can debug your saved data action with tracing, to make sure it works as expected. For more information, see Get to Know the Data Action Tracing.
-
Using a data action trigger in a story or analytic application: Run Data Actions, Multi Actions, and Allocations
-
Scheduling it in the Calendar: Schedule Data Actions in the Calendar
-
Using a script object in an analytic application: Use Data Actions Technical Objects
Example Scenario: Creating Data Actions with Copy Operations
For planners who are new to data actions in SAP Analytics Cloud, learn how to create copy steps and cross-model copy steps in a data action.
These example scenarios will illustrate how to create two data actions:
- A copy step that copies the Actuals from a Sales model to a Plan version, using a parameter for the source date and target date.
- A cross-model copy step that copies the "Gross Sales" and "Discounts" from a Sales model to a Finance model.
Create a Copy Step with Parameters
Prerequisites
You will need to create a data action before you can add steps.
Context
To create a copy step with a customizable source and target date, you can create parameters for these members. A planning user could then choose the source and target dates for the copy step when running the data action.
Procedure
-
Select
 (Add Copy
Step).
(Add Copy
Step).
-
Select Add Filter and filter the measures you want to copy in the copy step.
 A copy step with a filter on the version dimension and measures
 -
Select
 (Show Parameters
List) and then select Add Parameter.
(Show Parameters
List) and then select Add Parameter.
-
Define the parameter’s properties.
- ID: Type “FromDate” as the ID.
- Parameter Type: Select Member.
- Model: Leave the Model as Default Model.
- Measures/Dimension: Select the Date dimension.
- Cardinality: Select Single to only allow one value.
- Hierarchy: Select Any to allow selections from any hierarchy.
- Level: Select Any.
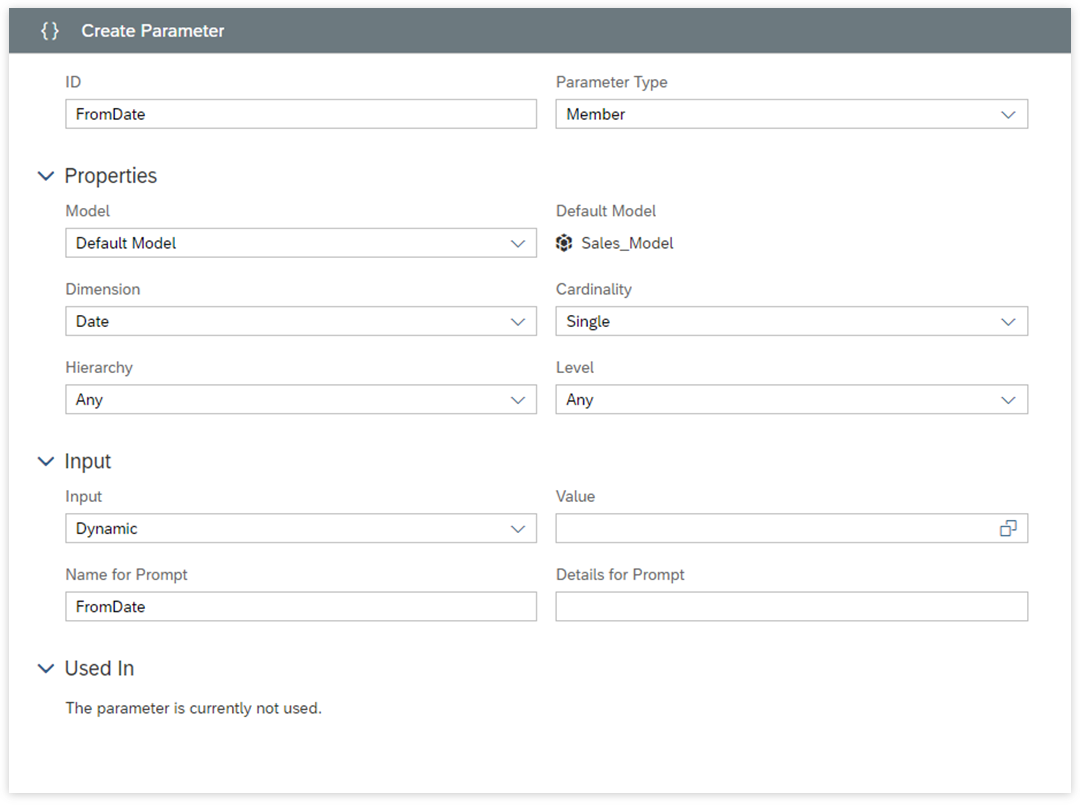 A configured member parameter for the Date dimension.
 -
Select Save Data Action.
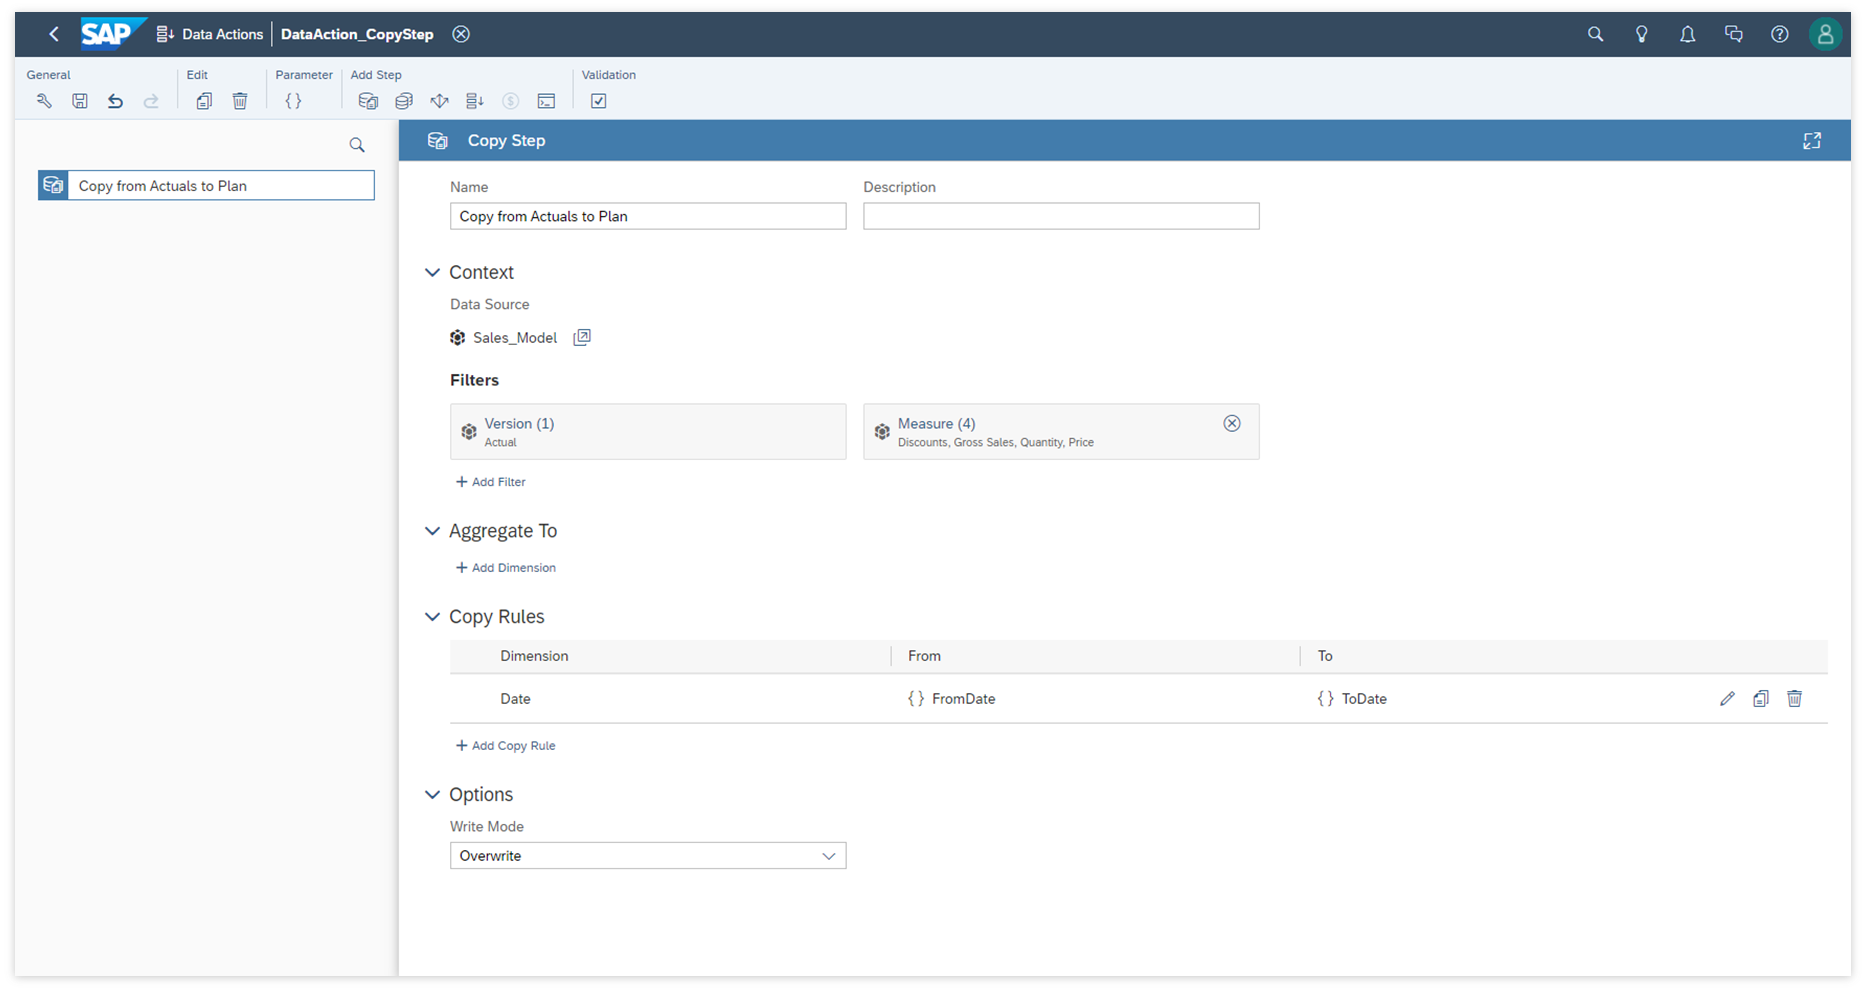 A completed copy step with parameters for the date dimension
Results
Create a Cross-Model Copy Step
Context
To copy data from one model to another, you can use a cross-model copy step. This step includes mapping options to let you choose which dimensions will be copied and where they will be copied to.
Procedure
-
Select
 (Add Cross-Model Copy Step) and
type a name and description for the step.
(Add Cross-Model Copy Step) and
type a name and description for the step.
We will call this step “Transfer to Finance”.
-
Select Done.
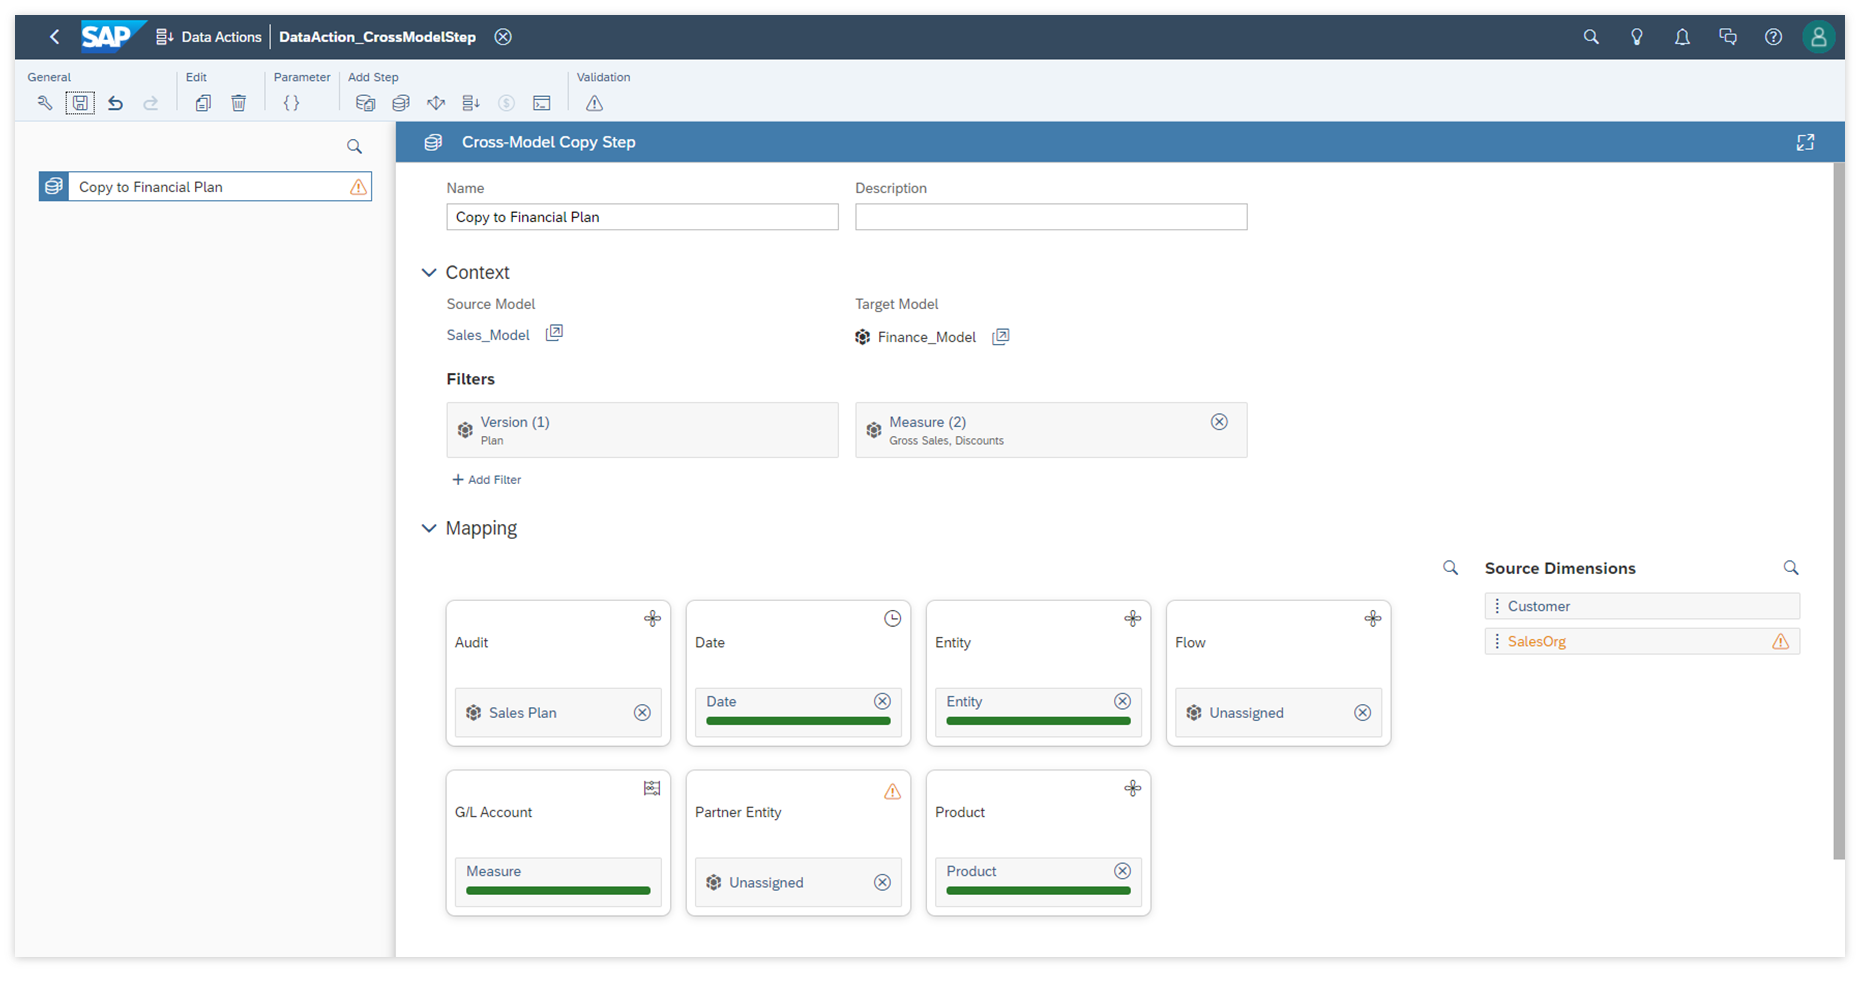 A completed cross-model copy step
Results
You now have a cross-model copy step that will copy data from a Sales model to a Finance model when triggered in a story or analytic application.