Configure Scheduling of Publication
As an Admin, you can configure Scheduling options. You also need to make sure that specific privileges are granted to people creating the schedules.
Schedule Publication Roles and Permissions
Before you begin scheduling your publication, make sure that you've the necessary permission and that you've configured the scheduling options from System Administration.
-
If you’re a BI Admin or an Admin. By default, these roles come with the Schedule Publication permission.
-
If the Schedule Publication permission has been assigned to a custom role created.
-
If you have a Copy or Edit permission to a story once the Schedule Publication permission is given.
When a user is deleted, all schedules created and owned by the user will be deleted.
Scheduling-Related Permission
| Permission | Description |
|---|---|
| Create | To create a schedule and view or edit the schedule you have created. |
| Manage | To view and modify any schedule that is available in a tenant. Note As a prerequisite, the user should have
Manage permission on Public and Private files. |
Assigning Schedule Publication Permission
To view or assign the schedule publication permission to a role, follow the steps:
-
From the
 (Main Menu),
select .
 -
Select the role to which you want to assign the scheduling permission.
-
Navigate to the Schedule Publication permission or type in Schedule Publication in the search bar at the top-right corner.
-
Select the required permission and click
 (Save).
You can also assign Schedule Publication permission to custom roles. To create custom roles, see Create Roles.
Schedules of stories based on live connections will always run with the user credentials corresponding to the live connection.
Configuring Scheduling
From , navigate to the System Configuration tab.
-
To enable schedule publication, switch on the Allow Schedule Publication toggle.
-
To enable schedule publication for non-SAP Analytics Cloud recipients, turn on the Allow Schedule Publication for non-SAC Users toggle.
-
To enable Bursting of a publication, in addition to switching on the Allow Schedule Publication toggle, switch on the Allow Publication Bursting toggle.
-
To limit the Maximum number of concurrent publications, enter a number between 1-100 in the field provided.
NoteLeave the field empty if you do not wish to limit the number of publications that can run at the same time.
Scheduling Publications Based on Imported Data Sources
-
You can schedule a story based on imported data sources. For details, see Import Data Connection Overview Diagram.
Scheduling Publication Based on Live Connections
In addition to switching on the Allow Schedule Publication toggle, complete the configuration information provided in this section to schedule stories based on live connections.
-
Enable the Allow live data to leave my network switch from . For details, see Configure System Settings.
-
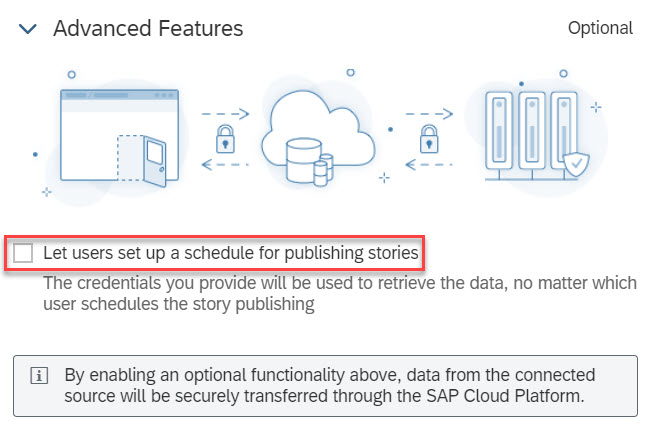
Edit the Connections set up for the corresponding story, and from the Advanced Features section, select the Let users set up a schedule for publishing stories option.

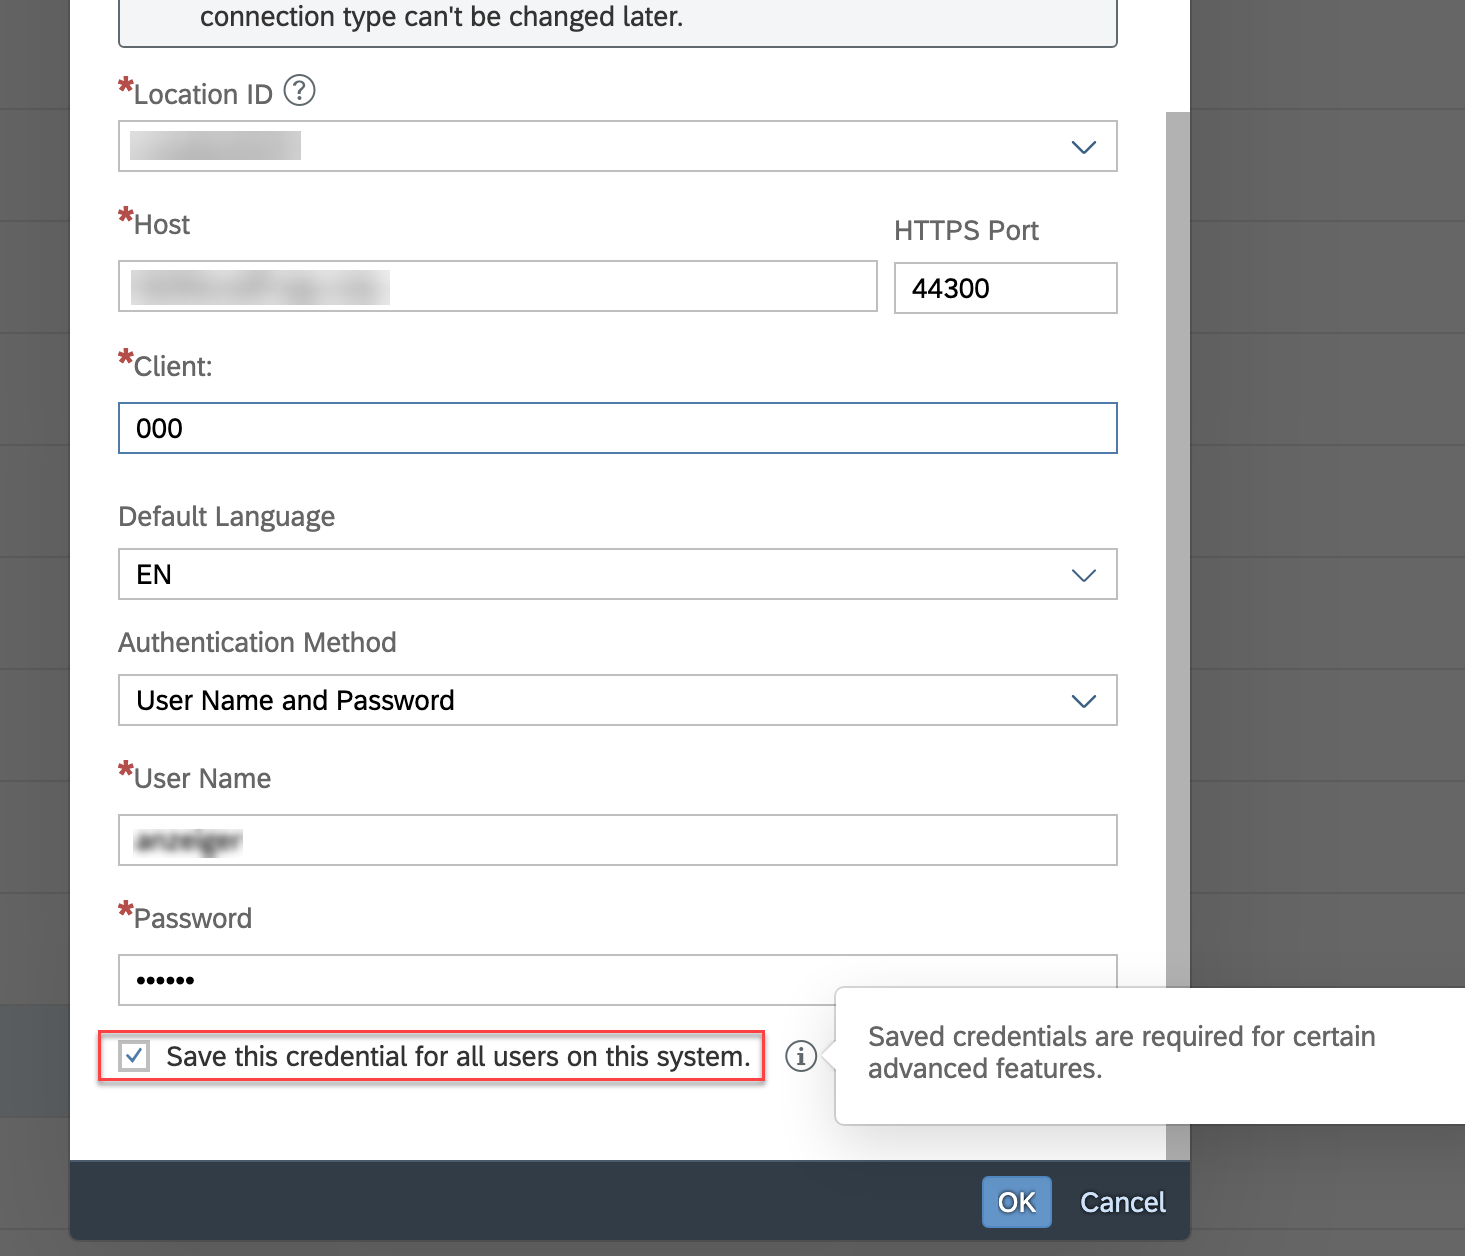
For details on setting up live data connections, see Live Data Connections Advanced Features Using the Cloud Connector. Make sure that you have successfully saved this connection for scheduling to function.
When the connection type is Tunnel, save the credentials to be able to use the scheduling functionality.

Schedules of stories based on live connections will always run with the user credentials corresponding to the live connection.
Typically, your schedule will run within 4 to 6 hours. For a story based on live data, the time to run a schedule varies based on the complexity of the query and the time it takes to run the query on the remote system. If you don't receive the publications within 24 hours, contact SAP Product Support.
Managing Schedules Within a Tenant
The Manage permission on Schedule Publication allows you to view, modify, and delete the schedules available in a tenant.
This means you can access their schedules from your Calendar and change the details as per your requirement.
Prerequisite
You should have the Manage permission on Public and Private files to view the schedules of public or private stories.
If an Admin role deletes a user, all schedules created and owned by the user will be deleted.
Context
- Who should be assigned with the Manage permission on Schedule Publication and what can the assigned user do with this permission?
- What happens when the user doesn't have Manage permission on Public or Private files?
Schedule Manager or Schedule Administrator
- Subject
- Message
- Time
Schedule Manager with or without Manage permission on Public or Private files
Let's understand what happens when the Schedule Manager doesn't have Manage permission on either Public or Private files, or both but has Manage permission on Schedule Publication.
Scenario
Let's assume a scenario where the schedule manager, Smith, wants to view a schedule that was created by a user, Jane, and he wants to modify the message in the schedule.
Schedule Manager with manage permission on Public and Private files
In this scenario, Smith is able to view the schedules that Jane had created for the publication that is owned by her and the one which is residing in the teams folder.
Schedule Manager with manage permission on Public files
In this scenario, Smith has Manage permission on Public files but not on Private files and the scheduled publication resides in a private folder that is owned by Jane. When Smith opens his calendar in SAP Analytics Cloud, he won't be able to view the schedule that Jane had created because Smith would require Manage permission on Private files to view the schedule for a publication owned by Jane.
Schedule Manager with manage permission on Private files
Now, when Smith opens his calendar in SAP Analytics Cloud, he won't be able to view the schedule that Jane had created. This happens due to lack of permissions. A schedule manager would require Manage permission on Public files to view the schedule for a publication residing in public folders such as any team folder, Sample, or Public.
Schedule Manager without manage permission on Public and Private files
In this scenario, Smith won't be able to view any schedules that are available in the tenant except the ones which he owns.
Licensing Information
For every 20 licenses of SAP Analytics Cloud, users within a tenant can create one publication (PDF) per hour. Similarly, for every 100 licenses, users can create five publications (PDFs) per hour. Hourly slots would be based on the Coordinated Universal Time (UTC).
You'll need a minimum of 25 licenses to be able to create a schedule.
-
Planning Standard
-
Planning Professional
-
BI Concurrent
-
BI User
For example, if the total number of licenses you own are as follows:
-
Planning Standard: 10
-
Planning Professional: 10
-
BI Concurrent: 80
-
BI User: 17
-
Analytics Hub: 20 (excluded)
The total number of licenses will be 117 and thus the total number of publications that can be scheduled in an hour would be six.
You can share the publication with any number of SAP Analytics Cloud users within the tenant and a maximum of three non-SAP Analytics Cloud users.

 Security
 Roles
Roles