Schedule Data Locks in the Calendar
In the SAP Analytics Cloud calendar, you can create data locking tasks to make sure that model data is locked at the right time.
Context
You may want to gather data for different parts of your plan at different times, and at other times, you may want to prevent further changes. With data locking, users who are responsible for different regions (or data slices) of model data, as well as users with the Modeler role, for example, can lock or unlock them. To learn more, see Configuring Data Locking.
Before you create a data locking task, you should get familiar with how data locking is set up for the model, and which users own the locks. They'll be your assignees for the task, or, if you're the owner, you can schedule an automatic task. If you need to, you can set up the task first and then edit the model to match it.
-
If you're the data locking owner of a specific region (or data slice) of a model, you can schedule automatic data locks, and the system will set the locks at the specified time or once certain start conditions are met.
-
If someone else is responsible and you want to schedule the data locks to be set at a specific date or once certain start conditions are met, you can assign the task to the responsible person and ask for their agreement to set the data locks automatically using their permission.
-
If someone else is responsible and you want to have the data locks set during a certain timeframe, you can set up a manual task and assign it to the responsible persons. Then, the assignees can apply the required data locks you defined by simply submitting the task. The data locks are immediately set after submission.
You can define the start date according to your needs:
-
Set the start and due dates and times. Need to schedule something on a recurring basis? You can set up recurrence, and change individual occurrences as needed.
-
Let the task start once another calendar event reaches a certain status (accomplished, for example), or several other calendar events reach one of the defined statuses.
-
If your task is grouped within a parent process, let it start at the same time as its parent process.
Procedure
-
In the Calendar, select

 (Create)
 Data Locking
Task
Data Locking
Task .
.
-
Decide whether the data locks should be set automatically at a certain point in
time, or if they should be set by an assignee in a certain timeframe.
To proceed, click the respective button in the interactive image below:

Set Data Locks Automatically
Prerequisites
If the data locking task runs automatically, make sure that you have the necessary permissions to set data locks for the region (or data slice) of the model you'll define in a later step. If you don't have the necessary permissions, you should know who's responsible so you can assign the task to this person and ask for their agreement to run the task using their permissions.
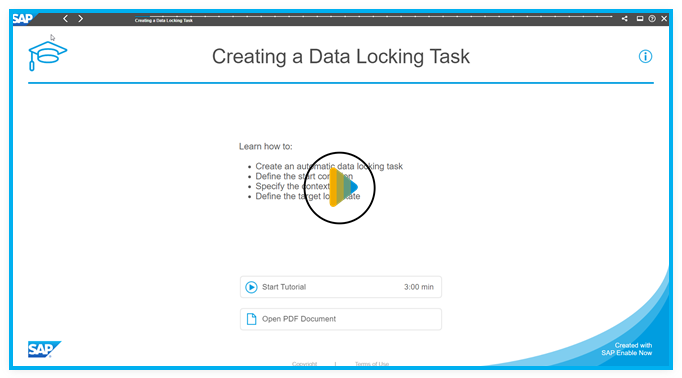
Learning Tutorial
Click through the interactive tutorial illustrating how to create an automatic data locking task in step-by-step instructions (3:00 min); the tutorial is captioned exclusively in English:
Procedure
- Optional:
If the start condition is set to Time, you can set
up recurrence; to close your monthly forecasts, for example: Select
Add Recurrence and then fill in the settings.
Option Description Recurrence Pattern Set the task to repeat by Minute, Hour, Day, Week, or Month. Every Set the recurrence frequency. - For tasks that occur in a minute interval, enter a number
between 5 an 9999. The minimum interval is every 5 minutes,
the default interval is every 30 minutes.Note
A high recurrence frequency like every 5 minutes can put extra load on the system and may slow it down.
Automatic data locking tasks with two preceding task occurrences that are still running are automatically canceled.
- For tasks that occur in a weekly interval, pick a specific weekday.
- For tasks that occur in a monthly interval, define the day
of the month.
For example, you can set the task to occur on the 5th day every 2 months.
When you enter 31 as day of the month, the event will occur on the last day of the month (February 28th, March 31st, April 30th, for example).
Start Date of First Occurrence Set the start date and time for the first occurrence. Due Date of First Occurrence Set the due date and time for the first occurrence. End Recurrence by Set when the recurrence pattern ends: - End Date: fill in the end date details.
- Repetitions: set the number of repetitions; this includes the first occurrence.
- No End Date
NoteNote that you can't add a recurrence when a parent process is selected.
- For tasks that occur in a minute interval, enter a number
between 5 an 9999. The minimum interval is every 5 minutes,
the default interval is every 30 minutes.
- Optional:
If there's an overall process for the task, such as the Q3 2021 Forecast,
add the task to the process:
-
Choose
Add Parent Process and select the
process. -
If you selected a process in the calendar before creating this task, this process will be selected as a parent process by default. You can remove or edit it to add a different parent process if needed.
Creating this structure helps you stay organized when the planning process involves unlocking, updating, and locking data at different times.
NoteYou can select only the processes that you can edit. You need to be the owner or the assignee of the parent process.
If you've set up recurrence for your task, you can't add it to a parent process.
-
- Optional:
To set reminders, select Add
Reminders and fill in the required time settings.
-
In the
Context section, specify which data to lock or
unlock.
-
In the Model field, choose
 Select Model and choose a planning
model.
Select Model and choose a planning
model.
If data locking isn't set up for your model, you’ll see a message. You can still create the task, but remember to add data locking to the model afterwards.
-
Set filters if you want to lock or unlock a specific slice of the
model data. Select
Add Filter, choose the dimension and the
members that you want to include, and repeat as needed. Remember
that only driving dimensions will be selected for data
locking.
For example, if you’re creating a task to lock the forecast for Q3 2021, you'd set a filter on the version and time dimensions. Otherwise, the task will change the lock state for all the data that's set up for data locking.
The context is added to the Data Locking section, where you can see the current lock state.
If you don't have permissions for the model, or if data locking isn't enabled for any of the data, you won't see the current state.
-
In the Model field, choose
-
To view the data locking dialog of your model, choose
 Manage Data Locks in the Data
Locking section.
Manage Data Locks in the Data
Locking section.
The Data Locking dialog appears, where you'll see the filters that you've previously set for the model. You can also view the data locking status here.
- Optional:
Add people to the task.
Select
Add Owners.To let more people monitor and manage the task, you can add additional owners. -
Select You in the Assignee section, and then choose Change from the dropdown menu.
-
In the Change User dialog, select the user name of the person you'd like to send a permission request.
If you don't have appropriate permissions to set the data locks, you can change the assignee from yourself to another user who has the necessary permissions and send a permission request. Select
Add Viewers.If you want other people to be able to see the task, you can share the task with them. -
As owners and viewers, you can add individual users or teams that have been created in SAP Analytics Cloud:
Adding teams instead of individual users may help save you time, and you don't need to define who's taking care of the task. You can choose to Resolve the team so the individual users are displayed, and adapt the list according to your needs.
NoteAfter you resolve a team, the reference to that team is removed. Instead, the system behaves like you added all the team members individually. Any changes to the team on the SAP Analytics Cloud Security page (like adding or removing team members) will not be reflected in the People section of your calendar task.
-
You can also add someone who isn't already a member:
- To add a non-member, in the appropriate People section, select the dropdown list and then select Invite Non-Member by Email.
- Type the person's email address.
TipIf you add someone and then decide to share the task with someone else, select the user name or the team name, and then choose Change from the dropdown menu. In the Change User dialog, select the new name.
If you add 7 or more users or teams as owners or viewers, only the first 5 user or team names are displayed and a link (... 3 More, for example) lets you access a dialog with the complete list of added users and teams. In this dialog, you can can search for user or team names, and you can add, change, or remove them.
-
- Optional:
If you haven't done so already, you can add the task to a process in the
Hierarchy section.
-
Choose
Add Parent Process and select the
process, for example, the Q3 2021 Forecast. -
If you've already set a parent process, it is displayed as the parent process. You can select it to see its details. You can remove or edit it to add a different parent process if needed.
Creating this structure helps you stay organized when the planning process involves unlocking, updating, and locking data at different times.
NoteYou can select only the processes that you can edit. You need to be the owner or the assignee of the parent process.
If you've set up recurrence for your task, you can't add it to a parent process.
-
- Optional:
Once you've activated the task, you may want to send an immediate reminder
to the assignee: In the Time section, select
 Send Immediate Reminder and enter some text as
message.
Send Immediate Reminder and enter some text as
message.
The assignee will be notified right away.
Results
Notifications are sent to the involved people.
The data locks will be set automatically at the specified time. After running the task, its status will automatically change to Successful or Failed, depending on the outcome.
If you replaced yourself with another assignee and sent the permission request, but the assignee didn’t grant permission before the task started, the data locks won't be set and the task status will change to Canceled.
Set Data Locks Manually by an Assignee
Procedure
- Optional:
If the start condition is set to Time, you can set
up recurrence; to close your monthly forecasts, for example: Select
Add Recurrence and then fill in the settings.
Option Description Recurrence Pattern Set the task to repeat by Minute, Hour, Day, Week, or Month. Every Set the recurrence frequency. - For tasks that occur in a minute interval, enter a number
between 5 an 9999. The minimum interval is every 5 minutes,
the default interval is every 30 minutes.Note
A high recurrence frequency like every 5 minutes can put extra load on the system and may slow it down.
- For tasks that occur in a weekly interval, pick a specific weekday.
- For tasks that occur in a monthly interval, define the day
of the month.
For example, you can set the task to occur on the 5th day every 2 months.
When you enter 31 as day of the month, the event will occur on the last day of the month (February 28th, March 31st, April 30th, for example).
Start Date of First Occurrence Set the start date and time for the first occurrence. Due Date of First Occurrence Set the due date and time for the first occurrence. End Recurrence by Set when the recurrence pattern ends: - End Date: fill in the end date details.
- Repetitions: set the number of repetitions; this includes the first occurrence.
- No End Date
NoteNote that you can't add a recurrence when a parent process is selected.
- For tasks that occur in a minute interval, enter a number
between 5 an 9999. The minimum interval is every 5 minutes,
the default interval is every 30 minutes.
- Optional:
If there's an overall process for the task, such as the Q3 2021 Forecast,
add the task to the process:
-
Choose
Add Parent Process and select the
process. -
If you selected a process in the calendar before creating this task, this process will be selected as a parent process by default. You can remove or edit it to add a different parent process if needed.
Creating this structure helps you stay organized when the planning process involves unlocking, updating, and locking data at different times.
NoteYou can select only the processes that you can edit. You need to be the owner or the assignee of the parent process.
If you've set up recurrence for your task, you can't add it to a parent process.
-
- Optional:
To set reminders, select Add
Reminders and fill in the required time settings.
-
In the
Context section, specify which data to lock or
unlock.
-
In the Model field, choose
Select Model and choose a planning
model.
If data locking isn't set up for your model, you’ll see a message. You can still create the task, but remember to add data locking to the model afterwards.
-
Set filters if you want to lock or unlock a specific slice of the
model data. Select
Add Filter, choose the dimension and the
members that you want to include, and repeat as needed. Remember
that only driving dimensions will be selected for data
locking.
For example, if you’re creating a task to lock the forecast for Q3 2021, you'd set a filter on the version and time dimensions. Otherwise, the task will change the lock state for all the data that's set up for data locking.
The context is added to the Data Locking section, where you can see the current lock state.
If you don't have permissions for the model, or if data locking isn't enabled for any of the data, you won't see the current state.
-
In the Model field, choose
-
To view the data locking dialog of your model, choose
Manage Data Locks in the Data
Locking section.
The Data Locking dialog appears, where you'll see the filters that you've previously set for the model. You can also view the data locking status here.
-
In the
People section, add the relevant data locking owners as
assignees for the task.
Make sure you include the right data locking owners. For example, if you want to lock the forecast for EMEA and you assign the task to the data locking owner for Germany, the assignee can only lock part of the data.
-
You can add individual users or teams that have been created in SAP Analytics Cloud:
Adding teams instead of individual users may help save you time, and you don't need to define who's taking care of the task. You can choose to Resolve the team so the individual users are displayed, and adapt the list according to your needs.
NoteAfter you resolve a team, the reference to that team is removed. Instead, the system behaves like you added all the team members individually. Any changes to the team on the SAP Analytics Cloud Security page (like adding or removing team members) will not be reflected in the People section of your calendar task.
-
You can also add someone who isn't a current member if they will receive a user with the required data locking permissions before the start date of your task:
- To add a non-member, in the appropriate People section, select the dropdown list and then select Invite Non-Member by Email.
- Type the person's email address.
-
If you'd like to schedule a data locking task for yourself that you need to perform in a certain timeframe, you can add yourself as assignee: Select the dropdown list next to
Add Assignees and then select
Add Myself. For example, in your planning process you might want to review the data entries first, before you set the data locks.
TipIf you add an assignee and then decide to substitute someone else, select the user name or the team name, and then choose Change. In the Change User dialog, select the new name.
If you add 7 or more users or teams as assignees, only the first 5 user or team names are displayed and a link (... 3 More, for example) lets you access a dialog with the complete list of added users and teams. In this dialog, you can can search for user or team names, and you can add, change, or remove them.
-
- Optional:
If you haven't done so already, you can add the task to a process in the
Hierarchy section.
-
Choose
Add Parent Process and select the
process, for example, the Q3 2021 Forecast. -
If you've already set a parent process, it is displayed as the parent process. You can select it to see its details. You can remove or edit it to add a different parent process if needed.
Creating this structure helps you stay organized when the planning process involves unlocking, updating, and locking data at different times.
NoteYou can select only the processes that you can edit. You need to be the owner or the assignee of the parent process.
If you've set up recurrence for your task, you can't add it to a parent process.
-
- Optional:
Once you've activated the task, you may want to send an immediate reminder
to the assignees: In the Time section, select
Send Immediate Reminder and enter some text as
message.
The assignees will be notified right away.
Results
Notifications are sent to the involved people. The assignees can submit the task between the start date and the due date. When a data locking owner submits the task, any data slices that they own within the context of the task are set to the target lock state.