Preparing Stories for the Digital Boardroom
Before adding stories to your SAP Analytics Cloud boardroom presentation, go to the Stories area of the application and optimize the display and enabled features for the Digital Boardroom.
Use Responsive Pages
It is recommended to design Digital Boardroom presentations using  Responsive story pages. Responsive pages allow you to create
layouts that automatically resize and reflow when viewed on different screen sizes,
and are required for viewing on mobile devices. Canvas pages can also be used;
however, grid pages are not supported. If a story contains a mixture of responsive,
canvas, and grid page types, only the responsive and canvas pages are imported into
the Digital Boardroom designer.
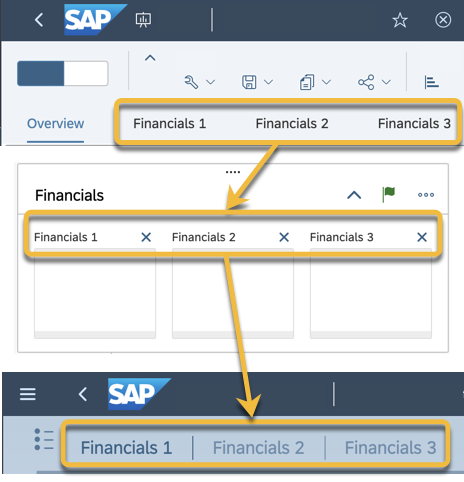
Create Meaningful Story Page Titles
Each page title in your story is visible in the Digital Boardroom navigation when presenting. Choose meaningful titles for your story pages to clearly communicate the purpose of the visualizations on that page.

Enable Sort, Top N, and Variance Options
Data on a story tile can be sorted from the  (Sort)
context menu or filtered by ranked values from the
  (Rank)
context menu. You can also show suggested variances by selecting
  (Variance) from the context menu. You can enable these
options so presenters can use them from within a Digital Boardroom agenda or
dashboard.
- With a tile selected, open the Designer panel and
select
 Styling.
 - In the Boardroom Properties section, select any of
the options:
- Enable Sort Option in Boardroom
- Enable Top N Option in Boardroom
- Enable Variance Option in Boardroom
Enable Data Exploration
While presenting a story tile in the Digital Boardroom, you can launch the Explorer from the
 (Explorer) context menu. The Explorer allows you to
change measures, dimensions, and chart types, and edit filters, to further analyze
your data. For more information, see Explore Your Data and Launching the Explorer from a Story Page.
You can also access  Smart Insights from the Explorer to see more information
about a particular data point in your visualization (for details, see Smart Insights).
To enable the Explorer:
- With a tile selected, open the Designer panel and select
 Builder.
 - In the section, select Enable Explorer.
If you want to restrict the number of measures and dimensions that are visible in the Explorer, select Configure Measures & Dimensions. Note that all measures and dimensions that are currently in the chart are automatically included and can’t be removed. Also, if you don’t specify any additional dimensions or measures, then only the ones used in the chart or table are available in the Explorer.
You can clear your configuration of measures and dimensions by selecting Clear Selection.
Restriction- Measure and dimension configuration is not available for blended charts and tables.
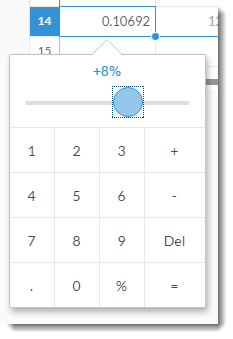
Enable Touch Cell Input
- Select a table in your story page.
- Open the Designer panel, and select
 Styling.
 - In the Boardroom Keypad Slider section, enable the slider.
- Specify the minimum, maximum, and step size values for the slider of the keypad.
After saving your story, the touch keypad can now be used to edit numbers in a table cell during the boardroom presentation.


