Enable Content Discoverability with the Analytics Catalog
Enable the Analytics Catalog so that users can view published content on the Catalog tab on their Home screen.
Who does this apply to?
- Users who have the Execute permission for Publish Content.
- Users who have the Manage permission for Catalog Administration, and the Read and Update permissions for System Information.
- Users who have the Manage permission for Public Files and Private Files.
- Users with any of these standard application roles: Admin or BI Admin.
What is the Analytics Catalog?
Your organization may have hundreds or thousands of saved stories. Your content creators probably carefully created some of those stories, but some others might contain outdated information, or be the result of users experimenting with various features. How can users tell which stories they should be using?
Use the Catalog!

The catalog is a single access point for content published to users and teams within SAP Analytics Cloud. Content creators can publish content to the catalog, and users will be able to discover those stories from their Home page. Because a special permission is needed to publish content to the catalog, users will know that the catalog content has been vetted by a content creator.
- Stories
- Analytic Applications
- Digital Boardroom presentations
- Models
- Datasets
- Uploaded SAP Analytics Cloud files
- Content Links
- Insights
The Catalog tab is enabled by default, but an administrator can disable it.
To enable the catalog, you'll need the Manage permission for Catalog Administration, and the Read and Update permissions for System Information.
To publish content to the catalog, users will need the Execute permission for Publish Content.
Enable or Disable the Catalog
Context
The catalog is enabled by default on newer SAP Analytics Cloud systems, but is disabled by default on older systems.
Procedure
-
From the side navigation, choose

 System
 Administration
 and select the Catalog tab.
Results
Only the tabs that you turned on will appear on the Home page. For users who have not yet used the catalog, Favorites, or Shared With Me tabs, the published cards are in the default sort order. The default sort order does not affect users who regulary use the tabs.
Set Up Filters in the Catalog
Context
When users publish content to the catalog, they can apply filters to the content. Other users can then use the filters to easily find content in the catalog.
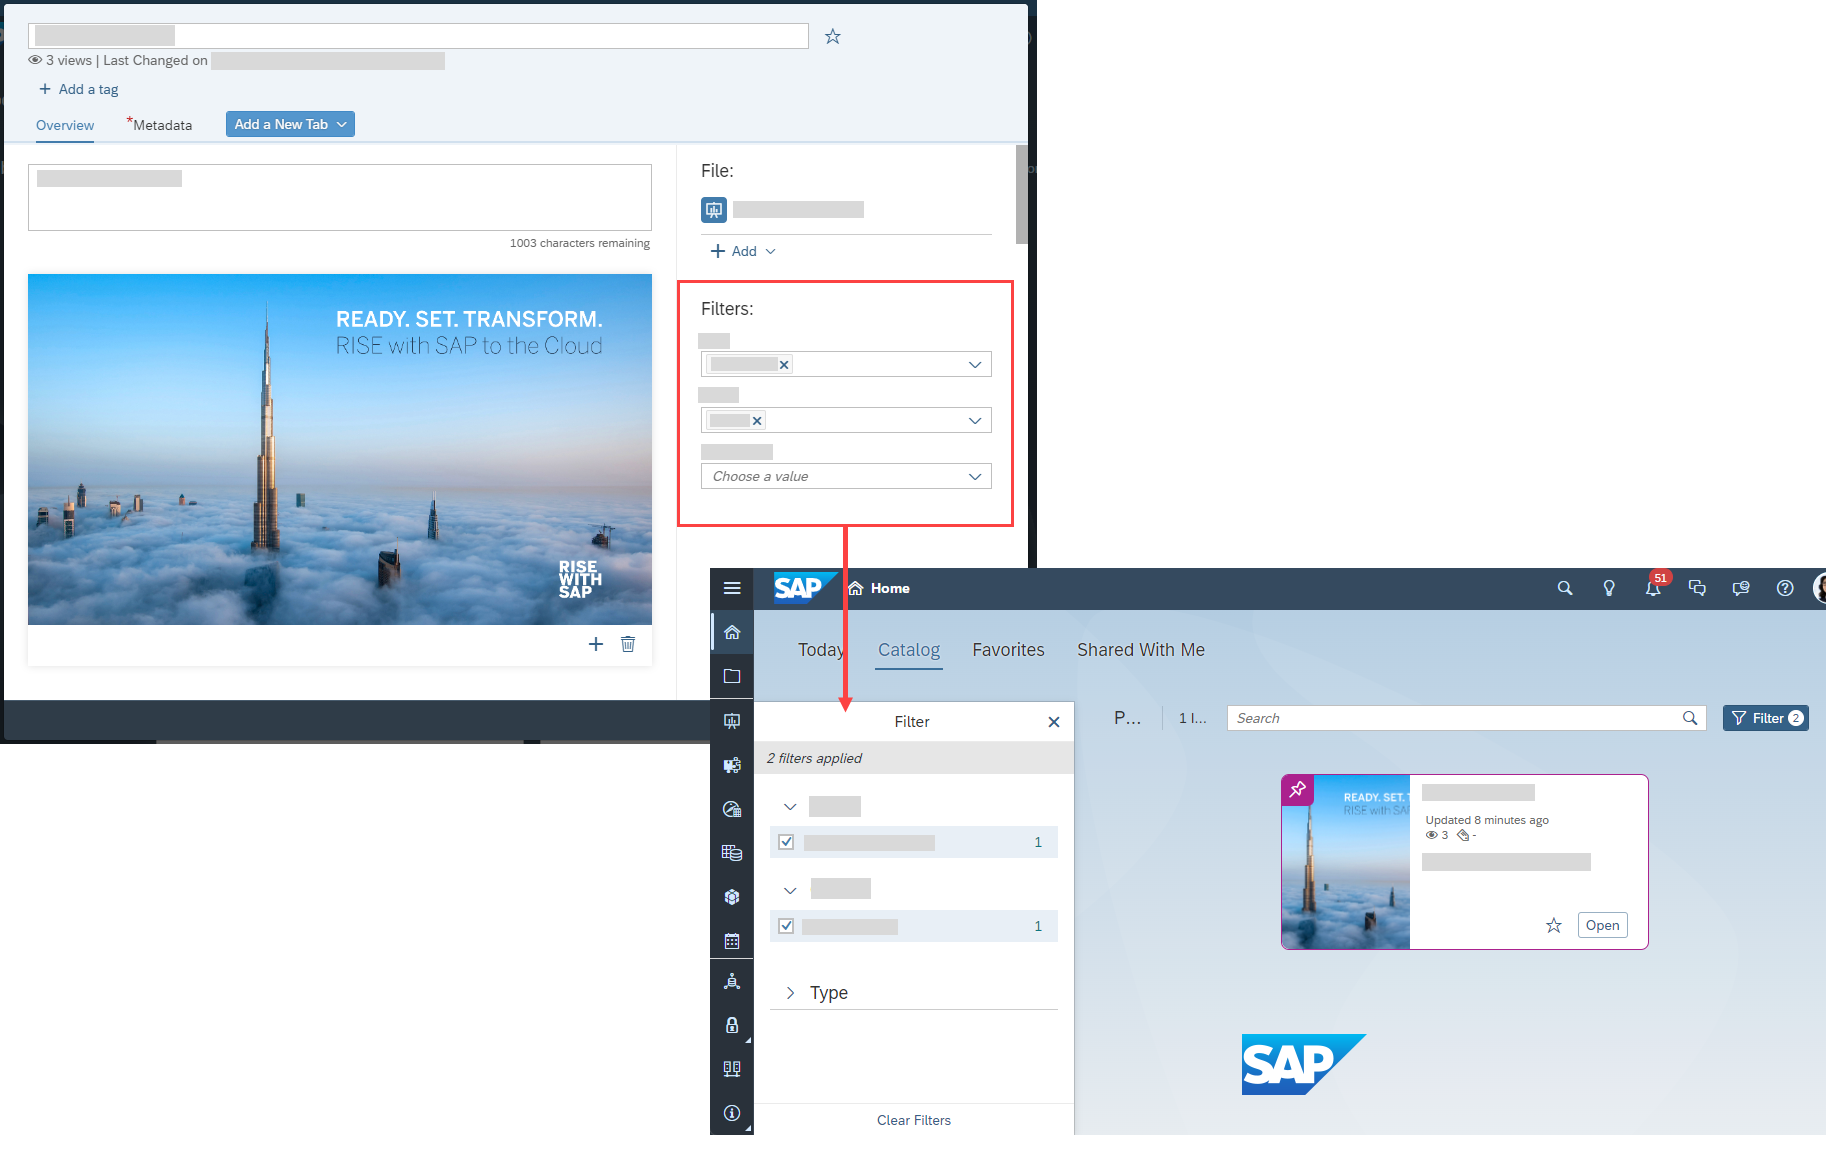
You can set up the filters, which are like groups, and add values (members) for each filter. For example, you can set up filters for "City" or "Color". You can also translate the content filters into other languages.
For a user to add and define filters, they must have the Admin role assigned to them or be assigned a role with the Manage permission for Catalog Administration and the Read and Update permissions for System Information
Procedure
-
From the side navigation, choose System Administration and select the Catalog tab.
-
In the Content Filters section, select
 (Add a new filter).
-
Under Members, type names to add to the filter.
For example, you can create a filter named Line of business with several members, such as Overview, Sales, and Finance.

-
If you want to translate the content filters and the card layout text into other languages, choose a source language (the
language that you typed the content filter names and member names in).
-
Go to the Setting section and under Translation, select the source
language.
The translation service will then translate the content filters and text on the card layout to the supported languages. For more information, see Learn About the Translation Process. To see the content filter translations, from the side navigation, choose
 Translation, and edit the Content
Filters.
Translation, and edit the Content
Filters.
-
Go to the Setting section and under Translation, select the source
language.
Results
When users publish content to the catalog, they can apply the filters to the content they are publishing. For more information, see Publish and Share Content to the Catalog.
Users can open the Filter panel and select filters to help them find the content they're interested in. For more information, see Find and Access Content in the Catalog.
When new users view content in the catalog, only the cards that match the default selected filters are visible. The user can clear all the default filters and select the filters they want. The default filters selected are used only on the first view of the catalog and do not affect existing users who regularly filter content.
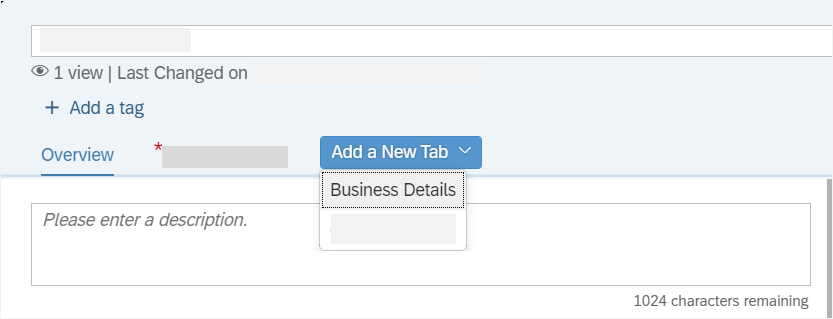
Add Tabs to the Catalog Overview Dialog
Context
When users publish content to the catalog and select Edit details to open the catalog card overview dialog, just one tab (Overview tab) is available by default. If needed, you can add up to 10 additional tabs to the catalog card overview dialog. The tabs that you add can be mandatory or optional. Mandatory tabs require information and will always appear in the dialog. Users can't remove them. If a tab isn't mandatory, users can add or remove the tabs.
Procedure
-
From the side navigation, choose System Administration.
Results
When a user publishes content to the catalog, and opens the catalog card overview dialog, all mandatory tabs appear. Users can select Add a New Tab to add any of the non-mandatory tabs. For information on publishing content, see Publish and Share Content to the Catalog.
Recommend Catalog Items
Context
Sometimes it is helpful when certain content items appear with a higher priority or recommendation than other items. These recommended items appear at the top of the Catalog tab.
Procedure
Results
A pushpin appears on the upper left corner of the card, and the card is moved to the top of the view. The sort order is applied to the recommended items separately from the unrecommended items. Users can see the recommended items based on their access permission for the content.
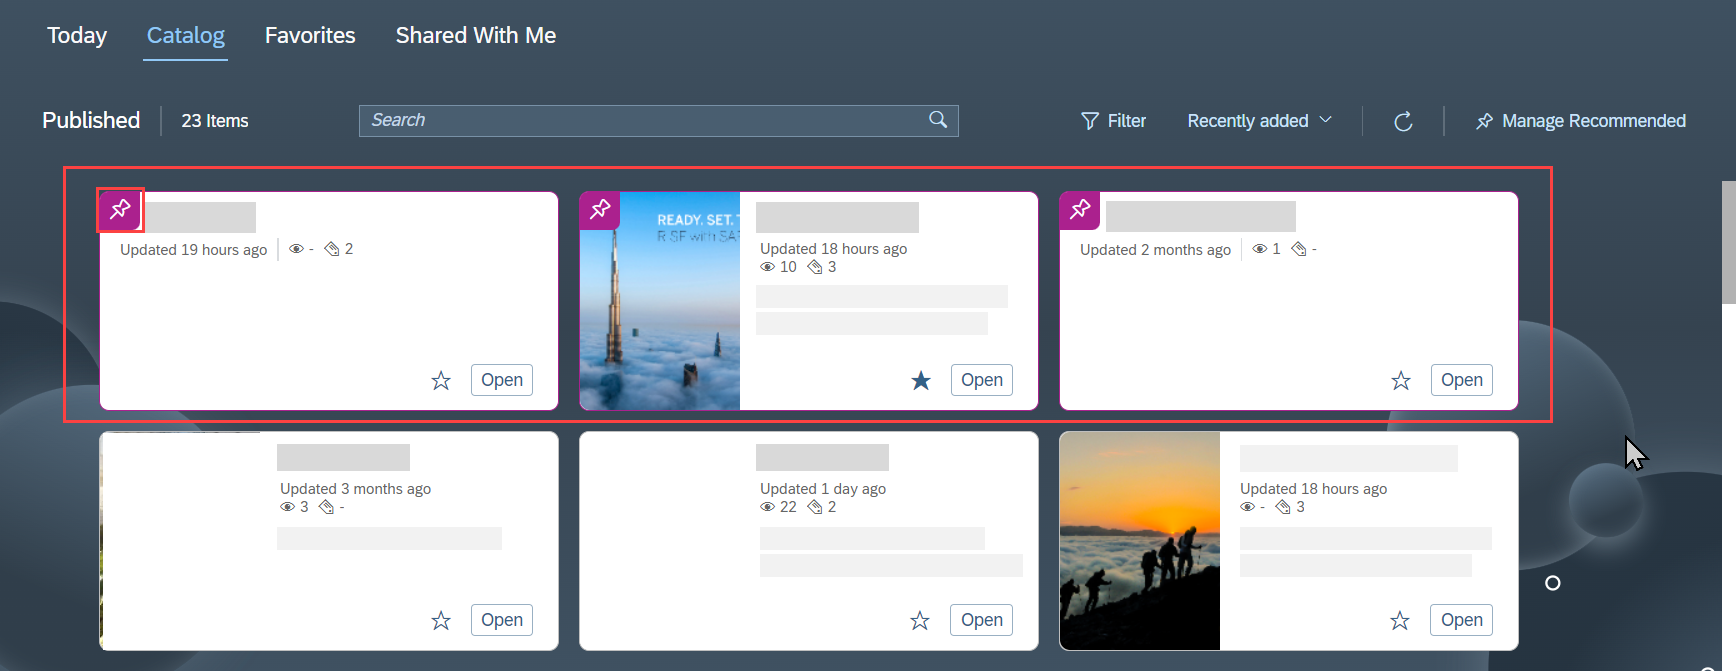
If you are a system administrator or a Non-Admin user with the appropriate permission, you can see the Manage Recommended button, which lets you remove several items or all items from being recommended. Removing items from being recommended does not remove them from being published in the catalog. These items will no longer appear at the top of the Catalog tab and will appear with the other published items arranged based on the sort order applied. To remove items from being published, see Publish and Share Content to the Catalog.
Requests for Content Published to the Catalog
When someone publishes content to the catalog, they can choose whether or not to grant Read access. If they don't grant access, users will need to request access to the content before they can open it. Those access requests will be sent to the system administrators, who will need to approve or deny those requests.
When a user requests access to content, you'll receive an email from the system, and see a notification in the shell bar:
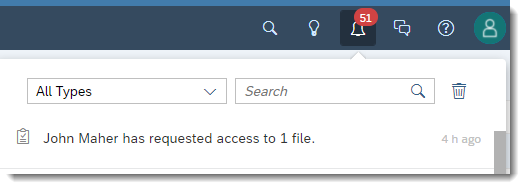
A row will also be added to the file request list. To access the list, from the side navigation choose  Security
  Requests File Requests. From here, you can select one or more requests, and then select the Approve or
Deny icons. You can update the list by selecting the Refresh icon:
Requests File Requests. From here, you can select one or more requests, and then select the Approve or
Deny icons. You can update the list by selecting the Refresh icon:

Content with dependent files (dependencies)
Often, content requested by users depends on other files (dependencies), such as stories, digital boardroom presentations, analytic applications, content links, and models and datasets. When a user requests access to such content, access is automatically requested for the dependencies, in the background.
For example, if a user requests access to a story in the catalog, access requests for that story and any underlying dependencies, such as the models, are sent to administrators, to allow the user full access to the story and its data. Users don't see the access requests for those dependencies, but you will see them in the File Requests list.
Access requests for file dependencies where the file dependencies are from different workspaces that you don't have access to are not automatically generated, and no automated notification is provided. The only way to know that you don’t have access to these file dependencies is to open the content (for example, the story). If you see a message that you don’t have access to the file dependencies after you open the content, you must independently and manually request access to the workspaces and the specific file dependencies from the content owner. Depending on the content owner’s role, the content owner might need to ask other users for assistance with granting access permission to workspaces and file dependencies.
For example, Story A is published to the catalog. Story A is saved in Workspace A and is dependent on files from different workspaces. User B is a team member for Workspace A but does not have access to the other workspaces. User B can request access to Story A. However, for User B to get access to the file dependencies, User B must ask (for example, by email) the owner of Story A for access to the other workspaces and ask for access to the specific file dependencies.
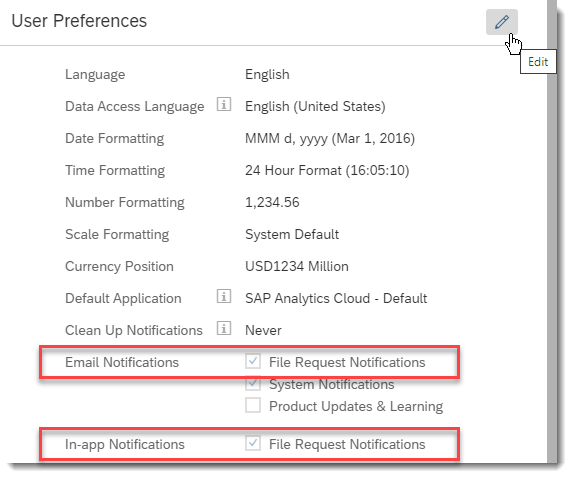
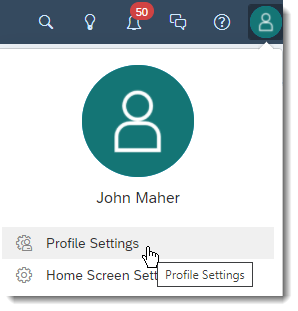
Disabling notifications
Context
If your SAP Analytics Cloud organization has more than one administrator, all of you will receive these file-request notifications and emails. Some admins might want to disable the notifications and emails:
Procedure
-
Select your user avatar in the upper-right corner, and choose Profile Settings.
-
In the User Preferences section, select the Edit icon and change the
settings.