From Input Tasks to Calendar Tasks
Learn how to organize your data collection process with SAP Analytics Cloud calendar tasks instead of using input tasks.
What You Should Know
In optimized story experience, input tasks are not supported. We recommend to use calendar tasks instead.
How to Proceed
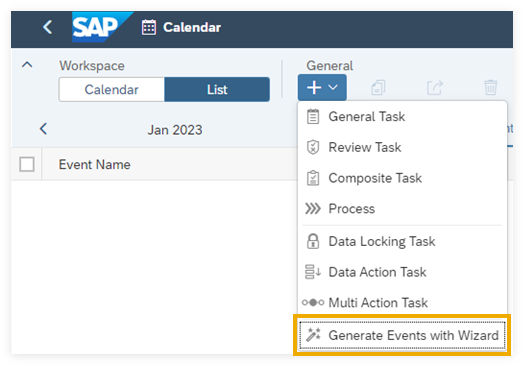
We recommend to use the Generate Events wizard in the calendar that lets you generate tasks from a driving dimension, similar to your experience with input tasks.
Alternatively, you can manually create composite tasks, or you can create general tasks and review tasks, and group these tasks by a process.
Processes are used to structure groups of tasks. They link together the calendar events they contain, these can be tasks or other processes. That way, you can model complex planning processes.
For more information about the different calendar events, see Get to Know the Different Calendar Events.
Video: How to Create Planning Events Using the Calendar
Open this video in a new window
In this video, you will create the events for a planning process using the integrated calendar in SAP Analytics Cloud.
Video: How to Complete Planning Workflows Using the Calendar
Open this video in a new window
In this video, you will explore how different users can complete tasks designated in the calendar to complete a typical planning workflow.
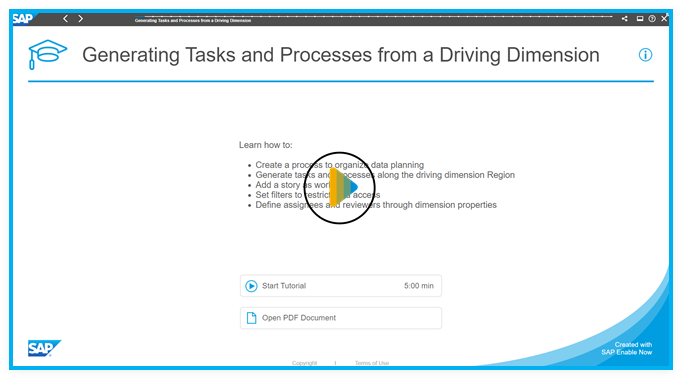
Learning Tutorial
Click through the interactive tutorial illustrating how to create a process and generate child events such as tasks and processes in step-by-step instructions (5:00 min); the tutorial is captioned exclusively in English:
Input Tasks and Calendar Tasks: A Comparison
When you generate tasks in the calendar, many functions are similar to the creation of input tasks, but there are also some differences and further possibilities with calendar tasks.
| Creating Input Tasks | Generating Calendar Tasks and Processes |
|---|---|
| You create input tasks from within a story. | You generate the tasks within the calendar using the Generate
Events wizard that guides you through the different
options. There you can add a work file to the tasks. It can be a story, an analytic application, or a Web page. To start
the wizard, choose
|
| When creating an input task, you and the people you assign to the task work on a
private version of the story. The original story won't be affected, changed data will only be visible to others after the input task has been completed and you've published the private version. |
When creating calendar tasks, you decide if you use a story or an analytic application
as work file. You can also decide, if you'd like to use a private
version or a public version.
|
| The input task is modeled as one entity with several input forms for the assignees. | The tasks are always grouped by a parent process. You can use an existing calendar process to generate child tasks, or you can generate the parent process with the child tasks in one go. |
| The input task starts directly once created. You can only define a due date. | You can schedule the tasks by defining a start and a due date. |
| You select a planning model the input task should be based on. Note
The model has either one or more dimensions with responsible users assigned to the dimension members, or it has at least the Responsible setting enabled so that a user can be set as responsible on the input task Summary page by selecting a substitute under Available Assignees. |
You select a planning model as the basis for the task generation. In addition, the
filters that are applied to the attached work file (story or
analytic application) for the assignees and reviewers are based on
the model definition. Note
The model needs to contain at least one dimension with responsible users defined in the dimension properties. |
| You select a dimension with the Responsible option turned on. |
|
| You select assignees from a list that is filled by the Responsible property of the dimension. | You select the dimension property that defines the users or teams
you would like to set as assignees. Note
With the calendar, you can add multiple assignees to a task or a process. One of them submits the task. Depending on how your modeler has defined the dimension properties, you can assign either single or multiple users or teams per member. |
| You can decide if the assignees working on different dimension members can see each
other or not. For example, the assignee working on the data input for Germany can see the assignee working on the data input for Spain. |
The assignees working on different dimension members don't see each other because they
work in separate tasks. For example, the assignees working on the data input for Germany can't see the assignees working on the data input for Spain. They are not aware of the task for Spain. Within the same task, all assignees can always see the other assignees. The assignees can use the Discussions panel to collaborate on their task. |
| You as the owner of the input task review the work of the assignees. It's not possible to skip the review step. |
You select the dimension property that defines the users or teams you would like to
set as reviewers. Note
With the calendar, you can add multiple reviewers to a task. One of them approves the work of the assignees. Depending on how your modeler has defined the dimension properties, you can assign either single or multiple users or teams per member. If required, you can add multiple review rounds. Tip
You can also leave this property empty and assign the
reviewers after the task generation.
If you don't set any reviewers, the tasks will be completed without any review. |
| Result: Input forms are created either for dimension nodes, or for dimension leaf members. It's not possible to have input forms for both nodes and leaf members in one input task. |
Result: Composite tasks are created for dimension leaf members, and processes are created for dimension nodes. All events are grouped by an overall parent process. |
| After the input task creation you can assign the input task to a substitute or remove assignees. You can't add other people to the task as viewers. | After the event generation you can add viewers to the tasks and
processes using the Details panel of an event
or the Edit Events wizard for changes in
multiple events. There you can edit also other settings, or even change the task type or the hierarchical structure, if needed. For details, see Work with Calendar Events You Created. |
| The assignees can directly start to work once the input task is created. For details, see Plan Data in Input Tasks Assigned to You. | Before the assignees can start their work, you need to activate
the process and its generated child events, either automatically or
manually after the event generation.
The assignees can start their work at the defined start date. For details, see Work with Calendar Events Assigned to You. |
| Accessing the task: The assignees are notified by email and notification in SAP Analytics Cloud. They can access their tasks from there, from the calendar, or from the Input Forms folder on the Files page. |
Accessing the tasks and processes: When you activate the process manually using the option Activate & Notify, the involved people are notified by email and notification in SAP Analytics Cloud. They can access their tasks from there, from the calendar, or from the Calendar Highlights tile on the home screen. |
| Data access for assignees: The story data are automatically filtered for the respective dimension member in the corresponding input form. |
Data access for assignees and reviewers: The story or analytic application data are automatically filtered for the respective dimension member once the assignees and reviewers open the work file. |

 (Create)
 Generate Events with Wizard
For more information how to generate tasks and processes in the calendar, see Generate Tasks and Processes with the Calendar Wizard.