Work with Planning Applications
In SAP Analytics Cloud, analytics designer you can create applications for planning your business data.
These planning applications support both manual and automated data entry and changes. You can enter the planning data manually in the table (in cells or rows) or use data actions to enter data automatically.
What You Should Know
At design time you cannot enter values in the table.
Enter Data
You can enter data by selecting the cell and entering values. After that, the changed cells are highlighted in the table. For more information, see Entering Values in a Table.
Use Table's More Actions Menu for Planning
-
Ignore Data Locks/Enforce Data Locks
This function is only shown when the table is based on a planning model that supports backend data locks. By default the data locks are enforced, so Ignore Data Locks will be shown. You can toggle between the two states. For more information, see Configuring Data Locking.
-
Manage Data Locks
This function displays data locks if there're any, which is only shown when the table is based on a planning model that supports backend data locks. You can choose whether to display data lock information in Show/Hide settings.
-
Value Lock Management
This function is only displayed when the table is based on a planning model that supports frontend value locks. You can create value locks so that data in the selected cell can't be changed or edited. For more information, see About Value Lock Management.
-
Mass Data Entry
This function is only available at runtime, which lets you enter multiple values in a table without waiting for the system to update between entries. For more information, see Entering Multiple Values in a Table.
-
Distribute Values
This function is only available at runtime, which helps you assign values to a group of cells or distribute values from a source cell to a group of cells. You can also access this function by selecting

 (Allocate)
 Distribute Values
 from the view time toolbar. For more information, see Assign and Distribute Values with the Planning Panel.
Use View Time Toolbar Functions for Planning at Runtime
The menu options in the toolbar change depending on the type of application, analytic or planning, and the data it contains.
-
Publish Data
For more information, see Planning on Public Versions.
RememberBefore leaving the analytic application, check whether to publish your data changes. You'll also be reminded when leaving the application without publishing:
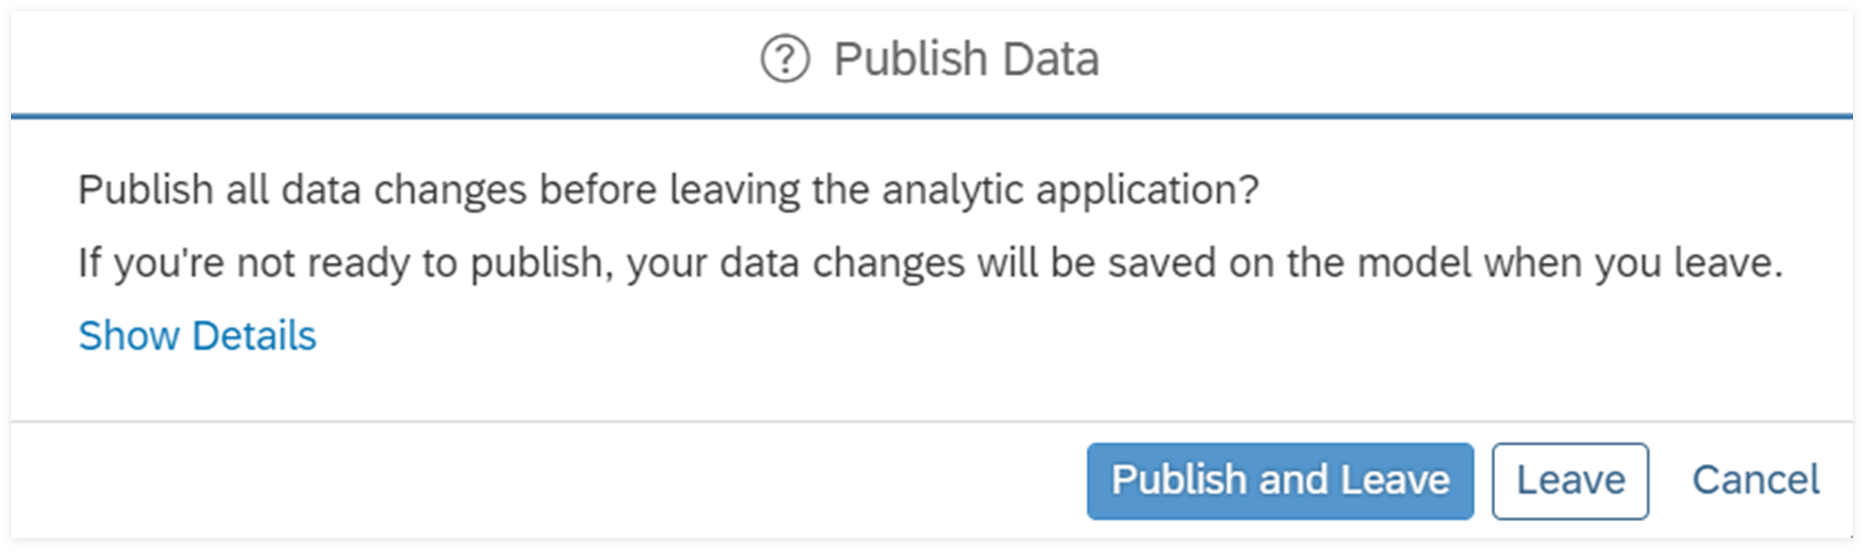
To not show this dialog at runtime, at design time, go to the Styling panel of canvas, and under Planning Settings deselect Remind of publishing all data changes before leaving.
-
Version Management
For more information, see Create, Publish, and Manage Versions of Planning Data.
-
Version History
For more information, see Undo, Redo, and Revert Changes to Versions.
-
Allocate
There two ways to allocate values:-
distributing a value using the planning panel
For more information, see Assign and Distribute Values with the Planning Panel.
-
running an allocation process
For more information, see Run Data Actions, Multi Actions, and Allocations. For background information on allocations, please see Learn About Allocations.
-
Use Data Action Trigger and Data Actions Technical Object
You can use a Data Action Trigger widget to automate planning functions for local planning models.
To add the widget, from the Insert section of the toolbar, select  (Add) More Widgets Data Action Trigger to open the Data Action Trigger configuration panel.
Data action trigger cannot be executed at design time, but only at runtime.
For more information, see:
Get Started with Data Actions for Planning
Run Data Actions, Multi Actions, and Allocations
Besides the Data Action Trigger widget you can use the Data Actions technical object and the related script APIs to perform short running data actions via scripts as well as setting and reading parameter values. For more information, see Use Data Actions Technical Objects.
Use Multi Action Trigger
You can add a Multi Action Trigger widget to automate a sequence of operations including data actions, predictive steps, and version management steps on one or more versions and planning models.
To add the widget, from the Insert section of the toolbar, select (Add) More Widgets Multi Action Trigger to open the Multi Action Trigger configuration panel.
Multiple action trigger cannot be executed at design time, but only at runtime.
For more information, see:
Use BPC Planning Sequence Trigger
You can use the BPC Planning Sequence Trigger widget to run planning sequences for BPC live data connection models. In this way, application users can run a planning sequence defined in the BPC system, which can contain one or more planning functions.
To add this widget, from the Insert section of the toolbar, select (Add) More Widgets BPC Planning Sequence Trigger, and then select a BPC live connection model and planning sequence.
After adding the widget, also add a table with the same model to the application. The planning sequence is applied to the table when application users select the BPC planning sequence at runtime.
BPC Planning Sequence cannot be executed at design time, but only at runtime.
For more information, see Run Planning Sequences from BPC.
Besides, as an application designer you can use related APIs to offer application users more options to interact with the planning sequence. For more information, see Work with Planning Applications.
Use Value Driver Tree
You can use a Value Driver Tree widget to visualize the value chain of your business and carry out driver-based planning.
From the Insert section of the toolbar, select (Add) More Widgets Value Driver Tree to pick a data source and add the widget to your application.
For detailed steps to set up and use value driver trees, see Set Up Value Driver Trees for Planning.
If you want to add a legacy value driver tree to your analytic application, you need to transform it first. For details, see Transforming Legacy Value Driver Trees.