Import Data Source Reference
- Personal Files
- SAP BPC
- SAP S4/HANA
- SAP HANA
- SAP BW
- SAP Universe
- SAP ERP
- SAP Integrated Business Planning
- SAP Cloud for Customers
- SAP Concur
- SAP Fieldglass
- SAP SuccessFactors
- Open Connectors Cloud Storage Data Sources
- Open Connectors Cloud Storage Query-Based Data Sources
- Google Drive
- Google BigQuery
- SQL Data
- OData Services
- Workforce Analytics
- Qualtrics
Personal Files
The data is imported and analyzed, and then mapped to the dimensions of the target model. Note that the data to be imported must fit the structure of the existing target model.
When you import data into an existing model, you can align the new data with existing version categories or create new version categories during the import. For example, if the existing model contains actual values, you can now import planning data by selecting the Planning category and entering a label for the new version data. Then, in stories generated from the model, both the actual and the new planning columns will be visible.
The workflow to import data from a file into an existing model is:
- Open the model that will be updated.
- Select a source file.
- Start the import and initial mapping process.
- Finish mapping the imported data to existing dimensions in the model.
- Cleanse your data and fix any mapping or data quality problems.
Data files can be in your local file system or in your network. The source data can be an Excel spreadsheet (.xlsx) or a delimited text file (.csv or .txt). If you import data from Microsoft Excel, and if the data is saved in separate sheets in the Excel workbook, either you can choose which sheet to import (if from a local file system) or the first sheet is automatically imported (from a network file).
The source data must include columns that can be matched to the existing dimensions in the selected model. It must also include transactional data (measures) in numeric format (for example, 1,587,370.50 or 1.587.370,50 ) but not scientific notation.
- From the (
 )
Main Menu, select
)
Main Menu, select  Files.
 - Open the model you want to update.
- Switch to the Data Management screen.
- Select


 File
File .
. - Choose whether you want to import data from a file on your local system, or
from a file server.
If you don't see the option to import data from a file server, see Allow Data Import and Model Export with a File Server.
TipIf you import a file from a file server, you can also schedule imports from that file. For more information, see Update and Schedule Models. - If you're importing from a file server, choose a file server connection, or
select Create New Connection.
If you create a new file server connection, specify the path to the folder where the data files are located. For example: C:\folder1\folder2 or \\servername\volume\path or /mnt/abc.
- Choose the file you want to import.
- If you are importing from a local Excel workbook containing multiple sheets,
select the Sheet you want to import.
If you are importing from an Excel file on a file server, the first sheet is automatically imported.
- If you're importing a .csv file, select which delimiter is used in the file.
- Select Import.
You can continue to work on other tasks while the dataset is being uploaded in the background.
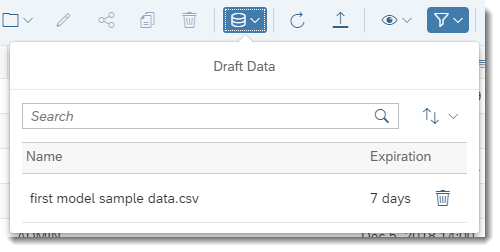
- When the draft data is finished uploading, open it from the Draft
Sources list.

The data appears in the data integration view, where you can complete the mapping of your new data to the model's dimensions.
Next Steps
After the initial import of raw data, continue with the data preparation task before completing your model: See Import and Prepare Fact Data for a Classic Account Model and Import and Prepare Fact Data for a Model with Measures..
Related Information
Attributes of an Account Dimension
Creating a Model with Coordinate or Area Data for Geospatial Analysis
SAP BPC
Prerequisites
- You use SAP Business Planning and Consolidation, version for BW/4HANA, and the SAPCP cloud connector is installed and configured on premise, or
- You use SAP Business Planning and Consolidation, version for SAP NetWeaver (BPC NW) of version 10.1 and the SAPCP cloud connector is installed and configured on premise, or
- You use SAP Business Planning and Consolidation, version for Microsoft of version 10.1 and both the SAPCP cloud connector and SAP Analytics Cloud agent are installed and configured on premise.
For SAP BPC 11.0/11.1, version for BW/4HANA and SAP BPC 10.1, version for SAP NetWeaver, only importing data from a BPC standard configuration is supported.
During the data import, if a member doesn't belong to any hierarchy, the member will by default be added to Hierarchy1 as root member that has no parent or child members.
For SAP BPC 11.0/11.1, version for BW/4HANA and SAP BPC 10.1, version for SAP NetWeaver, if
the BPC environment does not have the HANA Accelerator on (this can be
checked via the environment level IMG parameter ACCELERATOR_ON in the BPC
system), make sure you refer to the SAP Note 1858257  to
enable member set functions in BPC first.
to
enable member set functions in BPC first.
If you import data from BPC 10.1, version for SAP NW on BW 740, make sure you
apply the SAP Note 2550738 on the BPC system
beforehand.
If you want to import a larger volume of transaction data from BPC to SAP Analytics Cloud
without changing your memory configuration, you can apply the SAP Note
2755379 or upgrade your BPC system to a minimum
support package specified in the note.
Importing into a New Model
- From the
 Modeler
start page, select From a Data Source SAP BPC. NoteFrom the acquire data panel, select the
Modeler
start page, select From a Data Source SAP BPC. NoteFrom the acquire data panel, select the filter
icon to narrow down the number of data sources in the list.
You can filter by data source type or by
category.
filter
icon to narrow down the number of data sources in the list.
You can filter by data source type or by
category. -
To create a model from SAP BPC:
-
Choose a BPC connection type and select a BPC connection from the list of connections. You can choose from the following connection types:
- SAP BPC for SAP BW/4HANA
- SAP BPC 10.1 for Microsoft platform
- SAP BPC 10.1 for SAP NetWeaver
NoteIf the connection you select is an OAuth connection that you haven't authenticated, or your OAuth authentication has expired, then a dialog will pop up for you to enter your BPC credentials and complete the OAuth authentication process. If SSO is enabled, you can directly sign in without entering your BPC credentials again.
You can also create a new connection on the fly by selecting Create New Connection and following the instructions in Import Data Connection to an SAP BPC System.
- Choose to create a new query or copy a query from an existing BPC
model for mapping later.
Click Next after completing all the settings on this page.
- On the next page, enter a Model Name for the new target model, and optionally a Description.
-
If you want users to be able to write data back to the BPC model, choose Write-back model. Otherwise, choose the Basic model.
NoteIn a write back model, transaction data is synchronized from time to time based on your model settings. Master data imported from BPC is read-only and cannot be changed.
- When the model type is Basic model, you can choose to create new dimensions as public dimensions or private dimensions.
-
If you need to convert currency values, toggle on Currency Conversion. You can then either directly use an existing SAP Analytics Cloud currency conversion table, or import a currency conversion table from BPC.
NoteWhen currency conversion is enabled, only the local currency is imported from BPC. When currency conversion is disabled, all data values of local currencies and pre-converted currencies are imported without any currency unit.
-
To create a new conversion table by importing it from BPC, select Add New Currency Conversion Table from the Currency Conversion Table list. For detailed steps, refer to Import Currency Conversion Table From SAP BPC.
Click Next after completing all the settings on this page.
-
-
In the next Select Model from BPC dialog, select an Environment and then select a Model.
A name is automatically generated for the new BPC query, but you can rename it freely.
-
To build the BPC query you just created:
-
If you have chosen a basic type model, drag dimensions from Available Data to the Selected Data area.
-
To restrict the data to be imported, drag dimensions to the Filters area. Set a filter by selecting the filter icon. In the filtering dialog, select members to be included, and then select OK.
Click Next after completing all the settings on this page.
-
-
In the dimension mapping dialog, map the source BPC dimensions to the corresponding new dimensions in SAP Analytics Cloud.
-
Select a type for each dimension from the Dimension Type list.
-
For the Category dimension, an additional Version Mapping dialog is displayed to let you map the BPC category names to the SAP Analytics Cloud category names.
-
If you didn't toggle on the Currency Conversion setting in step 3, BPC's original data values are imported into SAP Analytics Cloud.
In this case, if there's only a single currency used in your BPC system, you can select the Default Currency option and specify the currency; if different currencies are defined for different entities in BPC, you can select the option Local Currency is taken from:, and choose an entity attribute that defines the local currency.
When you have completed the mapping, select Finish.
-
-
The new model is created with BPC imported data.
Importing into an Existing Model
About Synchronizing BPC Delta Data to SAP Analytics Cloud in a Write-back Model
By directly clicking the  (Refresh) icon in the
  (Version Management) panel
for the version that you want to refresh from BPC, you can bring back only delta
data from BPC in BPC 10.1 NW on BW 750 and BPC, version for BW/4HANA.
(Version Management) panel
for the version that you want to refresh from BPC, you can bring back only delta
data from BPC in BPC 10.1 NW on BW 750 and BPC, version for BW/4HANA.
Important Information:
- If you are using a BPC 10.1 NW on BW 7.50 version lower than SP09, make sure
you first install the SAP Note 2504877 . Otherwise, full
data will be loaded into SAP Analytics Cloud when
syncing data.
- Syncing delta data to SAP Analytics Cloud is currently not supported in BPC 10.0 Microsoft version, BPC 10.1 Microsoft version, BPC 10.0 NW version and BPC 10.1 NW on BW740.
- Please don't activate BPC data on the BW DataStore Objects (advanced) or compress BPC data (by running a Light_Optimize data manager package) on the BW InfoCubes/InfoProviders at BPC side. Otherwise, the time-stamp information will be removed from the activated or compressed requests, and you might not be able to sync delta data from corresponding BPC model.
When a user clicks the Refresh button, other users won't be able to refresh or schedule to refresh the same model at the same time.
During this process, only transaction data are synchronized. Master data imported from BPC is read-only.
Performance Tips:
When synchronizing BPC delta data to a write-back model, it will retrieve data calculated by BPC member formula by default. This may bring extra performance burden.
To overcome this issue, we recommend you set the BPC model level IMG parameter "SKIP_GET_FORMULA_DATA" to 'X'. Then BPC calculated data will not be retrieved with delta query for a write-back model.
In a standard configuration of BPC 10.1 on NW 7.50 or higher, most InfoProviders are InfoCubes, but there might be some rare cases in BPC 10.1 on NW 7.52 that are advanced DataStore objects (aDSO).
You can customize the standard data size for an InfoCube based on your environment settings, which is not supported in an aDSO.
This defines the threshold for the total number of requests to be imported or exported each round in an InfoObject in NW 10.1. To do so, set the following parameter in table RSADMIN:
- Enter report SAP_RSADMIN_MAINTAIN in Tcode se38;
- In the Object field, enter the parameter: <Infocube ID>_BPC_REQU_SIZE;
- In the value field, enter the threshold number.
We recommend a minimum threshold value of 10000.
NoteYou can improve deployment performance by increasing that number; however, this depends on the maximum number of table partitions allowed in your RDBMS. For more information, see the recommendations of the RDBMS engine used by your NetWeaver platform.
ExampleFor example: in SQL Server, the maximum number of partitions is 1,000. This number is fixed by the database engine. You can calculate limits as follows: 10,000 * (number of maximum partitions per table).
This number is different, depending on the database engine you use.
For SQL Server 2005, 2008, and 2008 R2, the limit is 1,000 partitions per table => 10,000 * 1,000 = 10,000,000 rows per infocube.
About Import Data to a Basic Model or an Existing Model Created in SAP Analytics Cloud
To import data to a basic model or an existing model created in SAP Analytics Cloud:
- From the ()
Main Menu, select Files.
- Open the model that you want to update.
- Switch to the Data Management screen.
- In the Draft Sources section, select Data source SAP BPC.
-
Choose a BPC connection type and select a BPC connection from the list of connections. You can choose from the following connection types:
- SAP BPC for SAP BW/4HANA
- SAP BPC 10.1 for Microsoft platform
- SAP BPC 10.1 for SAP NetWeaver
NoteYou can create a new connection on the fly by selecting Create New Connection and following the instructions in Import Data Connection to an SAP BPC System. -
Choose to create a new query or copy a query from an existing BPC model for mapping later.
Click Next after completing all the settings on this page.
-
In the next Select Model from BPC dialog, select an Environment and then select a Model.
A name is automatically generated for the new BPC query, but you can rename it freely.
-
To build the BPC query you just created:
- If the SAP Analytics Cloud model is a basic type model, drag dimensions from Available Data to the Selected Data area.
- If you want to restrict the data to be imported, drag dimensions to the Filters area. Set a filter by selecting the filter icon. In the filtering dialog, select members to be included, and then select OK.
Click Next after completing all the settings on this page.
- In the dimension mapping dialog, check and map the source BPC dimensions to the corresponding new dimensions in SAP Analytics Cloud. When you've completed the mapping, select Next.
-
In the Import Method dialog, specify how any existing data in the model is to be treated, by choosing one of the following Import Methods:
Clean & Replace First deletes the existing data in the default replace scope, then updates existing SAP Analytics Cloud data with data imported from BPC. When there are new records from BPC that don't exist in SAP Analytics Cloud, add the new records directly to the SAP Analytics Cloud model. In this case, you can use the check box for each dimension to decide whether to include or exclude specific dimensions in or from the update. Update Updates the existing SAP Analytics Cloud data, and when there are new records from BPC that don't exist in SAP Analytics Cloud, the new records will be added directly to the SAP Analytics Cloud model. Append Based on the existing SAP Analytics Cloud data, append corresponding BPC data to it, and when there are new records from BPC that don't exist in SAP Analytics Cloud, the new records will be added directly to the SAP Analytics Cloud model. - If you choose the Clean & Replace method, you need to further define the default replace scope of the import.
- Choose Next. The model is updated with BPC imported data.
Results
The new model opens in the Modeler.
 Formula column. For instructions on creating formulas,
see All Formulas and Calculations.
Formula column. For instructions on creating formulas,
see All Formulas and Calculations.In the date dimension of the imported BPC model, if the number of the BASE_PERIOD, which represents the fiscal month doesn't match the number of the calendar month of PERIOD, then the fiscal year doesn't start with January. For example, in the following case, the fiscal year of this BPC model starts in April:
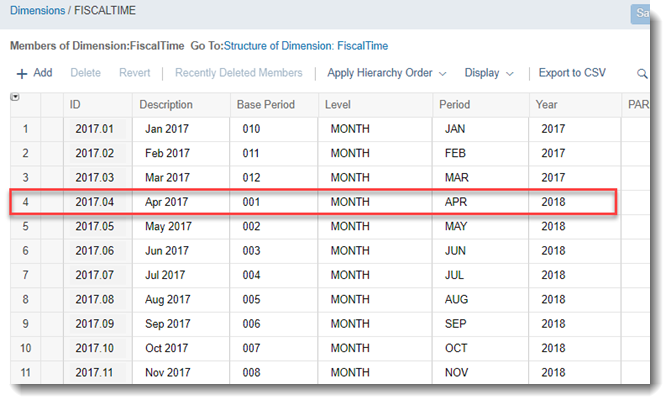
- The imported BPC data should have at least month granularity.
- Before importing data, in the time dimension of the BPC model, ensure that the values for the property BASE_PERIOD consist of three digits representing fiscal months, such as 001, 011, and 012, while values for the property PERIOD must consist of the first three capital letters of calendar months in English, such as APR or MAR.
When the data is configured in this way, the Fiscal Year option in the Modeler will be automatically enabled, and the starting month automatically set to the corresponding calendar month defined in BPC.
In the Modeler, you can still choose to disable fiscal year or change to another starting month.
Noted that during data import and export, BPC only denotes fiscal year by the calendar year it ends with. So if you plan to sync or export data back to BPC later, we recommend you retain this Denote fiscal year settings, otherwise fiscal year between the two systems will become inconsistent.
Save your model. The BPC transaction data is imported into your model.
On the Data Management screen, your model is displayed in the Import Jobs section.
If you want to schedule the execution of import jobs, follow these steps:
- Select an import job.
-
Select
 (Schedule
Settings), and choose between the following options:
(Schedule
Settings), and choose between the following options:Frequency Description None Select this option when you want to import the data manually. Once The import is performed only once, at a preselected time. Repeating The import is executed according to a recurrence pattern. You can select a start and end date and time as well as a recurrence pattern. - Select Save to save your scheduling settings.
If you've enabled write-back to BPC, users can write data back to BPC directly from stories. For detailed information, refer to the SAP BPC procedure.
About Importing SAP BPC Data
Imports from version 10.1 of SAP BPC are supported:
- SAP Business Planning and Consolidation, version for Microsoft Platform (BPC for Microsoft)
- Standard configuration of SAP Business Planning and Consolidation, version for SAP NetWeaver (BPC for NW)
- Standard configuration of SAP Business Planning and Consolidation, version for SAP BW/4HANA
Prerequisites
-
To import from a BPC system, the on-premise BPC system must be specifically set up to connect with SAP Analytics Cloud. Refer to Import Data Connection to an SAP BPC System for more information.
-
For SAP BPC, version for BW/4HANA and SAP BPC 10.1, version for SAP NetWeaver, if the BPC environment does not have the HANA Accelerator on (this can be checked via the environment level IMG parameter ACCELERATOR_ON in the BPC system), make sure you refer to the consulting SAP Note 1858257
to enable member set functions in
BPC first. -
If you import data from BPC 10.1, version for SAP NW on BW 740, make sure you apply the SAP Note 2550738
on the BPC
system. -
The imported BPC data should have at least month granularity. Before importing data, make sure that the time dimension in your BPC model has the following properties: BASE_PERIOD, PERIOD, YEAR, LEVEL.
-
The LEVEL property only supports the values YEAR, QUARTER, MONTH, DAY on base members. The level of base members in a time dimension should be consistent.
-
The PERIOD property represents the calendar period of the member. The format must contain the following settings:
If the value of the property LEVEL is YEAR, corresponding values of the property PERIOD must follow the following format: yyyy (e.g. 2020).
If the value of the property LEVEL is MONTH, corresponding values of the property PERIOD must consist of the first three capital letters of calendar months in English, such as JAN, FEB, or MAR. Others can not be supported.
If the value of the property LEVEL is QUARTER, corresponding values of the property PERIOD must be taken from "Q1, Q2, Q3, Q4", where "Q1" stands for "Quarter 1", and so on.
If the value of the property LEVEL is DAY, corresponding values of the property PERIOD must follow the following format: mmmdd (e.g. JAN01 for January 1st).
-
The BASE_PERIOD property should consist of a 3-digit number. It represents the fiscal period of the member only when the granularity of the time dimension is on a month level.
-
The YEAR property should be a 4-digit number representing the fiscal year (and calendar year if there’s no offset between BASE_PERIOD and PERIOD).
-
-
Before you can proceed with the import from BPC, you must have set up a connection to the BPC system in SAP Analytics Cloud Connections.
Activities
- Specify the connection to be used for importing data.
- If you're creating a new SAP Analytics Cloud model, provide information about the target model.
- Specify the source BPC model information, and build a query.
- Map source data to the new or existing model.
Specifying the Connection
You first need to select the connection to the BPC system. This can be an existing connection or one that you create on the fly during the export. For more information on creating connections, see Data Connections.
Providing Target Model Information
If you're creating a new model, you'll need to provide a name for the target model and optionally a description. Note that the model name can't start with a numeral or any other non-alphabetical symbol, such as a space.
When importing from BPC, models are by default planning enabled.
Specify Source Model Information
Next, specify the environment, which is a set of BPC models, and the specific model to be imported.
SAP Analytics Cloud reads only periodic data from BPC because it doesn't have a YTD measure by default, regardless of whether the BPC model is periodic or YTD. There's one exception: because the AST and LEQ account types in SAP Analytics Cloud aggregate the latest data in the Date dimension, these two account types will store and display YTD values correctly in SAP Analytics Cloud.
If the BPC model is the YTD type, for example, a consolidation-type model, then only importing into an SAP Analytics Cloud Basic Mode model is supported.
Mapping
Choose each dimension in the Source Dimensions area. You can create mappings between the source dimension and the target model dimension:
- Dimension Type (when creating a new model): The type
for each dimension. A type is automatically suggested for some dimensions,
but you can change or set the type by choosing one of the following options
from the list:
- Account: This dimension represents the accounts structure of your organization. You can have only one dimension of this type per model.
- Organization: This dimension represents the business units that drive your business. Depending on your organization, these could be operating units, geographic entities, cost centers, and so on. You can have only one dimension of this type per model.
- Date: Specifies the smallest time period to be applied to the model. You can use year, quarter, month, or day. It is created automatically when you create a model.
- Version: This is for the Category dimension.
- Generic: Any kind of business dimension that isn't an organizational one. This can include products, channels, or sales representatives. You can add multiple dimensions of this type to a model.
Once the mapping is complete, you can start the import.
Using SAP Analytics Cloud as a BPC Client Extension
In a write-back model, SAP Analytics Cloud can be used as a client extension for BPC models. You can perform planning and analysis, write your planning data back to the BPC model, and bring the newest data in from the BPC model at any time.
You can edit planning data in a public version of SAP Analytics Cloud, and when you save and publish the data, it is automatically written back to the BPC model.
Note that a public version in edit mode can't be updated from the BPC model.
Two options are available:
Pre-converted currency values in BPC are imported
Disable currency conversion in SAP Analytics Cloud. If the BPC data contains pre-converted currency data, it is imported into the model together with local currency values. In stories, you'll need to add the RPTCURRENCY dimension to the drill state to see data for all the different currencies.
Pre-converted currency values in BPC are not imported
Enable currency conversion in SAP Analytics Cloud, and choose a rate table. If the BPC data contains pre-converted currency data, it is not imported into the model. Only the local currency data is imported.
Related Information
Import Data Connection to an SAP BPC System
SAP S4/HANA
Prerequisites
You are using a supported version of SAP S/4HANA. For more information, see System Requirements and Technical Prerequisites.
Context
-
SAP Analytics Cloud supports OData Version 4.0. Logical Operators (such as Equal, Not Equal, Less or Equal, Greater than, Greater than or Equal, Less than, Less than or equal, Logical and, Logical or, Startswith, and substringof) are supported for S/4HANA. Not logical negation, arithmetic operators, or functions are not supported. The following table lists the minimum requirements for S/4HANA OData services:
Data Type
Operator
Format
String (Edm.String) "eq", "ne", "startswith", "toLower","substringof", "gt", "ge", "lt", "le", "eq", "ne"
"eq", "ne", "startswith", "toLower","substringof", "gt", "ge", "lt", "le", "eq", "ne"
Number (Edm.Decimal) "gt", "ge", "lt", "le", "eq", "ne", "M"
[value] m
Number (Edm.Double) "gt", "ge", "lt", "le", "eq", "ne", "d"
[value] d
Number (Edm.Single) "gt", "ge", "lt", "le", "eq", "ne", "f"
[value] f
Number (Edm.Int16) "gt", "ge", "lt", "le", "eq", "ne"
Number (Edm.Int32) "gt", "ge", "lt", "le", "eq", "ne"
Number (Edm.Int64) "gt", "ge", "lt", "le", "eq", "ne", "L"
[value] L
Datetime (Edm.DataTime) "gt", "ge", "lt", "le", "eq", "ne"
Datetime (Edm. DataTimeOffset) "gt", "ge", "lt", "le", "eq", "ne"
Boolean (Edm.Boolean) "eq", "ne"
True|False
Edm.Guid "eq", "ne"
guid'[value]'
Logical Operator "and", "or"
- Embedded Complex types are not supported.
- Select the appropriate option:
- If you're creating a new model:
- From the
Modeler start page, select From a
Data Source.
- Select SAP S/4HANA.
NoteFrom the acquire data panel, select the filter
icon to narrow down the number of data sources in the list.
You can filter by data source type or by
category. - From the
- If you're importing into an existing model:
- From the () Main
Menu, select
Files.
- Open the model you want to update.
- Switch to the Data Management
screen.
- Select Data source.
- Select SAP S/4HANA.
NoteFrom the acquire data panel, select the filter
icon to narrow down the number of data sources in the list.
You can filter by data source type or by
category. - From the (
- If you're creating a new model:
- Choose an existing connection, or create a new connection.
For information on creating an SAP HANA connection, see Import Data Connection to SAP S/4HANA.
- Copy a query from an existing model (which you can edit before saving), or
create a new query.
- To copy and edit an existing query, follow these steps:
- Select Copy a query from a model.
- Select a query from the list, and then select Next.
- Make your changes, and then select Create.
- To create a new query, follow these steps:
- Enter a name for your query.
- Select a table, and then select Next.
NoteYou can connect to services in the discovery service without having to create connections to all of the individual services.Build your query by moving data elements into the Selected Data and Filters areas. For more information, see Building a Query.
- To copy and edit an existing query, follow these steps:
- Select OK.
The data appears in the data integration view, where you can complete the mapping of your new data to the model's dimensions.
Next Steps
After the initial import of raw data, continue with the data preparation task before completing your model: See Import and Prepare Fact Data for a Classic Account Model and Import and Prepare Fact Data for a Model with Measures.
SAP HANA
Prerequisites
- The HANA database must first be set up by the system administrator. The HANA views in the database (analytic or calculation-type views) are available to create new models and datasets from.
- You need to install the SAP Analytics Cloud agent, with location ID. This location ID is configured through the Cloud Connector, and the agent needs to be allowlisted there. For more information, see:
- Select the appropriate option:
- If you're creating a new model:
- From the
Modeler start page, select From a
Data Source.
- Select SAP HANA.
NoteFrom the acquire data panel, select the filter
icon to narrow down the number of data sources in the list.
You can filter by data source type or by
category. - From the
- If you're importing into an existing model:
- From the () Main
Menu, select
Files.
- Open the model you want to update.
- Switch to the Data Management
screen.
- Select Data source.
- Select SAP HANA.
NoteFrom the acquire data panel, select the filter
icon to narrow down the number of data sources in the list.
You can filter by data source type or by
category. - From the (
- If you're creating a new model:
- Choose an existing connection, or create a new connection.
Selecting a HANA connection loads all the views for which you have the select privilege.
To filter on the dimension of a HANA views or acquire data from a HANA view, make sure you have analytic privilege. If you select a HANA view that only has the select privilege and try to filter on its dimension or acquire data, the application throws an error: You need an SAP HANA analytic privilege to complete this workflow. Please contact the HANA view owner for the required privilege.
Only the analytic view owner can grant the analytic privilege. For more information and example about how to gain privilege, see Examples: Securing Views Using SQL-Based Analytic Privileges.
For information on creating an SAP HANA connection, see Import Data Connection to SAP HANA.
-
Copy a query from an existing model (which you can edit before saving), or create a new query.
- To copy and edit an existing query, follow these steps:
- Select Copy a query from a model.
- Select a query from the list, and then select Next.
- Make your changes, and then select Create.
- Or, to build a query from scratch:
- Select Create a new query and select Next.
- Type a name for your query.
- If you want to type in a query manually:
- Select Freehand Query.
- Type in your query.
- Select Next.
- Or, to build a query from scratch:
- Select Build a Query.
- Select a HANA view from the list, or search for a view
by name, and then select
Next.Restriction
- Calculation views without a data category are not available.
- Users need to have read access to the view (to execute a SELECT on the run-time object; for example, grant select on schema Schema123 to User123), and an appropriate analytic privilege (for example, _SYS_BI_CP_ALL).
- If the data source contains prompts, select values for them.
- Drag dimensions and measures into the
Selected Data and
Filters areas to build your
query. Note that you can filter dimensions but not
measures.
See Building a Query for more information.
- Select Create when you're done.
You can continue to work on other tasks while the data is being uploaded in the background.
- To copy and edit an existing query, follow these steps:
Next Steps
After the initial import of raw data, continue with the data preparation task before completing your model: See Import and Prepare Fact Data for a Classic Account Model and Import and Prepare Fact Data for a Model with Measures.
If your HANA data contains location information, you will need to add location dimensions. For more information on live HANA data see Creating Geo Spatial Models from HANA Calculation Views. For information on acquired HANA data see Creating a Model with Coordinate or Area Data for Geospatial Analysis.
Related Information
SAP BW
Prerequisites
You use an SAP Business Warehouse (BW) system, version 7.3x or higher release, or an SAP BW/4HANA system, SP4 or higher, and both the SAP Business Technology Platform (BTP) Cloud Connector and SAP Analytics Cloud agent are installed and configured.
2408693 .-
Select the appropriate option:
- If you're creating a new model
- From the
Modeler start page, select From a
Data Source.
- Select SAP BW.
NoteFrom the acquire data panel, select the filter
icon to narrow down the number of data sources in the list.
You can filter by data source type or by
category. - From the
- If you're importing into an existing model:
- From the () Main Menu, select
Files.
- Open the model you want to update.
- Switch to the Data Management
screen.
- Select Data source.
- Select SAP BW.
NoteYou can select the
filter icon to narrow down the number of data sources in the
list. You can filter by data source type or by
category. - From the (
- If you're creating a new model
- Select an existing connection, or select Create New Connection to create a new connection.
- Copy a query from an existing model (which you can edit before saving), or
create a new query.
-
To copy and edit an existing query, follow these steps:
- Select Copy a query from a model.
- Select a query from the list, and then select Next.
- Make your changes, and then select Create.
-
Or, to create a new query, follow these steps:
- Select Create a new query and select OK.
- Type a name for your query.
- Select a BW query from the list, or search for a query by name, and then select Next.
- If the data source contains prompts, select values for them. If you're using a variable that is filled by customer exit, you can select the Use Backend Default option. Then when you refresh the data, the data is based on the current value filled by the customer exit instead of the value saved when the query initially ran.
- Select dimensions and measures for your query.
(If you're importing data via a BEx query using an SAP BW import data connection, see the note in the prerequisites above.)
- You can select the
 icon to open
the Select Presentations dialog, and then
choose which presentations you want to see. Depending on the
characteristic, you could have these presentations
available:
icon to open
the Select Presentations dialog, and then
choose which presentations you want to see. Depending on the
characteristic, you could have these presentations
available:Key (DISPLAY_KEY) Key (Internal) (KEY) Long Text (LONG_TEXT) Medium Text (MIDDLE_TEXT) Short Text (SHORT_TEXT) Text (TEXT)
- If one of the selected dimensions has a hierarchy,
you can click
 (Select Hierarchy and Drill Level)
for more options, such as specifying which hierarchy to use.
Note that No Hierarchy / Flat Presentation
(Default) is the default.
(Select Hierarchy and Drill Level)
for more options, such as specifying which hierarchy to use.
Note that No Hierarchy / Flat Presentation
(Default) is the default.You can also specify the drill level. The default drill level is 2.
- Select Create.
You can continue to work on other tasks while the data is being uploaded in the background.
-
- When the draft data is finished uploading, open it from the Draft
Data list (for a new model or dataset), or the
Draft Sources list (for an existing model or
dataset).
The data appears in the data integration view.
- Complete the following substeps if your SAP BW data source contains date
dimensions that you want to enrich with time-hierarchy information.
If you enrich the date dimensions, you can use date-related features such as sorting by date, and date range sliders for filtering.
-
Select the column that contains the SAP BW date dimension data.
-
In the right hand Details side panel, expand Modeling and choose the
Date dimension type. -
Choose the appropriate Date Format.
-
Next Steps
After the initial import of raw data, continue with the data preparation task before completing your model: See Import and Prepare Fact Data for a Classic Account Model and Import and Prepare Fact Data for a Model with Measures.
Related Information
Import Data Connection to an SAP BW or SAP BW/4HANA System
SAP Universe
Prerequisites
- The Cloud Connector and SAP Analytics Cloud agent are installed and configured.
- You use a supported version of SAP BusinessObjects Business Intelligence platform. For information on supported versions, see System Requirements and Technical Prerequisites.
- Select the appropriate option:
- If you're creating a new model:
- From the
Modeler start page, select From a
Data Source.
- Select SAP Universe.
NoteFrom the acquire data panel, select the filter
icon to narrow down the number of data sources in the list.
You can filter by data source type or by
category. - From the
- If you're importing into an existing model:
- From the () Main
Menu, select
Files.
- Open the model you want to update.
- Switch to the Data Management
screen.
- Select Data source.
- Select SAP Universe.
NoteYou can select the
filter icon to narrow down the number of data sources in the
list. You can filter by data source type or by
category. - From the (
- If you're creating a new model:
- Choose an existing universe connection, or create a new connection.
- If you created a new connection, you'll next create a new query.
If you chose an existing connection, you can copy an existing query (which you can edit), or create a new query.
- To edit an existing query:
- Select a query from the list.
- Select Modify existing query.
- Make your changes, and then select Next.
- To create a new query:
-
- Select Create a new query.
- Type a name for the query.
- Select a universe from the list, or search for a universe by name, and then select Next.
- Select data objects from the universe tree, and drag or double-click to add them to the Selected Data or Filters area.
- Select Next.
- If the universe contains prompts, select values for them.
- To edit an existing query:
- Select OK.
Next Steps
After the initial import of raw data, continue with the data preparation task before completing your model: See Import and Prepare Fact Data for a Classic Account Model and Import and Prepare Fact Data for a Model with Measures.
Related Information
Import Data Connection to an SAP Universe
SAP ERP
Prerequisites
- The SAP Business Technology Platform (BTP) Coud Connector and SAP Analytics Cloud agent are installed and configured.
- You use a supported version of SAP ERP Central Component. For information on supported versions, see System Requirements and Technical Prerequisites.
- Select the appropriate option:
- If you're creating a new model:
- From the
Modeler start page, select From a
Data Source.
- Select SAP ERP
NoteFrom the acquire data panel, select the filter
icon to narrow down the number of data sources in the list.
You can filter by data source type or by
category. - From the
- If you're importing into an existing model:
- From the () Main
Menu, select
Files.
- Open the model you want to update.
- Switch to the Data Management
screen.
- Select Data source.
- Select Select SAP ERP.
NoteYou can select the
filter icon to narrow down the number of data sources in the
list. You can filter by data source type or by
category. - From the (
- If you're creating a new model:
- Select an existing connection, or select Create New Connection to create a new connection.
- Copy a query from an existing model (which you can edit before saving), or
create a new query.
- To edit an existing query, follow these steps:
- Select a query from the list.
- Select Modify existing query.
- Make your changes, and then select Next.
- If the data source contains prompts, select values for them.
- Review the Preview data, and then select Done.
- Or, to create a new query, follow these steps:
- Select Create a new query.
- Type a name for the query.
- Select an ERP object from the list, or search for an object by name, and then select Next.
- Select columns from the Available Columns list to add to the Selected Columns list, and then select Next.
- If the data source contains prompts, select values for them.
- Review the Preview data, and then select Done.
- To edit an existing query, follow these steps:
Next Steps
After the initial import of raw data, continue with the data preparation task before completing your model: See Import and Prepare Fact Data for a Classic Account Model and Import and Prepare Fact Data for a Model with Measures.
Related Information
Import Data Connection to an SAP ERP System
Selecting the Right Model for Your Data
SAP Integrated Business Planning
- Select the appropriate option:
- If you're creating a new model:
- From the
Modeler start page, select From a
Data Source.
- Select SAP Integrated Business Planning.
NoteFrom the acquire data panel, select the filter
icon to narrow down the number of data sources in the list.
You can filter by data source type or by
category. - From the
- If you're importing into an existing model:
- From the () Main
Menu, select
Files.
- Open the model you want to update.
- Switch to the Data Management
screen.
- Select Data source.
- Select SAP Integrated Business Planning.
NoteYou can select the
filter icon to narrow down the number of data sources in the
list. You can filter by data source type or by
category. - From the (
- If you're creating a new model:
- Select an existing connection, or select Create New Connection to create a new connection. If you're creating a new connection, check out Import Data Connection to SAP Integrated Business Planning.
- Choose whether you want to copy an existing query, or create a new query.
- If you're copying an existing query, select it from the list, and
then click OK.NoteCopying a query is not supported with the new model type.
- Make changes to the query, and then click Create.
- Skip to step 6.
- If you're creating a new query, enter a name for your query.
- Select Build a Query to build a query using the query builder, or Freehand Query to manually type a query using V2 OData query syntax.
- If you chose to use the query builder, select a table, and
then select Next.
Build your query by moving data elements into the Selected Data and Filters areas. For more information, see Building a Query.
- If you selected the Freehand Query
option, type a query in the box and select
OK.
You will need to pass certain parameters to IBP. To see the parameters that can be used to request data, check out the Parameters for Requesting Data in the IBP documentation.
For example, the following query lets you get the product by rating:
Sample CodeKeyPredicate: Categories(1)/Products?$format=json&$select=Name ,Category/Name,Supplier/Name,Supplier/Address&$expand=Category,Supplier&$filter=Supplier/ID eq 0 FunctionImport: GetProductsByRating?rating=3&$format=json&$select=Name,Rating,Category/Name,Supplier/Name,Supplier/Address&$expand=Category,Supplier
For more information on the OData query syntax, refer to the OData documentation
 .Note
.NoteSAP Analytics Cloud has the following validation rules for freehand queries:
- Duplicated parameters ($select, $expand, $format, $top, $skip, $inlinecount, $filter) in the query are not allowed.
- Only entity set and function import are supported.
- For function import, entity set is only supported as a return type.
- If $select contains the Nav property but without $expand property, the query is invalid.
- If you're copying an existing query, select it from the list, and
then click OK.
- Select the appropriate option:
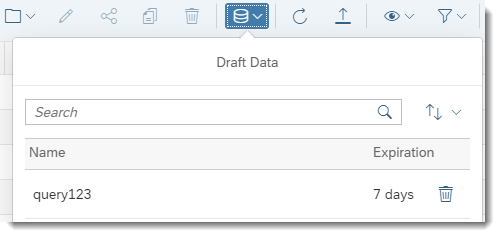
- If creating a new model: In the Draft Data dialog, select the data that you just uploaded.
- If importing to an existing model: In the Draft Sources list, select the data that you just uploaded.
Next Steps
After the initial import of raw data, continue with the data preparation task before completing your model: See Import and Prepare Fact Data for a Classic Account Model and Import and Prepare Fact Data for a Model with Measures.
SAP Business ByDesign Analytics
Context
For more information about extending SAP
Business ByDesign using SAP Analytics Cloud, see
Extending SAP ByDesign Analytics using SAP Analytics
Cloud. Information about available data sources in SAP Business
ByDesign can be found here.
- Select the appropriate option:
- If you're creating a new model:
- From the
Modeler start page, select From a
Data Source.
- Select SAP Business ByDesign
Analytics.NoteFrom the acquire data panel, select the filter
icon to narrow down the number of data sources in the list.
You can filter by data source type or by
category.
- From the
- If you're importing into an existing model:
- From the () Main
Menu, select
Files.
- Open the model you want to update.
- Switch to the Data Management
screen.
- Select Data source.
- Select SAP Business ByDesign
Analytics.NoteYou can select the
filter icon to narrow down the number of data sources in the
list. You can filter by data source type or by
category.
- From the (
- If you're creating a new model:
- Select an existing connection, or select Create New
Connection to create a new connection.NoteAdvanced features of customized OData data sources, such as SAP Cloud for Customer and SAP Business ByDesign Analytics, are only available using customized data source types. These features are not available using generic OData services. It is highly recommended to use the relevant customized data source types, if available, for your data service to leverage full capability of the data connector. It is possible to request a customized OData data source solution.
For more information, see:
- Copy a query from an existing model (which you can edit before saving), or
create a new query.
- If you're using an existing query, select it from the list:
- If you want to make changes to the query, select Modify existing query.
- Make your changes, and then select OK.
- If you're creating a new query, enter a name for your query:
- Select a table, and then select
Next.
Build your query by moving data elements into the Selected Data and Filters areas. For more information, see Building a Query.
- Select a table, and then select
Next.
- If you're using an existing query, select it from the list:
-
Select OK.
The data appears in the data integration view, where you can complete the mapping of your new data to the model's dimensions.
Next Steps
After the initial import of raw data, continue with the data preparation task before completing your model. See Import and Prepare Fact Data for a Classic Account Model, and Import and Prepare Fact Data for a Model with Measures.
SAP Cloud for Customers
Context
- Select the appropriate option:
- If you're creating a new model:
- From the
Modeler start page, select From a
Data Source.
- Select SAP Cloud for Customer.
NoteFrom the acquire data panel, select the filter
icon to narrow down the number of data sources in the list.
You can filter by data source type or by
category. - From the
- If you're importing into an existing model:
- From the () Main
Menu, select
Files.
- Open the model you want to update.
- Switch to the Data Management
screen.
- Select Data source.
- Select SAP Cloud for Customer.
NoteYou can select the
filter icon to narrow down the number of data sources in the
list. You can filter by data source type or by
category. - From the (
- If you're creating a new model:
- Select an SAP Cloud for Customer connection type:
- SAP Cloud for Customer: Use this data source type to connect to the SAP Cloud for Customer General OData API, which exposes lower level data objects used to create analytics in SAP Analytics Cloud.
- SAP Cloud for Customer Analytics: Use this
data source type to connect to the SAP Cloud for Customer
Analytics OData API, which exposes
analytical objects (reports) that users have already created in SAP
Cloud for Customer products.
For more information on the type of data you can access, see the SAP Hybris Cloud for Customer – OData Services - OData API Reference and the SAP Hybris Cloud for Customer Business Analytics Guide.
- Select an existing connection, or select Create New
Connection to create a new connection.NoteAdvanced features of customized OData data sources, such as SAP Cloud for Customer and SAP Business ByDesign Analytics, are only available using customized data source types. These features are not available using generic OData services. It is highly recommended to use the relevant customized data source types, if available, for your data service to leverage full capability of the data connector. It is possible to request a customized OData data source solution.
For more information, see:
- Copy a query from an existing model (which you can edit before saving), or
create a new query.
- If you're using an existing query, select it from the list.
- If you want to make changes to the query, select Modify existing query.
- Make your changes, and then select OK
- If you're creating a new query, enter a name for your query.
- Select a table or a template query, and then select
Next.
Build your query by moving data elements into the Selected Data and Filters areas. For more information, see Building a Query.
- Select a table or a template query, and then select
Next.
- If you're using an existing query, select it from the list.
- Select OK.
The data appears in the data integration view, where you can complete the mapping of your new data to the model's dimensions.
Next Steps
After the initial import of raw data, continue with the data preparation task before completing your model: See Import and Prepare Fact Data for a Classic Account Model and Import and Prepare Fact Data for a Model with Measures.
SAP Concur
Context
and Expense Entries API. Please be aware that the
Concur Expense Entries API has restrictions on the set of fields which can
be filtered on. Here's a list of available Expense Entries Filter
Parameters: - attendeeTypeCode
- expenseTypeCode
- hasAttendees
- hasVAT
- isBillable
- paymentTypeID
- reportID
Because of the above restrictions on filtering data, and data volume
restrictions of the Concur API, the amount of data that can be retrieved
from Concur into SAP Analytics Cloud
is limited. For more information on data import thresholds, see System Requirements and Technical Prerequisites and Expense Entries.
-
Select the appropriate option:
- If you're creating a new model:
- From the
Modeler start page, select From a
Data Source.
- Select Select SAP Concur. NoteFrom the acquire data panel, select the filter
icon to narrow down the number of data sources in the list.
You can filter by data source type or by
category.
- From the
- If you're importing into an existing model:
- From the () Main
Menu, select
Files.
- Open the model you want to update.
- Switch to the Data Management
screen.
- Select Data source.
- Select SAP Concur. NoteYou can select the
filter icon to narrow down the number of data sources in the
list. You can filter by data source type or by
category.
- From the (
- If you're creating a new model:
- Select an existing connection, or select Create New
Connection to create a new connection.
For more information, see Import Data Connection to SAP Concur
- Copy a query from an existing model (which you can edit before saving), or
create a new query.
- If you're using an existing query, select it from the list.
- If you want to make changes to the query, select Modify existing query.
- Make your changes, and then select OK.
- If you're creating a new query, enter a name for your query.
- Select a table, and then select
Next.
Build your query by moving data elements into the Selected Data and Filters areas. For more information, see Building a Query.
- Select a table, and then select
Next.
- If you're using an existing query, select it from the list.
- Select OK
The data appears in the data integration view, where you can complete the mapping of your new data to the model's dimensions.
Next Steps
After the initial import of raw data, continue with the data preparation task before completing your model: See Import and Prepare Fact Data for a Classic Account Model and Import and Prepare Fact Data for a Model with Measures.
SAP Fieldglass
-
Select the appropriate option:
- If you're creating a new model:
- From the
Modeler start page, select From a
Data Source. NoteFrom the acquire data panel, select the filter
icon to narrow down the number of data sources in the list.
You can filter by data source type or by
category.
- Select SAP Fieldglass.
- From the
- If you're importing into an existing model:
- From the () Main
Menu, select
Files.
- Open the model you want to update.
- Switch to the Data Management
screen.
- Select Data source.
- Select SAP Fieldglass. NoteYou can select the
filter icon to narrow down the number of data sources in the
list. You can filter by data source type or by
category.
- From the (
- If you're creating a new model:
- Select an existing connection, or select Create New
Connection to create a new connection.
For more information, see Import Data Connection to SAP Fieldglass.
- Copy a query from an existing model (which you can edit before saving), or
create a new query.
- If you're using an existing query, select it from the list, and then select OK.
- If you're creating a new query, enter a name for your query, select
a report, and then select Next.
In the list of reports, you can search by report ID or report description. When hovering over a report, the tooltip shows the report ID.
NoteSelecting a report starts the data import for a report in Fieldglass. Currently, it is not possible to filter or to select a subset of properties for Fieldglass data.For more information about reports in Fieldglass sign into SAP Fieldglass, click on the Help icon in the upper-right of your screen, and then select "Online Help". Within the "Create Report" section you can find instructions on how to fill in the required fields when creating a new Report. The section "View Predefined Reports/Graphs" provides more information about the set of most commonly used Reports/Graphs provided by Fieldglass.
The data appears in the data integration view, where you can complete the mapping of your new data to the model's dimensions.
Next Steps
After the initial import of raw data, continue with the data preparation task before completing your model: See Import and Prepare Fact Data for a Classic Account Model and Import and Prepare Fact Data for a Model with Measures.
SAP SuccessFactors
Context
For more information on the data you can access, see the SAP SuccessFactors HCM Suite OData API: Reference Guide in the SuccessFactors Product Page.
-
Select the appropriate option:
- If you're creating a new model
- From the
Modeler start page, select From a
Data Source.
- Select SAP SuccessFactors.
NoteFrom the acquire data panel, select the filter
icon to narrow down the number of data sources in the list.
You can filter by data source type or by
category. - From the
- If you're importing into an existing model:
- From the () Main Menu, select
Files.
- Open the model you want to update.
- Switch to the Data Management
screen.
- Select Data source.
- Select SAP SuccessFactors.
NoteYou can select the
filter icon to narrow down the number of data sources in the
list. You can filter by data source type or by
category. - From the (
- If you're creating a new model
- Select an existing connection, or select Create New
Connection to create a new connection.
For more information, see Import Data Connection to SAP SuccessFactors
-
Select your SuccessFactors query or select Create a new query to create a new query.
-
In the Create New Query dialog, enter a name and a description for your query.
-
In the Select Data area, select Build a Query from a Table or Start from a Template Query, select a table or a template query to build your query, and select Next. For more information, see Building a Query
- The Build a Query from a Table option lets you build a query from a table by moving data elements into the Selected Data and Filters areas.
- The Start from a Template Query option automatically selects the table and data elements to be included in the Selected Data and Filters areas based on the template query. For example, you can select the Headcount template query to build your query; you can then add or remove elements to finish building your own query.
- Select
(Refresh list) to display the list of
reports from SuccessFactors in real time. Note: The list of
templates cannot be refreshed.
-
Select OK.
Next Steps
After the initial import of raw data, continue with the data preparation task before completing your model: See Import and Prepare Fact Data for a Classic Account Model and Import and Prepare Fact Data for a Model with Measures.
Open Connectors Cloud Storage Data Sources
- Select the appropriate option:
- If you're creating a new model:
- From the
Modeler start page, select From a
Data Source.
- Choose an Open Connectors cloud storage data source, such as
Dropbox or Microsoft
OneDrive. NoteFrom the acquire data panel, select the
filter icon to narrow down the number of data sources in
the list. You can filter by data source type or by
category.
- From the
- If you're importing into an existing model:
- From the () Main Menu, select
Files.
- Open the model you want to update.
- Switch to the Data Management
screen.
- Select Data source.
- Choose an Open Connectors cloud storage data source, such as
Dropbox or Microsoft
OneDrive.NoteYou can select the
filter icon to narrow down the number of data sources in
the list. You can filter by data source type or by
category.
- From the (
- If you're creating a new model:
- Select an existing connection, or select Create New
Connection to create a new connection.
For more information, see Import Data Connection to SAP Open Connectors Cloud Storage Data Sources.
- Choose a file from the list, or search for a file, and select
Next.NoteOnly files that have been loaded will appear in the search results. To see more results, open more folders.NoteIf you're importing an Excel workbook containing multiple sheets, the first sheet is automatically imported.
- Specify whether the first row of data contains column headers.
- If you're importing a .csv file, select which delimiter is used in the file, or select Auto-detect.
- Select Import to begin the import procedure.
- When the draft data is finished uploading, open it from the Draft
Data list (for a new model or dataset), or the
Draft Sources list (for an existing model or
dataset).
The data appears in the data integration view.
Next Steps
After the initial import of raw data, continue with the data preparation task before completing your model: See Import and Prepare Fact Data for a Classic Account Model and Import and Prepare Fact Data for a Model with Measures..
Open Connectors Cloud Storage Query-Based Data Sources
- Select the appropriate option:
- If you're creating a new model:
- From the
Modeler start page, select From a
Data Source.
- Choose an Open Connectors query-based data source, such as
Microsoft Dynamics CRM or
Netsuite CRM 2018 Release 1.
NoteFrom the acquire data panel, select the
filter icon to narrow down the number of data sources in
the list. You can filter by data source type or by
category.
- From the
- If you're importing into an existing model:
- From the () Main Menu, select
Files.
- Open the model you want to update.
- Switch to the Data Management
screen.
- Select Data source.
- Choose an Open Connectors query-based data source, such as
Microsoft Dynamics CRM or
Netsuite CRM 2018 Release
1.NoteYou can select the
filter icon to narrow down the number of data sources in
the list. You can filter by data source type or by
category.
- From the (
- If you're creating a new model:
- Select an existing connection, or select Create New
Connection to create a new connection.
For more information, see Import Data Connection to SAP Open Connectors Query-Based Data Sources.
- Copy a query from an existing model (which you can edit before saving), or create a new query.
- If you're using an existing query, select it from the list.
- If you want to make changes to the query, select Modify existing query.
- Make your changes, and then select OK.
- To create a new query, follow these steps:
- Select Next.
- Type a name for your query and select Create.
- Select a table, and then select Next.
Build your query by moving data elements into the Selected Data and Filters areas. For more information, see Building a Query.
- Select Create.
You can continue to work on other tasks while the data is being uploaded in the background.
- When the draft data is finished uploading, open it from the Draft
Data list (for a new model or dataset), or the
Draft Sources list (for an existing model or
dataset).

Google Drive
Context
- If your SAP Analytics Cloud
system is hosted on a data center located within China, this feature is
not available.
When you connect to Google Drive, you can import any of the following file formats: Google Sheets, comma-separated-values text files (csv), and Microsoft Excel files (xlsx).
- The login prompt for Google Drive is displayed in a popup dialog. You'll need to disable the popup blocker in your browser before trying to connect.
- You can also import files from Google Drive in stories when adding data to a new story.
- Select the appropriate option:
- If you're creating a new model:
- From the
Modeler start page, select From a
Data Source.
- Select Google Drive.
NoteFrom the acquire data panel, select the filter icon
to narrow down the number of data sources in the list. You can
filter by data source type or by category. - From the
- If you're importing into an existing model:
- From the () Main Menu, select
Files.
- Open the model you want to update.
- Switch to the Data Management
screen.
- Select Data source.
- Select Google Drive.
NoteFrom the acquire data panel, select the filter icon
to narrow down the number of data sources in the list. You can
filter by data source type or by category. - From the (
- If you're creating a new model:
- Select a Google account, or create a new Google connection, or type or paste
the URL for your file directly into the dialog.
For your first access to Google Drive, you'll need to sign in to your Google Drive account.
- Choose a file from the list, and select Next.
- If you're importing from Google Sheets, and there are multiple sheets, select the sheet you want to import, and select Next.
- If you're importing a .csv file, select which delimiter is used in the file, or select Auto-detect.
- Select OK to begin the import procedure.
- Select the appropriate option.
- If creating a new model: In the Draft Data dialog, select the data that you just uploaded.
- If importing to an existing model: In the Draft Sources list, select the data that you just uploaded.
Results
The data is imported from Google Drive, and is displayed in the data integration view
Next Steps
After the initial import of raw data, continue with the data preparation task before completing your model: See Import and Prepare Fact Data for a Classic Account Model and Import and Prepare Fact Data for a Model with Measures.
Google BigQuery
Context
- Select the appropriate option:
- If you're creating a new model:
- From the
Modeler start page, select From a
Data Source.
- Select Google BigQuery.
NoteFrom the acquire data panel, select the filter icon
to narrow down the number of data sources in the list. You can
filter by data source type or by category. - From the
- If you're importing into an existing model:
- From the () Main Menu, select
Files.
- Open the model you want to update.
- Switch to the Data Management
screen.
- Select Data source.
- Select Google BigQuery.
NoteFrom the acquire data panel, select the filter icon
to narrow down the number of data sources in the list. You can
filter by data source type or by category. - From the (
- If you're creating a new model:
- Choose an existing BigQuery connection, or create a new one.
- Create a new query, or copy an existing query, and then select OK.
- Type a name for your query.
- Choose whether you want to build a query or type in Freehand SQL.
If you want to build a query, select a table from the list. If you want to use Freehand SQL, type your query in the Query box. Note: BigQuery standard SQL is supported, but legacy SQL is not.
- Select Next.
If you're building a query, drag objects from the Available Data list to the Selected Data and Filters boxes.
- Create a new query, or copy an existing query, and then select OK.
- Select Create to begin importing data.
Next Steps
After the initial import of raw data, continue with the data preparation task before completing your model: See Import and Prepare Fact Data for a Classic Account Model and Import and Prepare Fact Data for a Model with Measures.
SQL Data
Prerequisites
- The SAP Business Technology Platform (BTP) Cloud Connector and SAP Analytics Cloud agent are installed and configured.
- You have installed a JDBC driver. For details, see Import Data Connection to an SQL Database.
- Select the appropriate option:
- If you're creating a new model:
- From the
Modeler start page, select From a
Data Source.
- Select SQL Databases.
NoteFrom the acquire data panel, select the filter icon
to narrow down the number of data sources in the list. You can
filter by data source type or by category. - From the
- If you're importing into an existing model:
- From the () Main Menu, select
Files.
- Open the model you want to update.
- Switch to the Data Management
screen.
- Select Data source.
- Select SQL Databases.
NoteFrom the acquire data panel, select the filter icon
to narrow down the number of data sources in the list. You can
filter by data source type or by category. - From the (
- If you're creating a new model:
- In the Import Data or Create
Model dialog, do the following:
- Choose a connection type.
- Choose an existing connection, or create a new connection.
- Select Copy a query from a model to copy and edit an existing query, or select Create a new query to create a new query.
- To copy and edit an existing query, follow these steps:
- Select a query from the list, and select Next.
- Select Freehand SQL if you want to manually type an SQL statement, which adds a new card representing that query to the linking page.
- Make changes to the query.
- Select Preview to review the data; if
two or more tables are joined, the Joined Table
Quality chart will show the number of
accepted rows from the first table as well as matched
values, duplicated values, and omitted values from other
joined tables.
The values are displayed on the next page.
- Select Hide Preview.
- Select View SQL to show the SQL query
generated for joined tables.
You can then select Save as Freehand SQL Query to create a freehand SQL query based on the content of the View SQL dialog.
NoteWhen creating a Freehand SQL query, if the query contains parameters that are shown with question marks, the Freehand SQL query cannot be edited. -
Select OK to save your changes.
You can continue to work on other tasks while the data is being uploaded in the background.
- To create a new query, follow these steps:
- Select Next.
- Select Freehand SQL if you want to manually type an SQL statement, which adds a new card representing that query to the linking page.
- Drag and drop one or more tables from the list, or search
for tables by name or description.
When you add tables with matching primary keys, a join is created.
- If two or more tables are joined, you can select the
 (Inner
Join) icon to change the type of join to one of the
following options:
(Inner
Join) icon to change the type of join to one of the
following options:- Intersecting data only
(Inner Join) – This is the default option.
 All primary data (Left
Outer Join)
All primary data (Left
Outer Join) All data (Full Outer
Join)
All data (Full Outer
Join) Remove matched data
(Exception) – This option removes rows
from the left-hand side table that have a match in
the right-hand side table.
Remove matched data
(Exception) – This option removes rows
from the left-hand side table that have a match in
the right-hand side table.
- Select Preview to review the data; if
two or more tables are joined, the Joined Table
Quality chart will show the number of
accepted rows from the first table as well as matched
values, duplicated values, and omitted values from other
joined tables.
The values are displayed on the next page.
- Select Hide Preview.
- Select View SQL to show the SQL query
generated for joined tables.
You can then select Save as Freehand SQL Query to create a freehand SQL query based on the content of the View SQL dialog.
NoteWhen creating a Freehand SQL query, if the query contains parameters that are shown with question marks, the Freehand SQL query cannot be edited. - Select Next to build your query.
- Type a name and description for your query and select
Done.
You can continue to work on other tasks while the data is being uploaded in the background.
When the draft data is finished uploading, open it from the Draft Data list (for a new model or dataset), or the Draft Sources list (for an existing model or dataset).
The data appears in the data integration view.
Next Steps
After the initial import of raw data, continue with the data preparation task before completing your model: See Import and Prepare Fact Data for a Classic Account Model and Import and Prepare Fact Data for a Model with Measures.
Related Information
Import Data Connection to an SQL Database
Selecting the Right Model for Your Data
OData Services
You can create a connection that allows you to import data from both on-premise and cloud data sources using generic OData services. It is possible to request a customized OData data source solution. You can also save your OData connection details, and schedule model updates and data imports from OData sources.
Context
-
SAP Analytics Cloud supports OData Version 4.0. Logical Operators (such as Equal, Not Equal, Greater than, Greater than or equal, Less than, Less than or equal, Logical and, Logical or) are supported. Not logical negation, arithmetic operators, or functions are not supported.
The following table shows which operators need to be supported for each data type, for a generic OData service to integrate with SAP Analytics Cloud:
Data Type
Operator
Format
String (Edm.String) "eq", "ne", "startswith", "toLower"
"eq", "ne", "startswith", "toLower";
Number (Edm.Decimal) "gt", "ge", "lt", "le", "eq", "ne", "M"
[value] m
Number (Edm.Double) "gt", "ge", "lt", "le", "eq", "ne", "d"
[value] d
Number (Edm.Single) "gt", "ge", "lt", "le", "eq", "ne", "f"
[value] f
Number (Edm.Int16) "gt", "ge", "lt", "le", "eq", "ne"
Number (Edm.Int32) "gt", "ge", "lt", "le", "eq", "ne"
Number (Edm.Int64) "gt", "ge", "lt", "le", "eq", "ne", "L"
[value] L
Datetime (Edm.DataTime) "gt", "ge", "lt", "le", "eq", "ne"
Datetime (Edm. DataTimeOffset) "gt", "ge", "lt", "le", "eq", "ne"
Boolean (Edm.Boolean) "eq", "ne"
True|False
Edm.Guid "eq", "ne"
guid'[value]'
Logical Operator "and", "or"
- To integrate with SAP Analytics Cloud,
your OData service must support these query parameters and paging
capabilities:
OData Service Support
Requirements
Query parameters - $select: Filters properties (columns). Lets you request a limited set of properties for each entity.
- $filter: Filters results (rows). Lets you filter a collection of resources that are addressed by a request URL.
- $expand: Retrieves related resources. Specifies the related resources to be included with retrieved resources.
- $skip: Specifies the number of items in the queried collection that are to be skipped and not included in the result.
- $top: Sets the page size of the results. Specifies the number of items in the queried collection to be included in the result.
- $orderby: Orders the results. Lets you request resources in either ascending or descending order using asc and desc.
- $inlinecount: OData V2 only. Specifies that the response to the request includes a count of the number of Entries in the Collection of Entries identified by the Resource Path section of the URI.
- $count: OData V4 only. Lets you request a count of the matching resources included with the resources in the response.
Paging capabilities - Support paging based on $top and $skip.
- Should have the ability to return 1000 data rows per request, but if it doesn't, it must implement the “nextLink” function.
- The order of the data rows in the data source needs to be fixed during data acquisition (for example, by sorting on a column). Otherwise, when paging is done, there could be data correctness issues. For example, the same data row could appear more than once in different pages.
- The order of data rows should be guaranteed on data source during paging by $skip and $top.
- If you want to use the query builder in the step below when you create a
new query, the data service must support the select system query option.
Example:
https://services.odata.org/OData/OData.svc/Products?$select=Price,Name
Key-as-Segment isn't supported by the query builder, and should only be used with freehand queries.
Also, the $skip parameter must be supported by the data service.
- Embedded Complex types are not supported.
- Select the appropriate option:
- If you're creating a new model:
- From the
Modeler start page, select From a
Data Source.
- Select OData Services. NoteFrom the acquire data panel, select the
filter icon to narrow down the number of data sources in
the list. You can filter by data source type or by
category.
- From the
- If you're importing into an existing model:
- From the () Main Menu, select
Files.
- Open the model you want to update.
- Switch to the Data Management
screen.
- Select Data source.
- Select OData Services.NoteYou can select the
filter icon to narrow down the number of data sources in
the list. You can filter by data source type or by
category.
- From the (
- If you're creating a new model:
- Select an existing connection, or select Create New
Connection to create a new connection.
If you create a new connection, you can select the following options:
- Connect to an On-Premise OData serviceNote
To connect to an On-Premise OData service, ensure that the following tasks are completed:
- The Cloud Connector is installed. For more information, see Installing the Cloud Connector.
- The Cloud Connector is configured. For more information, see Configuring the Cloud Connector.
The SAP Analytics Cloud agent doesn't need to be installed during the configuration process.
- Connect to an SAP OData service When you
select this option, specific SAP metadata is respected. This
metadata specifies default behaviors based on SAP OData services
guidelines. For more information, see SAP
Annotations for OData Version 2.0.
NoteAdvanced features of customized OData data sources, such as SAP Cloud for Customer and SAP Business ByDesign Analytics, are only available using customized data source types. These features are not available using generic OData services. It is highly recommended to use the relevant customized data source types, if available, for your data service to leverage full capability of the data connector. It is possible to request a customized OData data source solution.For more information, see:
- Connect to an On-Premise OData service
- Choose whether you want to copy an existing query, or create a new query.
- If you're copying an existing query, select it from the list, and then click
OK.
- Make changes to the query, and then click Create.
- Skip to step 6.
- If you're creating a new query, enter a name for your query.
- Select Build a Query to build a query using the query builder, or Freehand Query to manually type a query using V2 OData query syntax.
- If you chose to use the query builder, select a table, and then
select Next.
Build your query by moving data elements into the Selected Data and Filters areas. For more information, see Building a Query.
- If you selected the Freehand Query option,
type a query in the box and select
OK.NoteWhen using freehand queries, the columns (including expanded entity columns) need to be specified, otherwise they won't be picked up in SAP Analytics Cloud.
For example, the following queries let you get the product by rating, or find a nearby airport:
OData V2 syntax:
Sample CodeKeyPredicate: Categories(1)/Products?$format=json&$select=Name ,Category/Name,Supplier/Name,Supplier/Address&$expand=Category,Supplier&$filter=Supplier/ID eq 0 FunctionImport: GetProductsByRating?rating=3&$format=json&$select=Name,Rating,Category/Name,Supplier/Name,Supplier/Address&$expand=Category,Supplier
OData V4 syntax, using the expand parameter:
Sample CodeKeyPredicate: Products?$select=ID,Name,Description,ReleaseDate,DiscontinuedDate,Rating,Price&$expand=ProductDetail($select=ProductID),ProductDetail($select=Details) FunctionImport: GetNearestAirport(lat=80, lon=90)
For more information on the OData query syntax, refer to the OData documentation
.NoteSAP Analytics Cloud has the following validation rules for freehand queries:
- Duplicated parameters ($select, $expand, $format, $top, $skip, $inlinecount, $filter) in the query are not allowed.
- Only entity set and function import are supported.
- For function import, entity set is only supported as a return type.
- If $select contains the Nav property but without $expand property, the query is invalid.
- Select the appropriate option:
- If creating a new model: In the Draft Data dialog, select the data that you just uploaded.
- If importing to an existing model: In the Draft Sources list, select the data that you just uploaded.
Next Steps
After the initial import of raw data, continue with the data preparation task before completing your model: See Import and Prepare Fact Data for a Classic Account Model and Import and Prepare Fact Data for a Model with Measures.
Workforce Analytics
- Select the appropriate option:
- If you're creating a new model:
- From the
Modeler start page, select From a
Data Source.
- Select SAP SuccessFactors Workforce
Analytics. NoteFrom the acquire data panel, select the
filter icon to narrow down the number of data sources in
the list. You can filter by data source type or by
category.
- From the
- If you're importing into an existing model:
- From the () Main Menu, select
Files.
- Open the model you want to update.
- Switch to the Data Management
screen.
- Select Data source.
- Select SAP SuccessFactors Workforce
Analytics.NoteYou can select the
filter icon to narrow down the number of data sources in
the list. You can filter by data source type or by
category.
- From the (
- If you're creating a new model:
- Select an existing connection, or select Create New
Connection to create a new connection.
For more information, see Import Data Connection to SAP SuccessFactors Workforce Analytics.
- Copy a query from an existing model (which you can edit before saving), or create a new query.
- If you're using an existing query, select it from the list.
- If you want to make changes to the query, select Modify existing query.
- Make your changes, and then select OK.
- If you're creating a new query, build your query by moving data elements
into the Selected Data and
Filters areas.
Select a measure to display a list of dimensions related to that measure. Then, select at least one dimension. For more information see, Building a Query.
NoteYou can only use dimensions as filters. Filters only support EQUALS and AND operations.- Select OK.
- Enter a name for your query.
- Select OK.
The data appears in the data integration view, where you can complete the mapping of your new data to the model's dimensions.
Next Steps
After the initial import of raw data, continue with the data preparation task before completing your model: See Import and Prepare Fact Data for a Classic Account Model and Import and Prepare Fact Data for a Model with Measures..
Qualtrics
Context
Best practices for consuming Qualtrics surveys
SAP Analytics Cloud can access data that has been provided through responses to a Qualtrics survey. When you're creating a model or dataset, it will be helpful if you have access to that survey in Qualtrics, so that you understand the structure of the survey.
Here are some suggestions to help you get the best out of analytics on Qualtrics surveys.
Note that questions in the Thrash section of your survey shouldn't be used when creating your model or dataset.
During the data preparation step while creating a model or dataset, the following basic initial steps will help in getting better insights:
- Add a count column in SAP Analytics Cloud.
Create a calculated column with the value 1 in each row, to count your responses.
- The first row appears with descriptions of questions. This row should be
removed.
Why is this row provided at all?
If you don't have access to the Qualtrics survey while creating the model or dataset, since the column headers provide the question numbers, the description information will help you decide which questions are relevant for analysis.
- Create a Geo dimension.
Use the columns LocationLatitude and LocationLongitude to create your Geo dimension. Video: Enrich Geographic Dimensions
Modeling different types of questions
Qualtrics offers several options for question types that may be included in a survey. Here are suggestions for handling some question types in SAP Analytics Cloud.
Net Promoter Score (NPS)
For a question of type NPS, for example Q1, Qualtrics generates a field Q1_NPS_GROUP with the value Promoter or 3, Detractor or 1, or Passive or 2 for each response. To calculate an aggregated NPS in SAP Analytics Cloud, calculate the counts of Promoters and Detractors, and calculate the NPS as: (Promotercount/count - Detractorcount/count)*100.
Matrix Table
For a question of type Matrix Table, columns are generated based on the number of statements. For example, if Q2 has 3 statements, then the generated columns are Q2_1, Q2_2, and Q2_3, and the descriptions are available as mentioned in basic step 2 above. You can create a model or dataset for each matrix question, by selecting the columns ResponseID and Q2_1 to Q2_3, doing an unpivot on the Q2 columns, and then adding a count as mentioned in basic step 1 above.
Link this model to the other model for this survey through ResponseID.
A similar approach can be followed for the Rank Order question type.
Text Entry
For these questions, if there is a TextIQ license, then performing text analysis generates some sentiment related fields. It is useful to have calculated measures based on the Sentiment score field, which can have Positive, Negative, or Neutral values.
Highlight
Avoid importing this question type during model creation because it generates a large number of columns, which could exceed the maximum number of columns supported by SAP Analytics Cloud. For these kinds of questions, use datasets instead.
Adding descriptions for dimension names and dimension members
The question numbers are available as dimension names. To have dimensions look more meaningful, add a description for each dimension in the model or dataset, based on your Qualtrics survey. For dimension members, the code values are provided. You'll need to provide descriptions based on the Qualtrics survey. You can get all of this information using the “Export Survey to Word” option in Qualtrics.
Restrictions
- CSV export size limit = 1.8 GB: Currently, response exports that exceed 1.8 GB will fail. To prevent your export from failing, use limits and filters to limit the size of your final export file.
- Each API token can run a maximum of 15 jobs per minute.
- Select the appropriate option:
- If you're creating a new model:
- From the
Modeler start page, select From a
Data Source.
- Select Qualtrics. NoteFrom the acquire data panel, select the
filter icon to narrow down the number of data sources in
the list. You can filter by data source type or by
category.
- From the
- If you're importing into an existing model:
- From the () Main Menu, select
Files.
- Open the model you want to update.
- Switch to the Data Management
screen.
- Select Data source.
- Select Qualtrics.NoteYou can select the
filter icon to narrow down the number of data sources in
the list. You can filter by data source type or by
category.
- From the (
- If you're creating a new model:
- Select an existing connection, or select Create New
Connection to create a new connection.
For more information, see Import Data Connection to Qualtrics
- Copy a query from an existing model (which you can edit before saving), or
create a new query.
- If you're using an existing query, select it from the list.
- If you want to make changes to the query, select Modify existing query.
- Make your changes, and then select OK.
- To create a new query, follow these steps:
- Select Create a new query, and then click Next.
- Type a name for your query.
- Select a table from the list, or search for one.
- Select Next.
Build your query by moving data elements into the Selected Data and Filters areas. For more information, see Building a Query.
- Select Create.
You can continue to work on other tasks while the data is being uploaded in the background.
- If you're using an existing query, select it from the list.
- When the draft data is finished uploading, open it from the Draft
Data list (for a new model or dataset), or the
Draft Sources list (for an existing model or
dataset).
The data appears in the data integration view.
Next Steps
After the initial import of raw data, continue with the data preparation task before completing your model: See Import and Prepare Fact Data for a Classic Account Model and Import and Prepare Fact Data for a Model with Measures..